With Love Triple Layer Card

With Love Triple Layer Card

With Love Birthday Card wwwDSCN6404.jpg

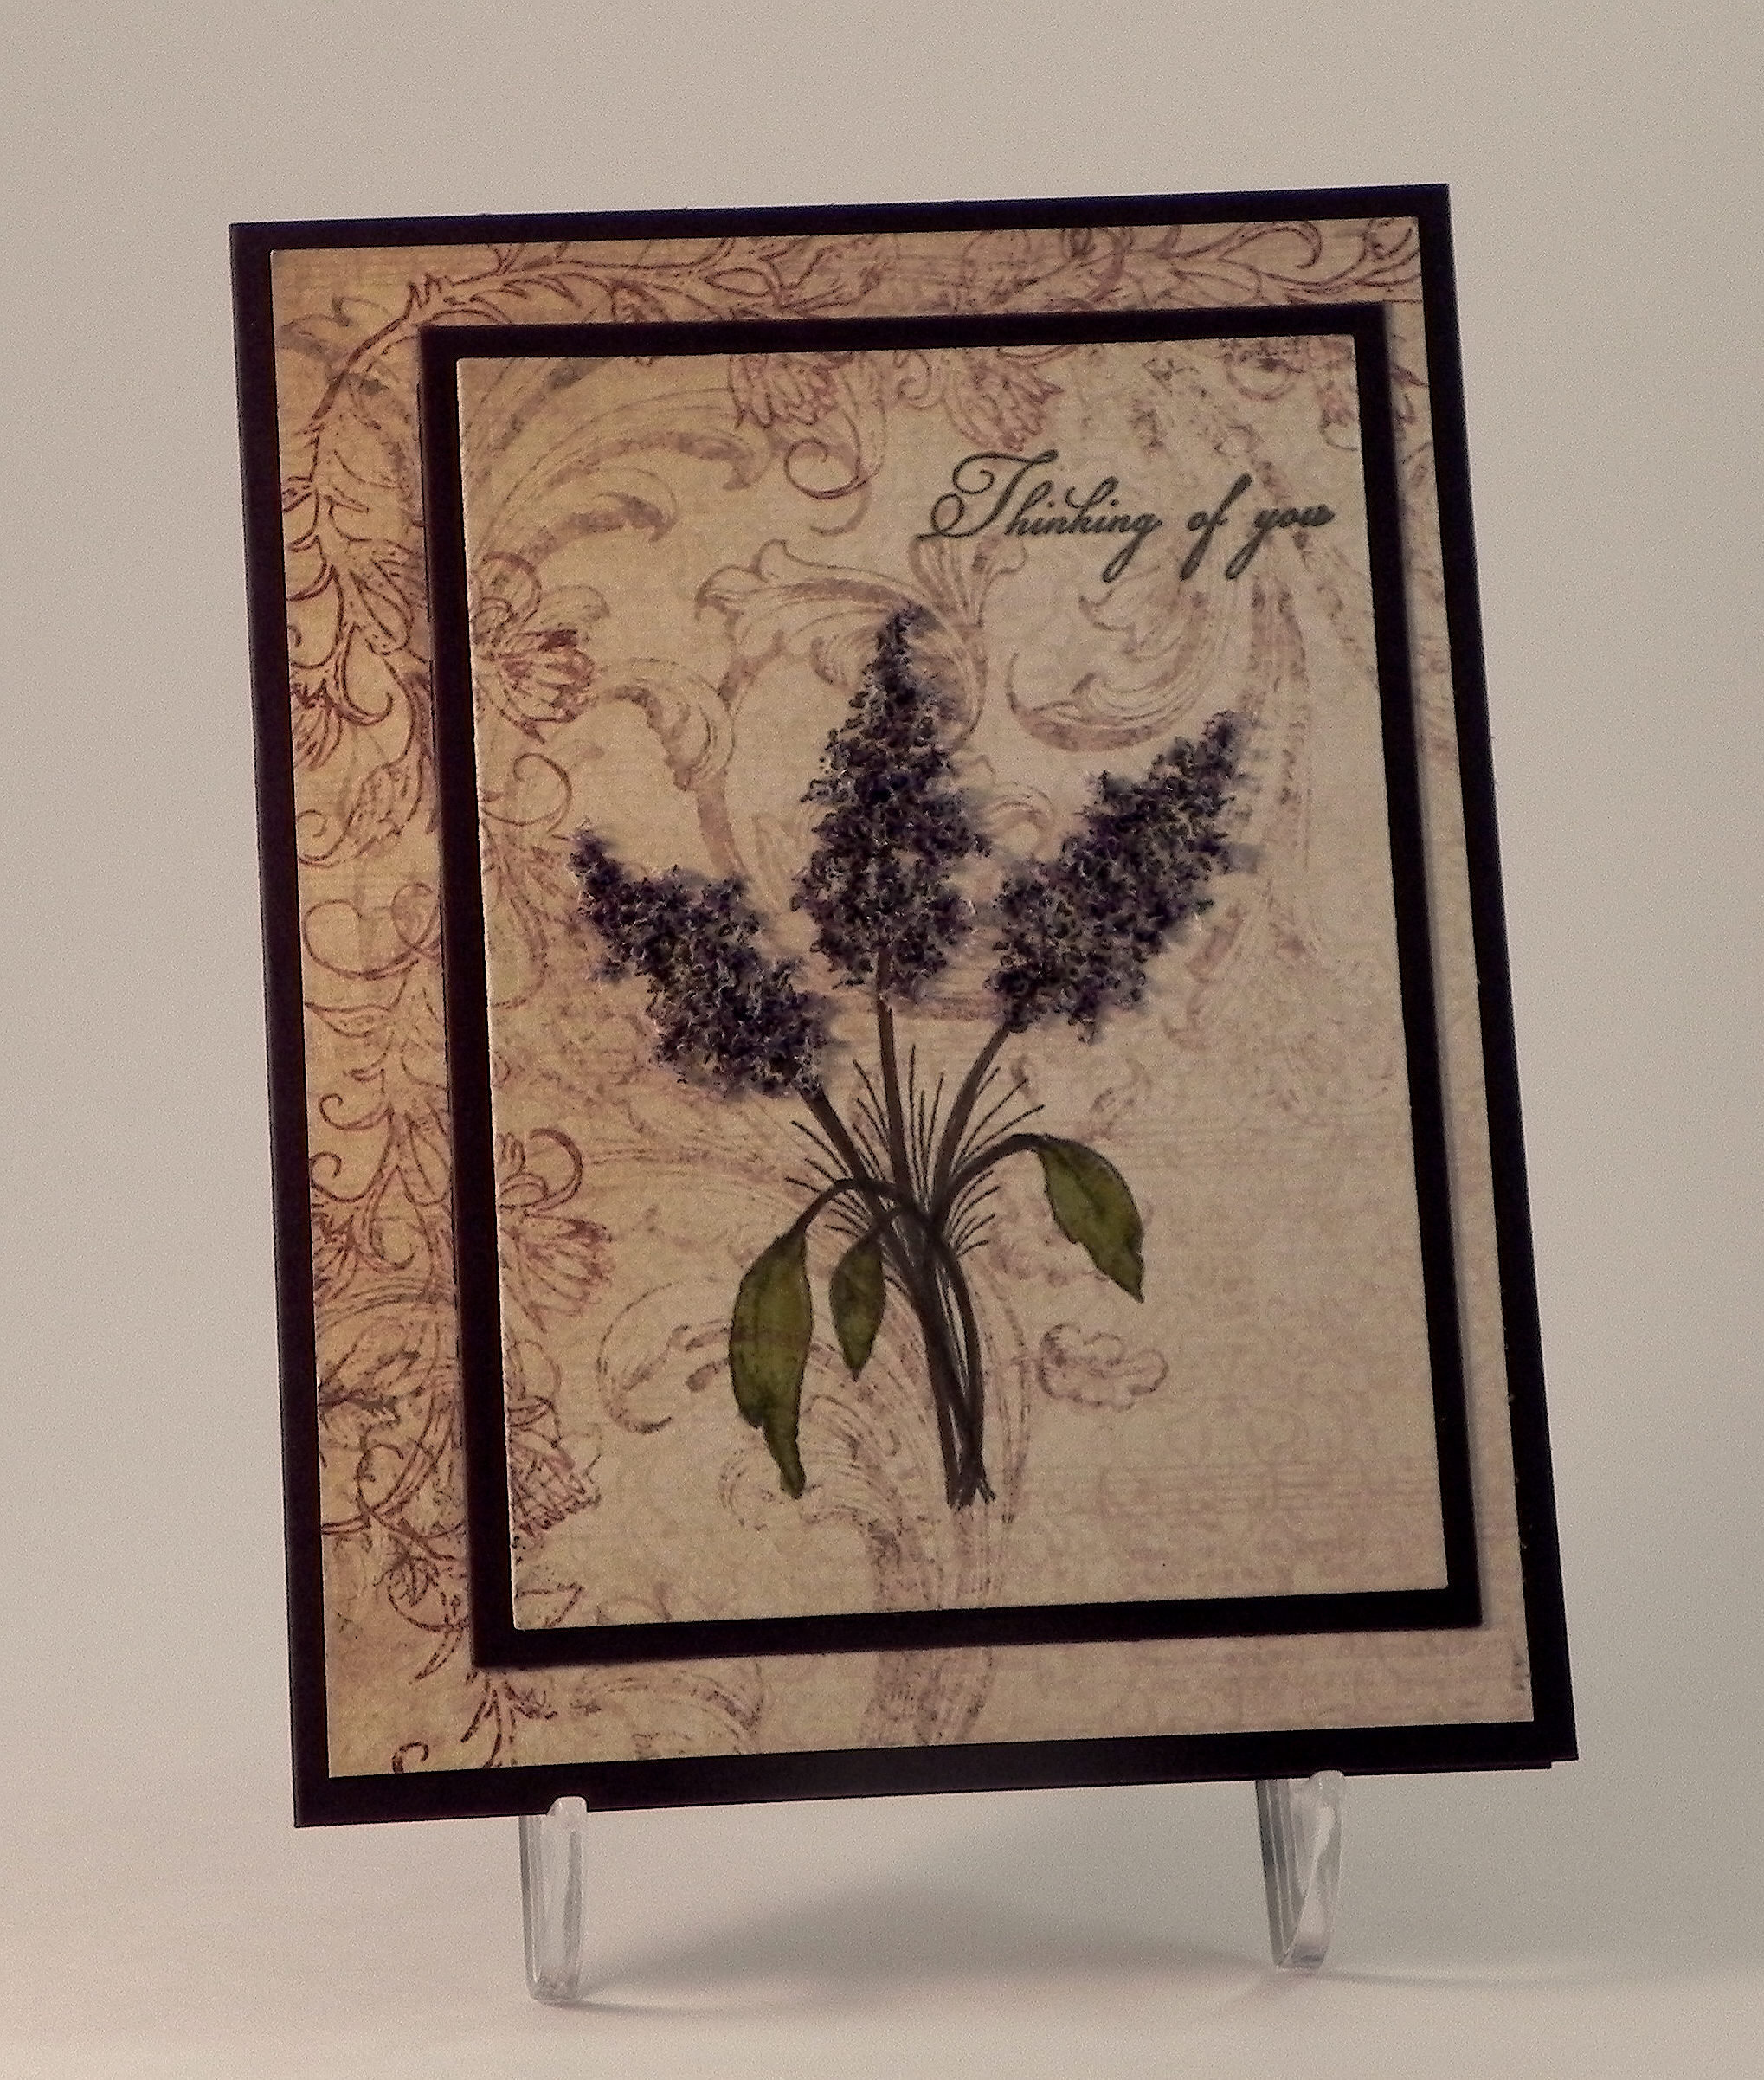
Normally, I stamp my panels when making a triple layer card, but I had this beautiful printed paper and wanted it to be the focus of my card.  The dark layers add interest without covering up the print.

This card was done with patterned papers (floral and brown) from a pack by Momenta.  (There is not a name on the package so I don’t know what it called.)  Once I cut and layered the panels, I adhered them to an ivory card base so the card was sturdier.  The stamp used  for the greeting is from the “Vertical Greetings 2” stamp set by Gina K Designs.  I heat embossed it with versamark ink and Ranger’s Liquid Platinum embossing powder.  The ribbon by Recollections – Celebrate It #215813 matches the embossing powder beautifully.  I stamped a birthday sentiment on the inside, but this card could be used for a variety of occasions. To cut my panels, I used dies from the Spellbinders “5×7 Matting Basics B” for the dark panels and “5×7 Matting Basics A” for the floral panels.  (The center panel was cut with a paper trimmer.)

This technique could be used with any printed paper for any occasion, and I will definitely use it again!

Thanks for checking out my card post!

This content uses referral links as described in the disclosure policy on my sidebar.

Autumn Tree Birthday Card (and other “Positively Negative” cards)

Autumn Tree Birthday Card (and other “Positively Negative” cards)

Autumn Tree Birthday Card wDSCN8814.jpg

I was asked to be the guest hostess for this week’s Mod Squad Challenge, and my challenge, called Positively Negative, is to create a project using the negative of a die (manual or electronically cut), punch, or hand-cut shape.  (Sadly, this site is no longer active.)

This card was originally posted in my stamptv gallery   (Sadly, this site is no longer active.), but I’m posting it here to show an example of a card where I did reverse masking (using the negative of a die) to create the sponged background for my tree image.

I used the Gina K Designs “The Giving Tree” set. Card stock used was gina k ivory and dark chocolate, and ink was gina k dark chocolate and memento desert sand. I used Flower Soft (autumn and nut brown) for the leaves. As mentioned above, a mat was made with the Spellbinders Wonky Squares die (discontinued?) to create the background for the tree. Yarn, a button and a gina k wood leaf finished it off.

Two more cards using the negative to sponge the background for my stamped images are below:

Floral Get Well cDSCN7706.jpg

You can see the original post in my stamp tv gallery.   (Sadly, this site is no longer active.)

The sentiment and floral image on this card are from the “With Love & Prayers” set by GKD. Gina K Wild Lilac and Moonlit Fog inks with a square mask were used to create the background. The image and sentiment were stamped with Gina K’s Edible Eggplant ink.

and

Thank You Challenge card DSCN5976c

 My card was originally posted in my stamp tv gallery.   (Sadly, this site is no longer active.)

This is a card I CASED after watching Melanie Muenchinger’s tutorial (HERE).   The stamp sets I used are Gina K Designs “A Year of Flowers 2” and “All Occasion Tags” (retired?) for the sentiment.  I used the Spellbinders Wonky Square die for this reverse mask as well.


I also did a card a few weeks ago where I used the negative of a flower die cut to create the template for my image using the Confetti Cluster Stamping technique.

Confetti Cluster FLower Card DSCN9112

You can see my original post (HERE).


And finally, here is a sample of where I used the actual negative on my card of a heart I created and cut with my Silhouette.

With Love Anniversary Card DSCN5803

You can see the original post in my stamptv gallery.   (Sadly, this site is no longer active.)


I can’t wait to see your “Positively Negative” creations over at the Mod Squad Challenge Blog this week!

Thanks for checking out my post!

This content uses referral links as described in the disclosure policy on my sidebar.

Thinking of You

Thinking of You

xDSCN6124

The Mod Squad Challenge this week is to create a card of encouragement.   (Sadly, this site is no longer active.)  I find that knowing friends are thinking of me when I am going through a rough time or am not feeling well is encouraging and helps me to feel better. This card was made for a friend who has not been feeling well, and we are hoping he feels better soon!

I started out this card with a Gina K Edible Eggplant card base and a piece of card stock cut from the Heartfelt Creations Antiquitiy Collection 12×12 paper pad.  The stamps I used are from the Gina K Designs “Little Branches” set (for the sentiment) and the Heartfelt Creations “Recovery Wishes” set (for the floral image).  They were both stamped with Gina K Edible Eggplant ink.  I use Copic Markers YG93 and YG95 and Lavender Flower Soft to add color to the floral image.  The flower soft was a little light for my edible eggplant card base, so I tapped the side of the brush nib of my Copic Marker V99 onto the flower soft (in random places) to make parts of it darker.  Once my images were stamped and colored, I used dies from the Spellbinders A2 Matting Basics A and B sets to cut out the focal image panel and frame. (The focal image panel is smaller than the cut-out frame so you can see some of the card base between the two.)

Seems simple enough, right?  It never is!!  Initially, I thought I’d do this kind of like triple stamping (but with only 2 layers and with the patterned paper instead of stamping by own background paper).  I stamped my images as described above and cut out the image panel with one of the dies.  Then I used the other die to cut out an edible eggplant mat.  I lined up the patterns on the printed paper and adhered the layers.  Then I proceeded to mess up my leaves when I colored them.  I tried it again and again several times and just couldn’t get them right.  (I have no idea what my problem was; they are just simple leaves!!)  Anyway, I kept using different corners of the two sheets of this paper that came in the pad (that was where the pattern was I wanted to use) and eventually ran out of corners/paper.  I ended up using a piece more in the middle of the page which had a lot less detail.  Here is my “double stamped” sample with the plainer paper panel.   (You can see that the pattern lines up on this sample.)

xDSCN6121

I liked this, but when I looked at it next to the messed up versions that had a little more detail in the print, this seemed a little plain to me.  I tried to salvage parts of some of the messed up cards by removing the image panels and was left with the cut-out frame and a lot of the eggplant.  I happened to see a scrap of the paper with the postage image sitting on my desk and tried stamping my images on that. I really liked this, but the scrap was smaller than the original panel so I couldn’t mat it like I had before. I tried centering it in the opening of the frame and ended up with the first card pictured above. Had I started with this idea from the beginning, my patterns would have lined up, but I was using scraps and panels cut separately so the patterns are different.  I’m still really happy with the end result, and I actually like the plain version a lot more as well now that it’s not side by side with the other ones!

Thanks for checking out my card project!

This content uses referral links as described in the disclosure policy on my sidebar.

Tissue Paper Sympathy Card

Tissue Paper Sympathy Card

Tissue Paper Sympathy Card DSCN9546

Over at Perfectly Rustics, the challenge this fortnight is to try a new technique. (http://perfectlyrustics.com/2015/04/20/prdc-no-46-new-technique/)

As I mentioned in my previous two posts, one of the techniques I recently discovered online was making a tissue paper background.  On my first card, I stamped and then inked my background.  For my second attempt, I used the tissue paper technique on the panel from which I die cut my focal images.  On that project, I used tissue paper that was already colored.

For this project, I started by stamping the “Silhouette Bouquet” stamp by I Brake for Stamps and the sentiment from the Gina K Designs “With Sympathy Duo” stamp set (retired?) with jet black Stazon ink onto a piece of white tissue paper.  I crumpled up the piece of tissue paper, covered a piece of white card stock with Ranger Multi Medium (Matte) using a foam paint brush, placed the flattened, wrinkled tissue paper on the adhesive-covered card stock and patted down.  I cut the edges that extended over the card stock with my paper trimmer and then applied a top coat of the multi medium to seal it. (HERE is one of the video tutorials I watched before creating my project.)

I added black enamel dots by Teresa Collins to the panel once it was dry.  Then, I mounted the finished panel on black card stock and then a white card base.

Using the same procedure but different stamps, I created a second black and white card.

Make A Wish Tissue Paper Card wDSCN9524

The stamp sets I used for this one were Gina K “Many Wishes” (retired?) and “Sweet Tweets” (retired?) for the sentiment. The ribbon is by Offray.

(I’d like to try this again at some point using multiple colors for my images as was demonstrated in the video I referenced above.  Also, she used dye inks which I’d also like to try.  They are so much easier to clean up and I have many more color options.  I’m just not sure if the ink will run with the multi medium that I used instead of the glue stick.)

Now it’s your turn!  Create a project using a technique you haven’t tried before and show it to us over at Perfectly Rustics!  I can’t wait to see what technique you use and what you create!

Thanks for checking out my card project!

This content uses referral links as described in the disclosure policy on my sidebar.

Always Remember…

Always Remember…

045 Always Remember  DSCN8444.jpg

Join us for a new challenge over at Perfectly Rustics!  This fortnight, the challenge is to include the word “remember” or “remembrance” on your project (http://perfectlyrustics.com/2015/04/06/prdc-no-45-remember/).

The inspirational stamp I used that includes the word “remember” is called “Always Remember” by Woodware Craft Collection – Clear Magic Singles. I think it is a fantastic message for someone who is going through a tough time or dealing with a loss.

(I believe it is actually a quote from the movie “Pooh’s Grand Adventure: The Search for Christopher Robin” based on A. A. Milne’s stories of Winnie the Pooh where Christopher Robin says to Winnie the Pooh, “If ever there is tomorrow when we’re not together… there is something you must always remember. You are braver than you believe, stronger than you seem, and smarter than you think….”)

Christopher Robin and Pooh

The sentiment was stamped with Gina K warm cocoa ink on Paper Pizazz Tan Floral Tapestry paper and cut with a Spellbinders die from the Labels Eight set.  This paper was also used for the background and to make the flower.  I created the flower with the Heartfelt Creations (Spellbinders) Sunkissed Fleur die and the Sunkissed Fleur Precut Set stamp.  The image details were stamped with warm cocoa ink on the patterned paper and then covered with Viva Decor copper 3D Stamp Paint.  The center of the flower was made with an Epiphany Crafts Shape Studio tool which I describe in my Potted Plant card post.  (This is one of the flowers I originally made for that card!)  The leaf flourish was cut with a die from the Heartfelt Creations (Spellbinders) Flower Pot set.  In addition to the patterned paper by Paper Pizazz, I also used Gina K dusty sage, Core-dinations valentia, and Melissa Frances first class mail.  All of the edges were sponged with the Gina K warm cocoa ink.

Now it’s your turn!  Create a project that includes the word “remember” or “remembrance” and enter it in the Perfectly Rustics “Remember” challenge.  I can’t wait to see your creation!

Thanks for checking out my card project!

This content uses referral links as described in the disclosure policy on my sidebar.