Happy Valentine’s Day

Happy Valentine’s Day

Happy Valentine's Day zDSCN7485.jpg

I made a pink card today.  I know… it’s not my usual color scheme!  And when I told my daughter that I was planning a pink card, she joked that I would still probably manage to get some brown on there… and I did!  It’s light, but it’s there!!  🙂

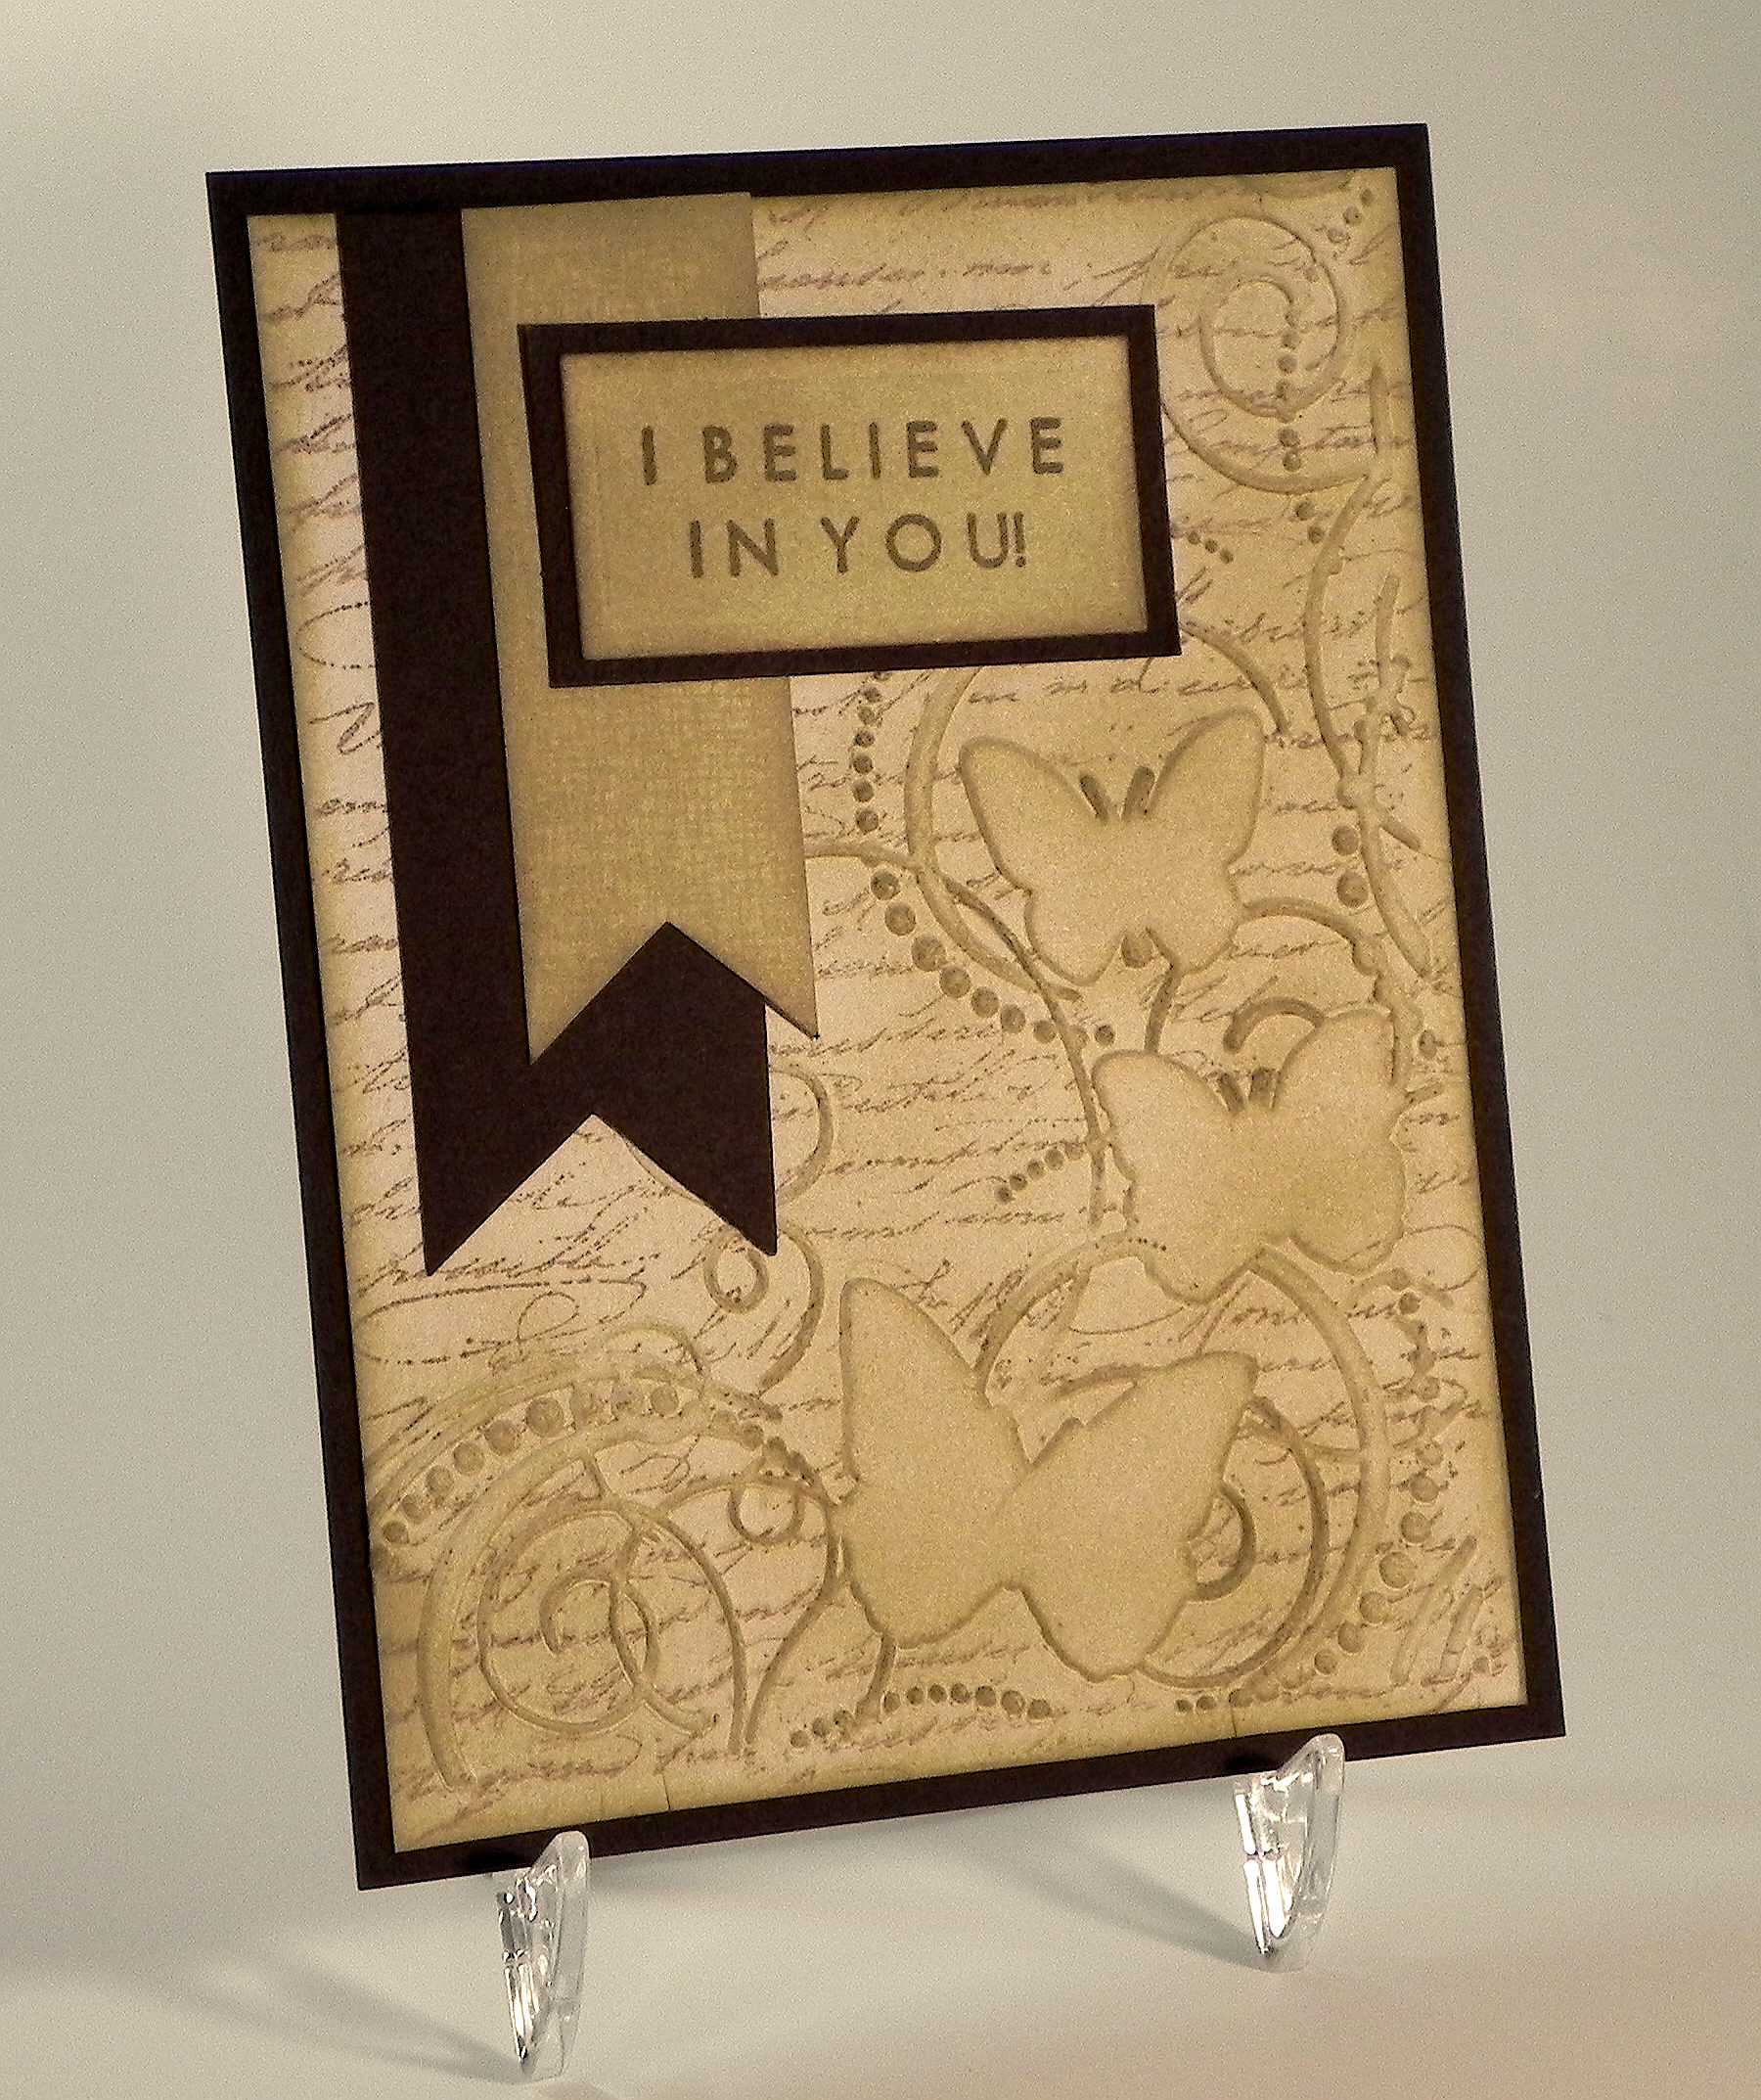
I purchased the beautiful patterned paper for my center three panels from Etsy.  It is part of a digital pack called “Textured Valentine Grunge” from a store called TheDigitalStash.  These panels were mounted on Gina K Designs Cranberry Tart card stock.  The print had a touch of tan running through it, so I added a bit of Recollections paper from a pack called Neutrals.  I also used a piece of pink from the DCWV Brights textured card stock pad.

I added a bit of texture to the tan panel with my crimper.

The greeting was a stamp by Craftsmart that I picked up in a bargain bin at one of the craft stores (AC Moore, I think?) and was stamped with Gina K Cranberry Tart ink.

I used to laugh when I was teaching 5th grade when Valentine’s Day would roll around.  This was one of the holidays for which our PTA would “host” classroom parties.  Prior to the big day, I had my students create and decorate folders to hang on the fronts of their desks so they had a place to deposit the Valentines that they brought in for all their classmates.  Imagine… a bunch of 5th graders exchanging “love notes” with every student!  (It was quite a hoot watching them open them in class. Some of them seemed to take it so seriously, making eye contact with and smiling at the senders as they opened their cards.)  Anyway, I always made a sample or two of these folders to get their creative juices flowing, and now, every time I create a Valentine’s Day card, I remember that silliness all those years ago!!  Fun times!!!  🙂

Thanks for checking out my card project!

This content uses referral links as described in the disclosure policy on my sidebar.

Another Wine & Cheese Thank You

Another Wine & Cheese Thank You

Stamped Wine and Cheese zDSCN7601.jpg

This card (above) was actually my 3rd attempt at a thank you note with this wine and cheese stamp by Inkadinkado (and not completely planned).  As I mentioned in a previous post, I had an idea I had wanted to try which was inspired by a card project called “Peace, Love, Joy Holiday Card” using an emboss resist technique that I saw on StampTV.  This 2nd attempt is here:

embossed wine and cheese zzDSCN7583

I followed the “recipe” in the video.  I began by stamping the background stamp called “Wine Labels” by Stampendous with Memento Warm Cocoa ink on ivory card stock.  Then I embossed the wine and cheese image on top of that with versamark ink and clear embosssing powder.  Finally, I sponged Memento Toffee Crunch and Warm Cocoa ink over the whole panel.  (I needed to go much darker than Gina did in her video because I couldn’t see the embossed image.)  This panel was layered on ivory card stock and brown card stock from a Recollections pack called Neutrals.

I felt like the wine and cheese image was a little too small, that it was difficult to see all the image’s details, and that the words behind it were completely lost.  (With this technique, you should see the brown words through the clear embossing.)

I was kind of annoyed at this point, because I was sure I would like this version better than I did.  I then decided to stamp the thank you and wine & cheese images on a scrap of ivory card stock with the Warm Cocoa ink just to see how that would look.  When I placed that panel on my desk, it happened to “land” on the other card.  Much better!!  I created another background panel, adhered my new stamped panel, and was good to go – finally!!

I don’t think I would have come up with that background had I not tried the emboss resist technique first.  (I had actually ordered that stamp specifically for that technique.)  But that was exactly the look I had in mind before my chalkboard technique attempt.  It took me a while, but I finally got there!!

Thanks for checking out my card projects!

This content uses referral links as described in the disclosure policy on my sidebar.

Stamped and Sponged Masculine Birthday Card

Stamped and Sponged Masculine Birthday Card

Stamped and Sponged Masculine Birthday Card zDSCN7570.jpg

Over at the Mod Squad Challenge this week, we are encouraged to make a Masculine Birthday card.   (Sadly, this site is no longer active.)  I’ve not participated in a challenge in quite some time and have been struggling with getting back into the card-making mood so I thought I’d give this one a try!  I decided to go with a “back to basics” approach with some basic sponging and stamping.

For my background panel, I sponged Memento Warm Cocoa, Toffee Crunch, and Gina K Blue Denim inks on a piece of white card stock.  The mask I used to create the border pattern on the left is from a set called “Borderline Masks” by Tim Holtz.  I used the Warm Cocoa ink to stamp a portion of the “Musical Collage” stamp by Hero Arts onto my inked panel along with some speckles with a stamp from the Tim Holtz “Visual Artistry Collection Nature’s Elements” stamp set.  The greeting is from the “Pleasant Plurals” stamp set (retired?) by Gina K Designs.  In addition to the white card stock for my base, I also used a few sheets from a paper pack called “Neutrals” by Recollections.  A piece of twine finished off my card.

Thanks for checking out my card project!

This content uses referral links as described in the disclosure policy on my sidebar.

I Believe In You

I Believe In You

I Believe In You zDSCN7438.jpg

I had recently seen a cool technique on You Tube (HERE) where you create a background behind an embossed image and was anxious to give it a try.  Basically, you first apply ink directly to the inside of your embossing folder with a sponge (to the side where the sections to be embossed are recessed and onto the raised background portion of the folder) , and then you stamp an image (also onto the inside of the embossing folder) on top of the inked surface.  When you insert your card stock in the folder and run it through your embossing machine, the ink and stamped image transfer to the card stock.  Because the ink and stamping didn’t hit the recessed portions of the folder, these embossed areas will remain “clean” and the ink and stamped image will appear behind.

I ended up lightly inking over the whole panel when I was done because I had started with white card stock and didn’t like the contrast between the browns and white.  Had I not done that, my butterflies and swirls would still be basically white.  In addition to the color added, I also like the way the sponging added darker detail to the edges of the embossed portions of the panel.

One thing to keep in mind is that the stamped image on your card stock will be a mirror image of the stamp.  Since I wanted text on my background, I used the Tim Holtz Stampers Anonymous Reflection Script stamp because this image is reversed so it came out the correct way on this project.  (Had I stamped this image directly onto my card stock, the text would all be backwards!)  For this technique, you need to select a stamp that works in reverse.

Another thing to consider is the embossing folder.  This technique works best with an embossing folder that has large, solid embossed areas and not just line images.  You want the background to be behind stuff.

For this card, I used Gina K Kraft ink for my background sponging and Dark Chocolate for my stamped image.  The embossing folder is “Butterfly In Corner” by Darice.  I sponged Kraft ink onto white card stock to create the lighter banner and the greeting panel, and as I mentioned earlier, I also sponged a bit of this ink over my embossed panel.  I used the Gina K Designs “Frame and Filler” background stamp (retired?) to add a bit of texture to the Kraft banner.  Gina K “Dark Chocolate” card stock was also used.

The greeting, stamped with Gina K Dark Chocolate ink, was from the Gina K Designs “Inspiration Mosaic” stamp set.  I was browsing through my greeting stamps, and when I saw this stamp, I knew I had to use it on a card for my husband… just because!

I love earth tones and created my husband’s card in varying shades of brown.  I also wanted to try this same card in a different color scheme and ended up with this one:

yDSCN7472

For this version, I used Stampin’ Up “Lost Lagoon” and “Blackberry Bliss” ink and Gina K “Edible Eggplant” card stock.  (The card stock looks so dark in the photo, but it is a beautiful, deep purple color.) Instead of a greeting, I used the butterfly die cut which was made with a die from the Spellbinders “Les Papillions” set (S4-371).  Everything else was the same as the brown version.

This card design with the butterfly embossing folder and script background was inspired by this card on Pinterest.  I pinned it a while back and forgot about it, although it must have stuck in the back of my brain because I made these cards before looking at my board and re-discovering this card!  So this was a CASE, and I didn’t even realize it!!

Thanks for checking out my card projects!

This content uses referral links as described in the disclosure policy on my sidebar.


Layered Sympathy Card

Layered Sympathy Card

Layered Sympathy Card wwDSCN7347.jpg

(Inner sentiment:  Wishing you comfort and peace in the midst of your sorrow)

You may be thinking, haven’t I seen this card before?

I find it extremely difficult to make sympathy cards and recently needed a few.  I had used this design earlier for a Hanukkah card (see previous post HERE) and had some panels left over.  I realized that the patterned paper is pretty generic and could be used for a variety of occasions so I changed the greeting and the inner sentiment and was good to go.

The greeting stamp on this card is from the “With Sympathy” duo (retired?) by Gina K Designs and was stamped with Gina K Charcoal brown ink.  The inner sentiment is from the “Assorted Greetings” stamp set, also by Gina K Designs.  The printed shimmer paper and solid card stock came from a pack called “Christmas – Holiday Printed Paper” by Recollections.  The ribbon also came from Michaels.

I’ve said this before, but I really need to make a bunch of sympathy and get well cards so I have them on hand when I need them.  Coming up with a few generic card designs like this one is perfect.  I can save them and just add an appropriate greeting when needed.

Thanks for checking out my card project…again!

This content uses referral links as described in the disclosure policy on my sidebar.