Twisted Easel Mother’s Day Card

(inside: To an amazing Mom)
Easel cards look like you fussed a little more than a traditional, folded card, but they are actually SUPER easy to make! Simply create a folded card base as usual and then fold the front in half. Basic easel cards are folded in half parallel to the fold. For a twisted easel, fold the front in half on a diagonal instead of parallel to the fold. Then, add a focal panel to your decorated base. (More detailed instructions are included below.)
You can see the two (diagonal) halves of the card front in this photo:

The base is also the “inside” of the card.

And this is what it looks like when it comes out of the envelope (folded flat):

Here’s how I created my twisted easel card:
Create the base. (Decorate as desired.)

Cut and decorate your focal panel and adhere to card base as shown. (DO NOT put adhesive on the entire back of the focal panel. While the panel will ultimately be centered on the card front, the adhesive should not cross the fold.)

Use the diagonal score line to help you line up your focal image.

With the closed card flat on the table, open the card and fold the front down (mountain fold). The attached focal panel stands up creating the easel effect.
*
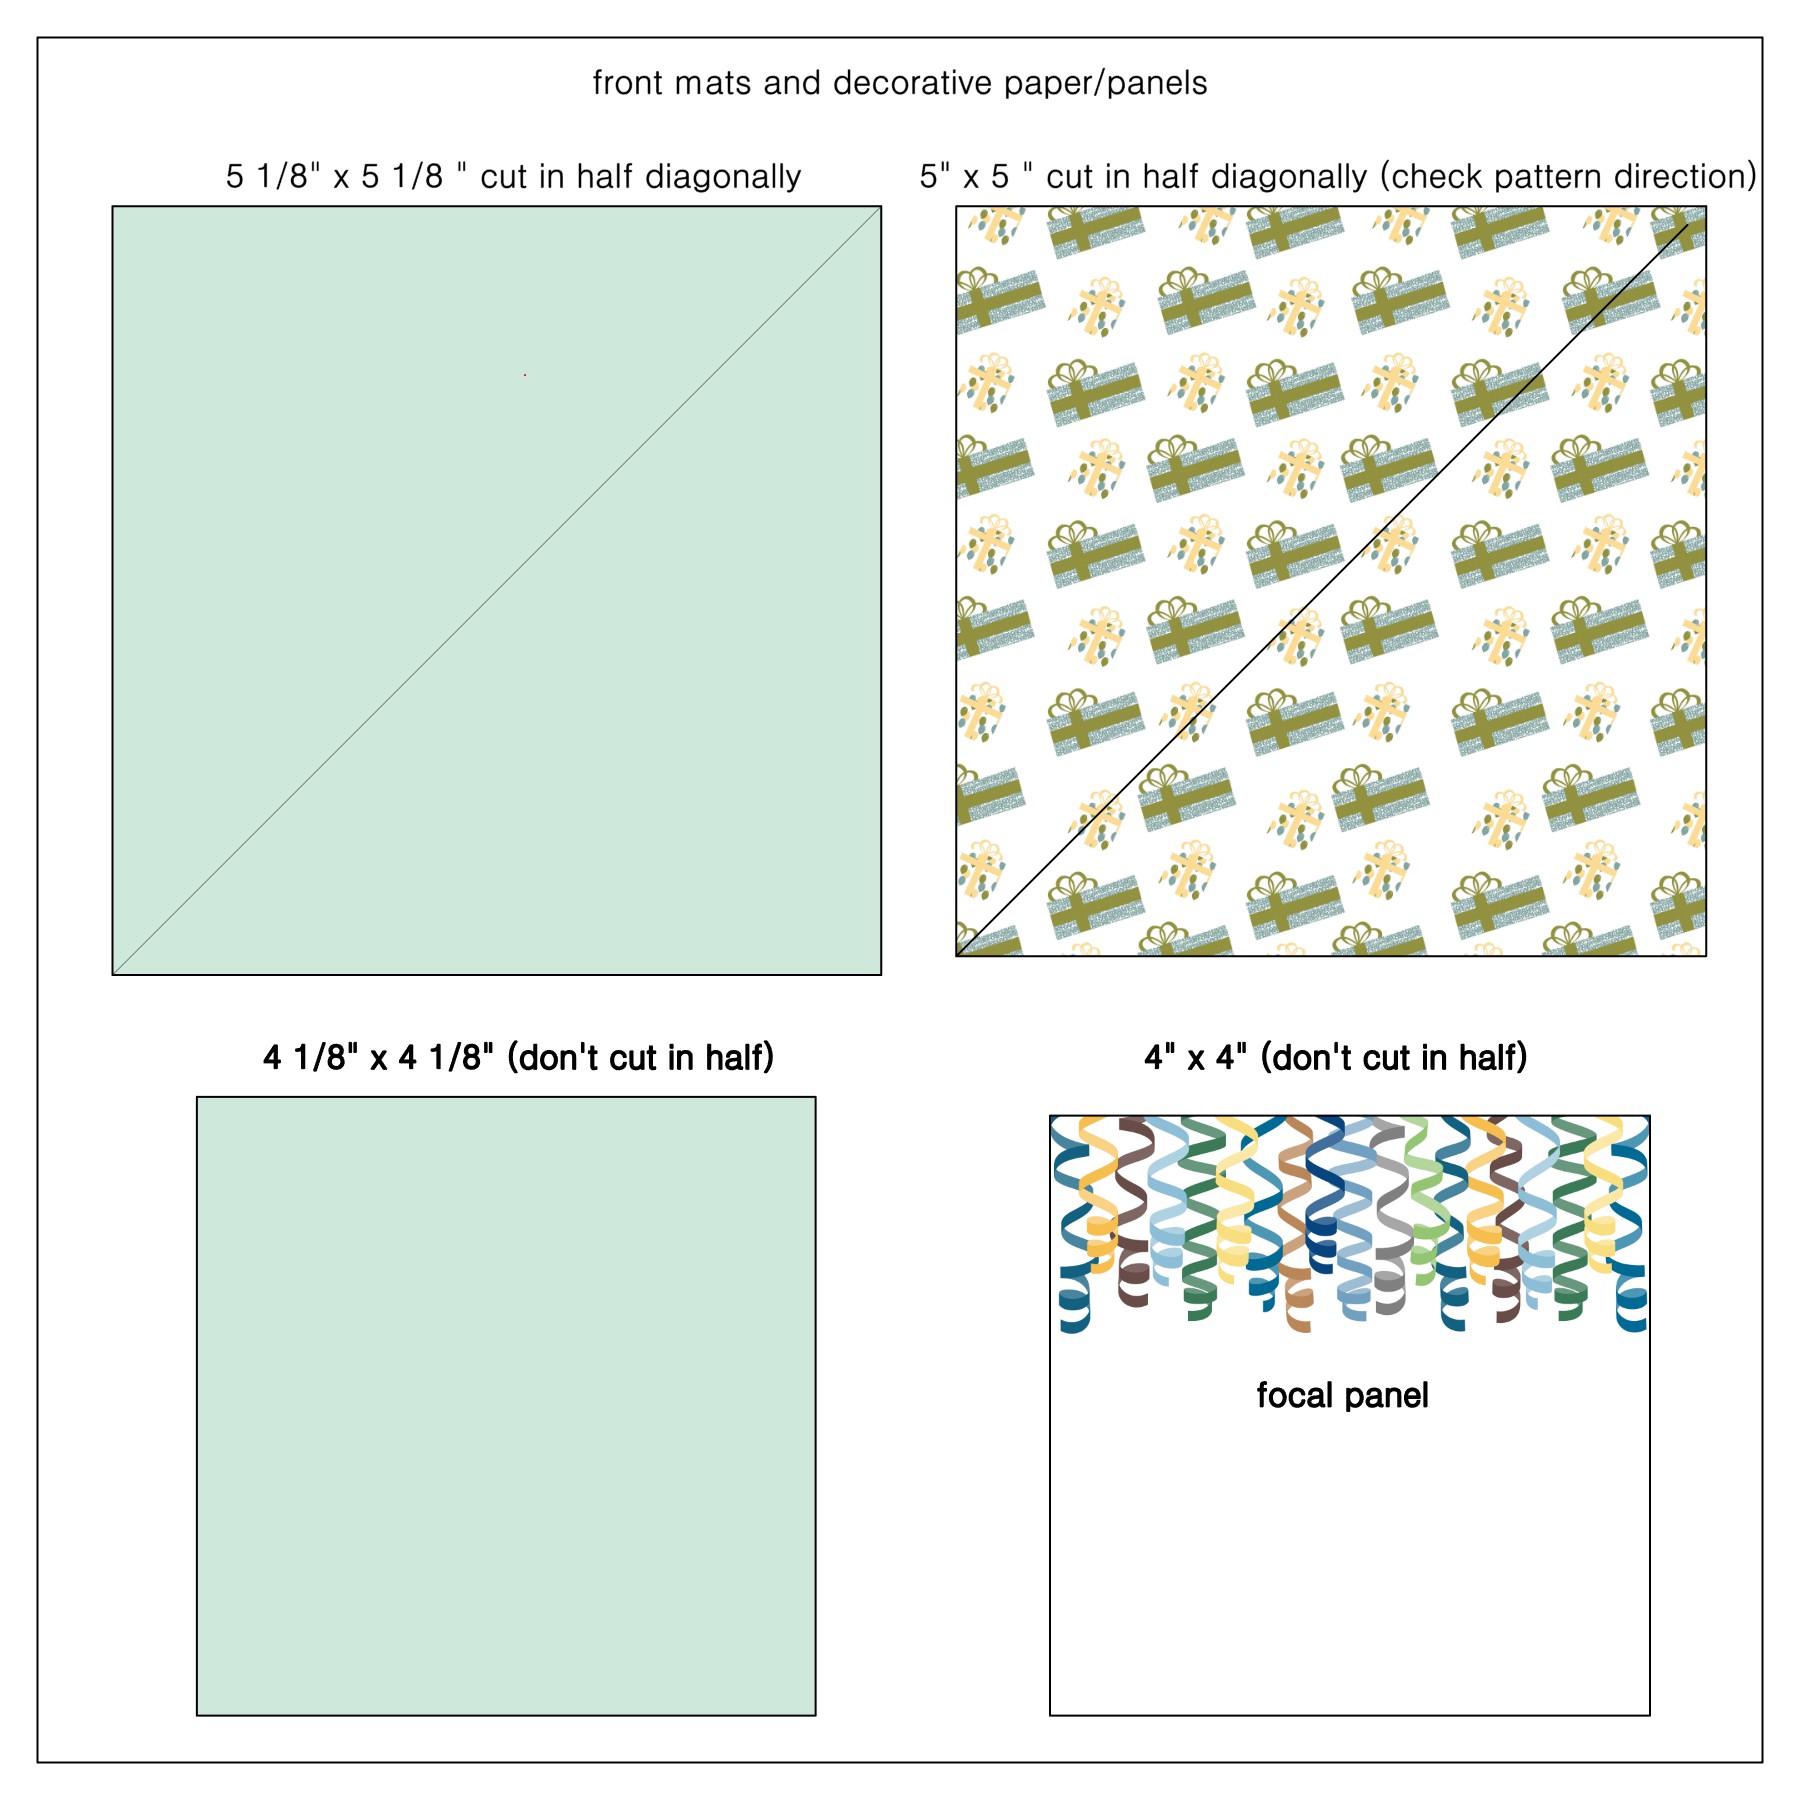
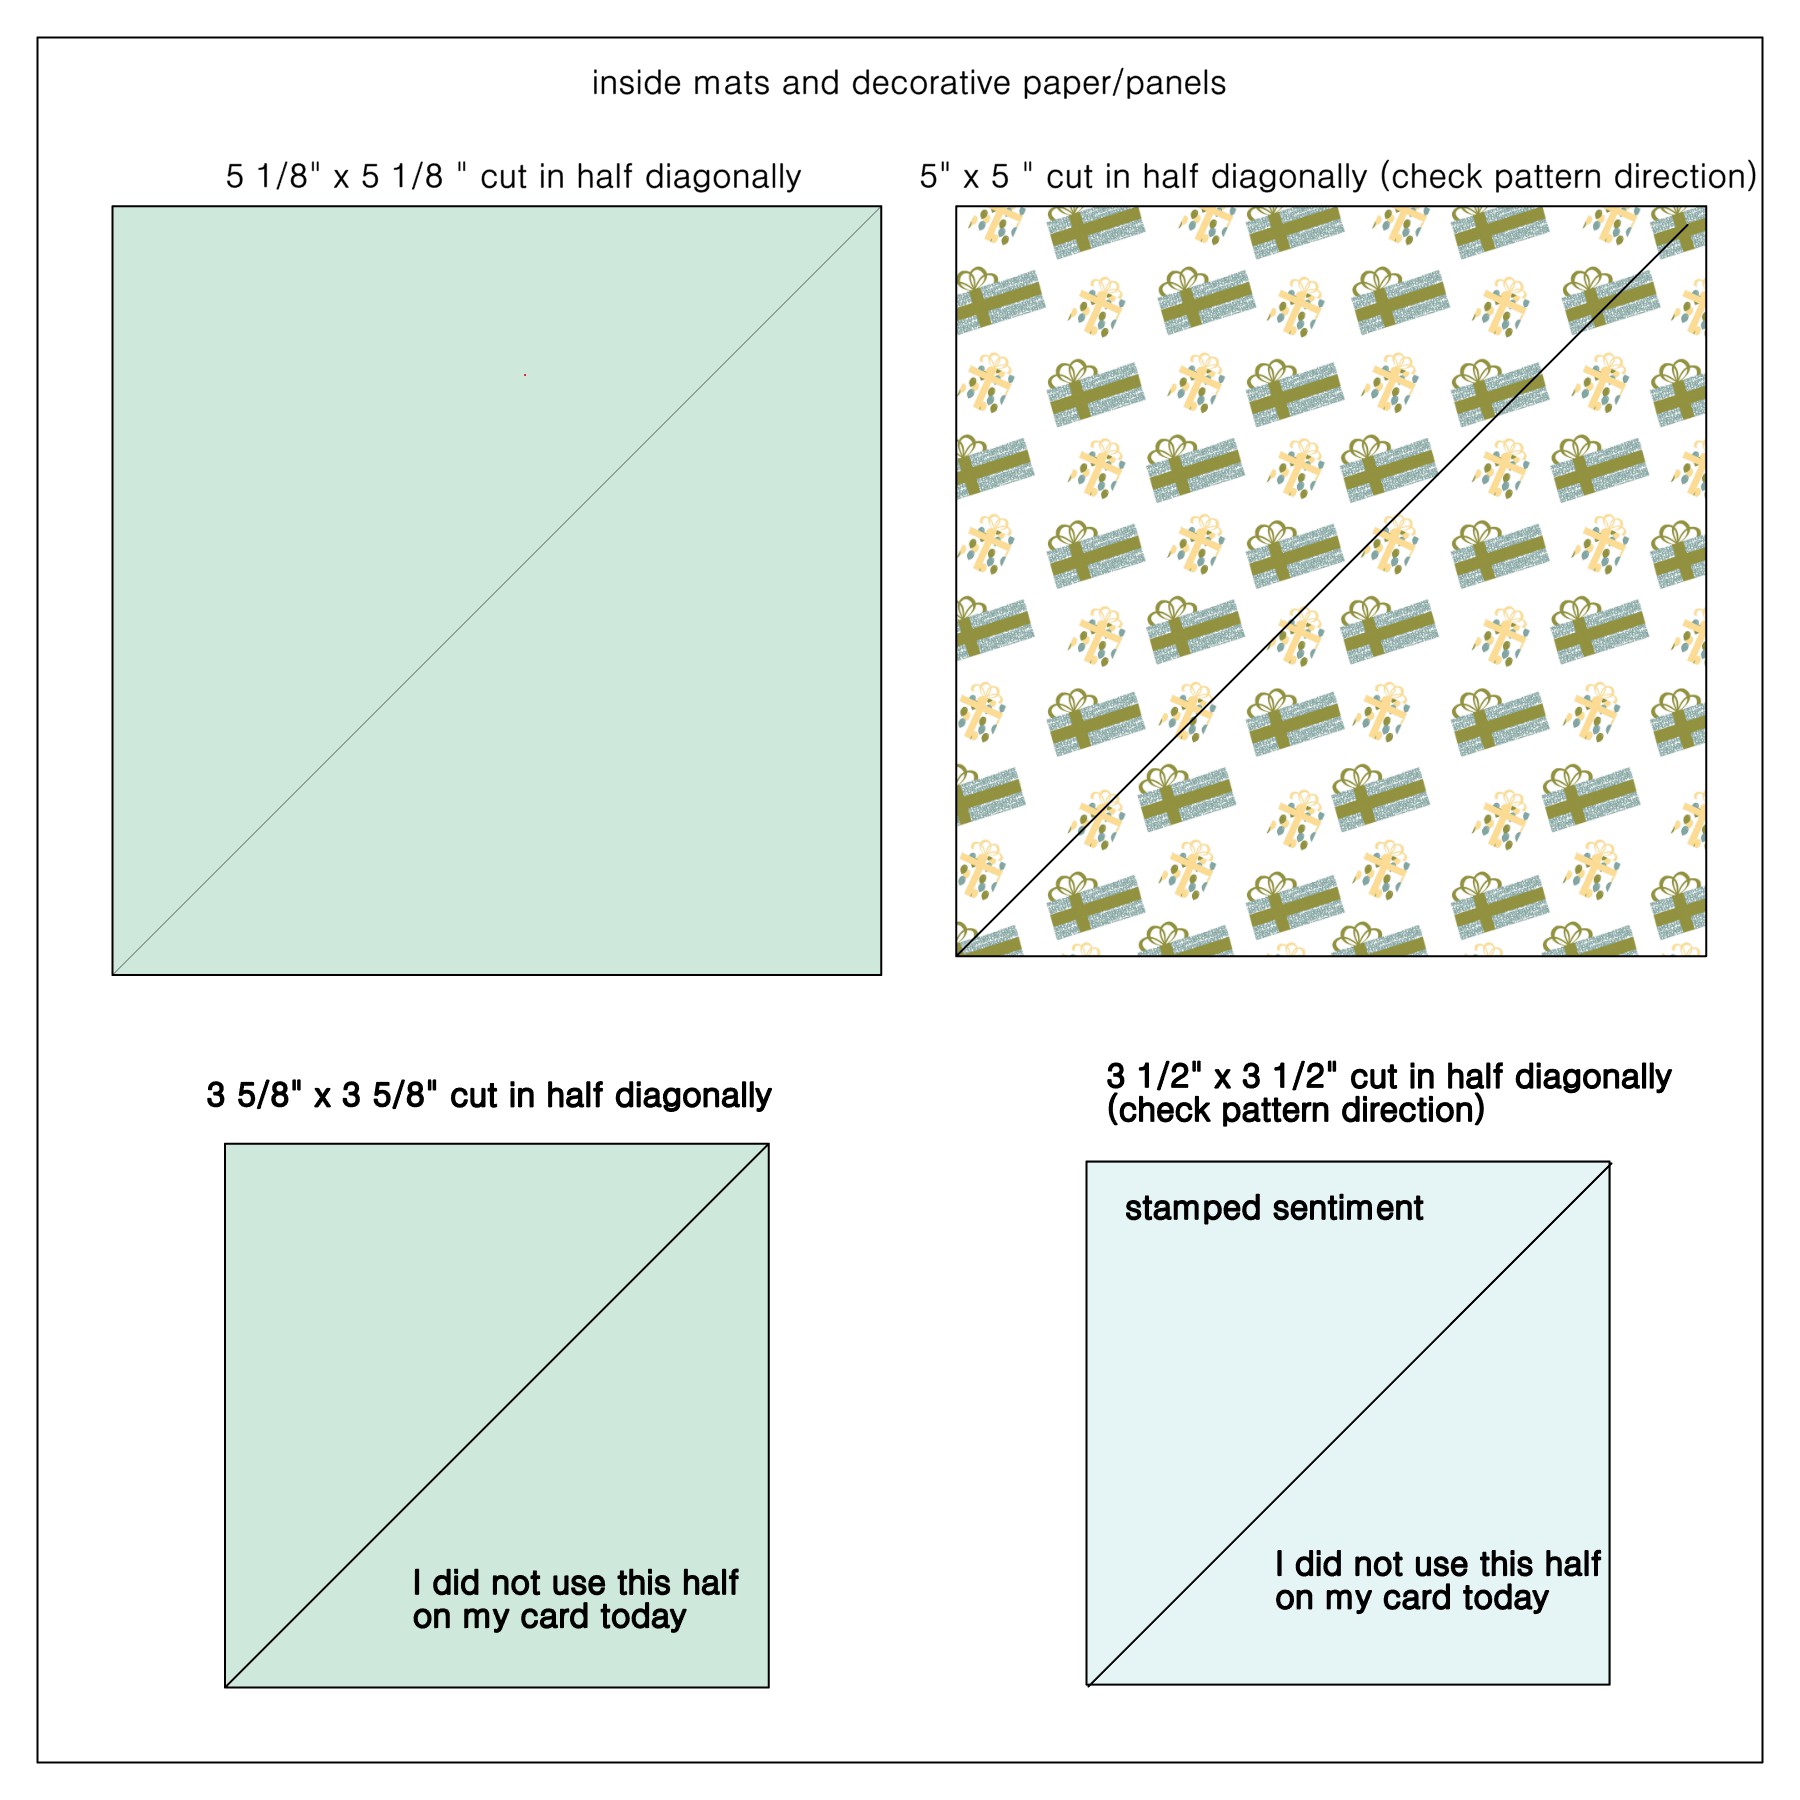
Here are my panel measurements:
For the front:
For the inside:
I used a square for my focal panel, but other shapes could also be used.
Originally, I had a square panel on the inside, and then I struggled with what to add as a “stopper” so the easel stayed up when opened. In the past, I’ve popped up a sentiment or die cut to sit in front of the opened easel. I had already made my sentiment panel and everything else I tried to add to the patterned paper interfered with the soft print. I ended up splitting the inside panel into triangles, and now the easel can sit in the center channel.
The paper I used is from the “Our Family Tree” 12 x 12 paper pad from The Paper Studio. I wanted to use silver card stock for the mats to add some elegance, but the paper is kind of vintage looking, so I made my borders super thin for just a touch of silver. My focal panel is pretty big to accommodate the large greeting die cut. Measurements can be adjusted if you want larger borders or a smaller focal panel.
The greeting was cut with the “Happy Mother’s Day Phrase” die by Cottage Cutz. The circles were made with my “Bubbles Border Punch” by Fiskars (no longer available?). The inside sentiment is from the “Fabulous Holiday Fillers” stamp set by Gina K Designs (no longer available).
I made a square envelope for this card using my We R Memory Keepers 1-2-3 (envelope) Punch Board and will need to mail at the Post Office.
Thanks for checking out my card project!