Scrap & Stamp

Scrap & Stamp

I bought my first pile of stamping supplies around the same time I started scrapping (1999). My neighbor hosted a Stampin’ Up demonstration, and the projects shown by the consultant were gorgeous. Besides thinking it might be fun to start making cards, I had the brilliant idea that I could do some stamping on my scrapbook layouts as well. I ended up spending a not-so-small fortune on stamps, inks, and supplies. When my supplies finally arrived, I attempted my first card and was EXTREMELY disappointed! It looked nothing like what had been shown at the demonstration! (I basically stamped an image onto the card base, colored it in with colored pencils, and wondered why it looked so boring!) I had no idea what I was doing, no knowledge of the many cool techniques that were out there, and quite frankly, I stunk at stamping! I couldn’t get a clean image consistently so I was petrified to bring my stamps and inks anywhere near my scrapbooks!

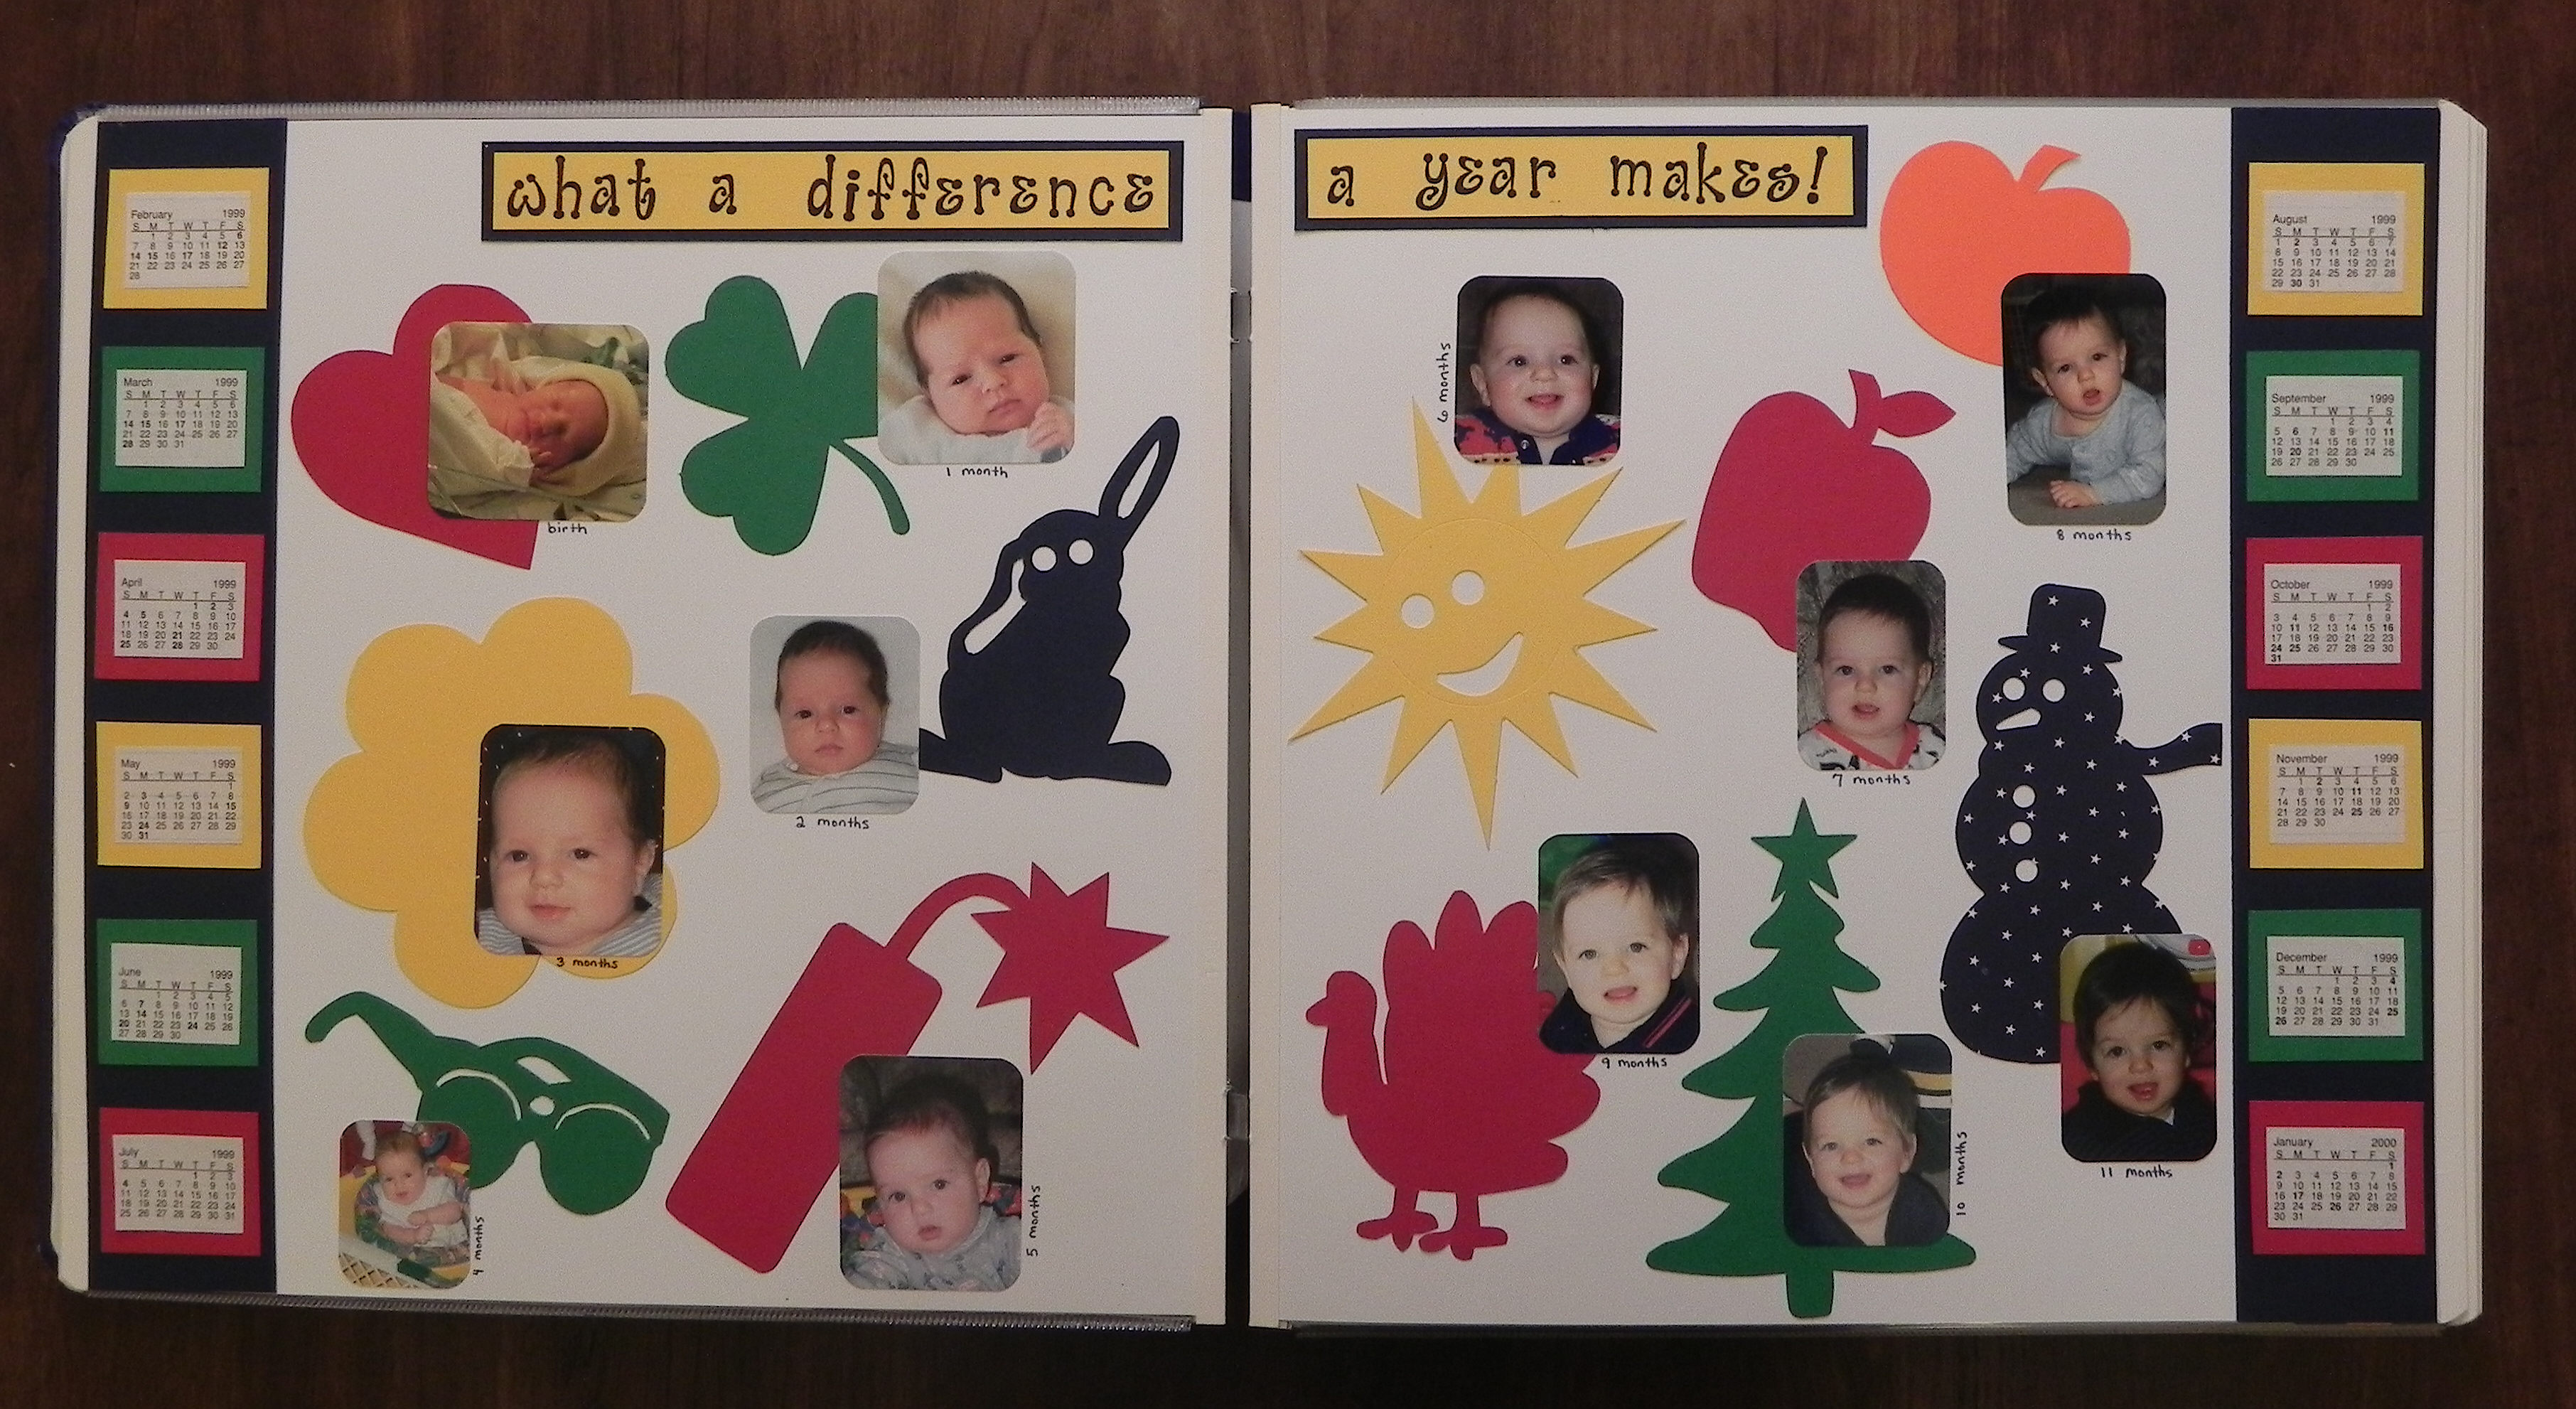
For my early attempts, and there were not many of them, I stamped letters or words from alphabet stamps on separate sheets of paper and cut them out to attach to my pages. If I messed up, and I did often, I could just re-stamp it since it wasn’t on the layout yet. I posted one of these examples yesterday. It was my daughters “Watch Me Grow” page. (Click HERE to see it.)

Another example was on my “A Magical Birthday” and “Happy New Millenium” layouts.  The letters were stamped on scrap paper and individually cut out. I liked the look, but that’s as much as I was comfortable doing early on!

cDSCN9952

cDSCN9773

After these early attempts, my stamps ended up in the basement in a box, pretty much forgotten.  A few years ago, my neighbor decided to get rid of a bunch of her stamps (I guess hers had ended up in her basement as well!) and asked me if I wanted them.  I decided to take them and give it another try! Now, I was determined to figure out how to use them, discovered You Tube videos and StampTV, and learned that I love stamping!  I’ve gotten better with practice and have learned a lot since I first started out, but I will admit I am still a little scared of stamping directly on the page!


Here are a few more recent examples of where I’ve incorporated stamping in my scrapping:

On this Easter layout, I created the bunny scenes in the corners by masking and stamping the elements on cardstock and matting the panels before adhering them to my layout.

cDSCN9956

caDSCN9958


For this spring layout, I used stamps for the border blocks.

cDSCN9961

cDSCN9963


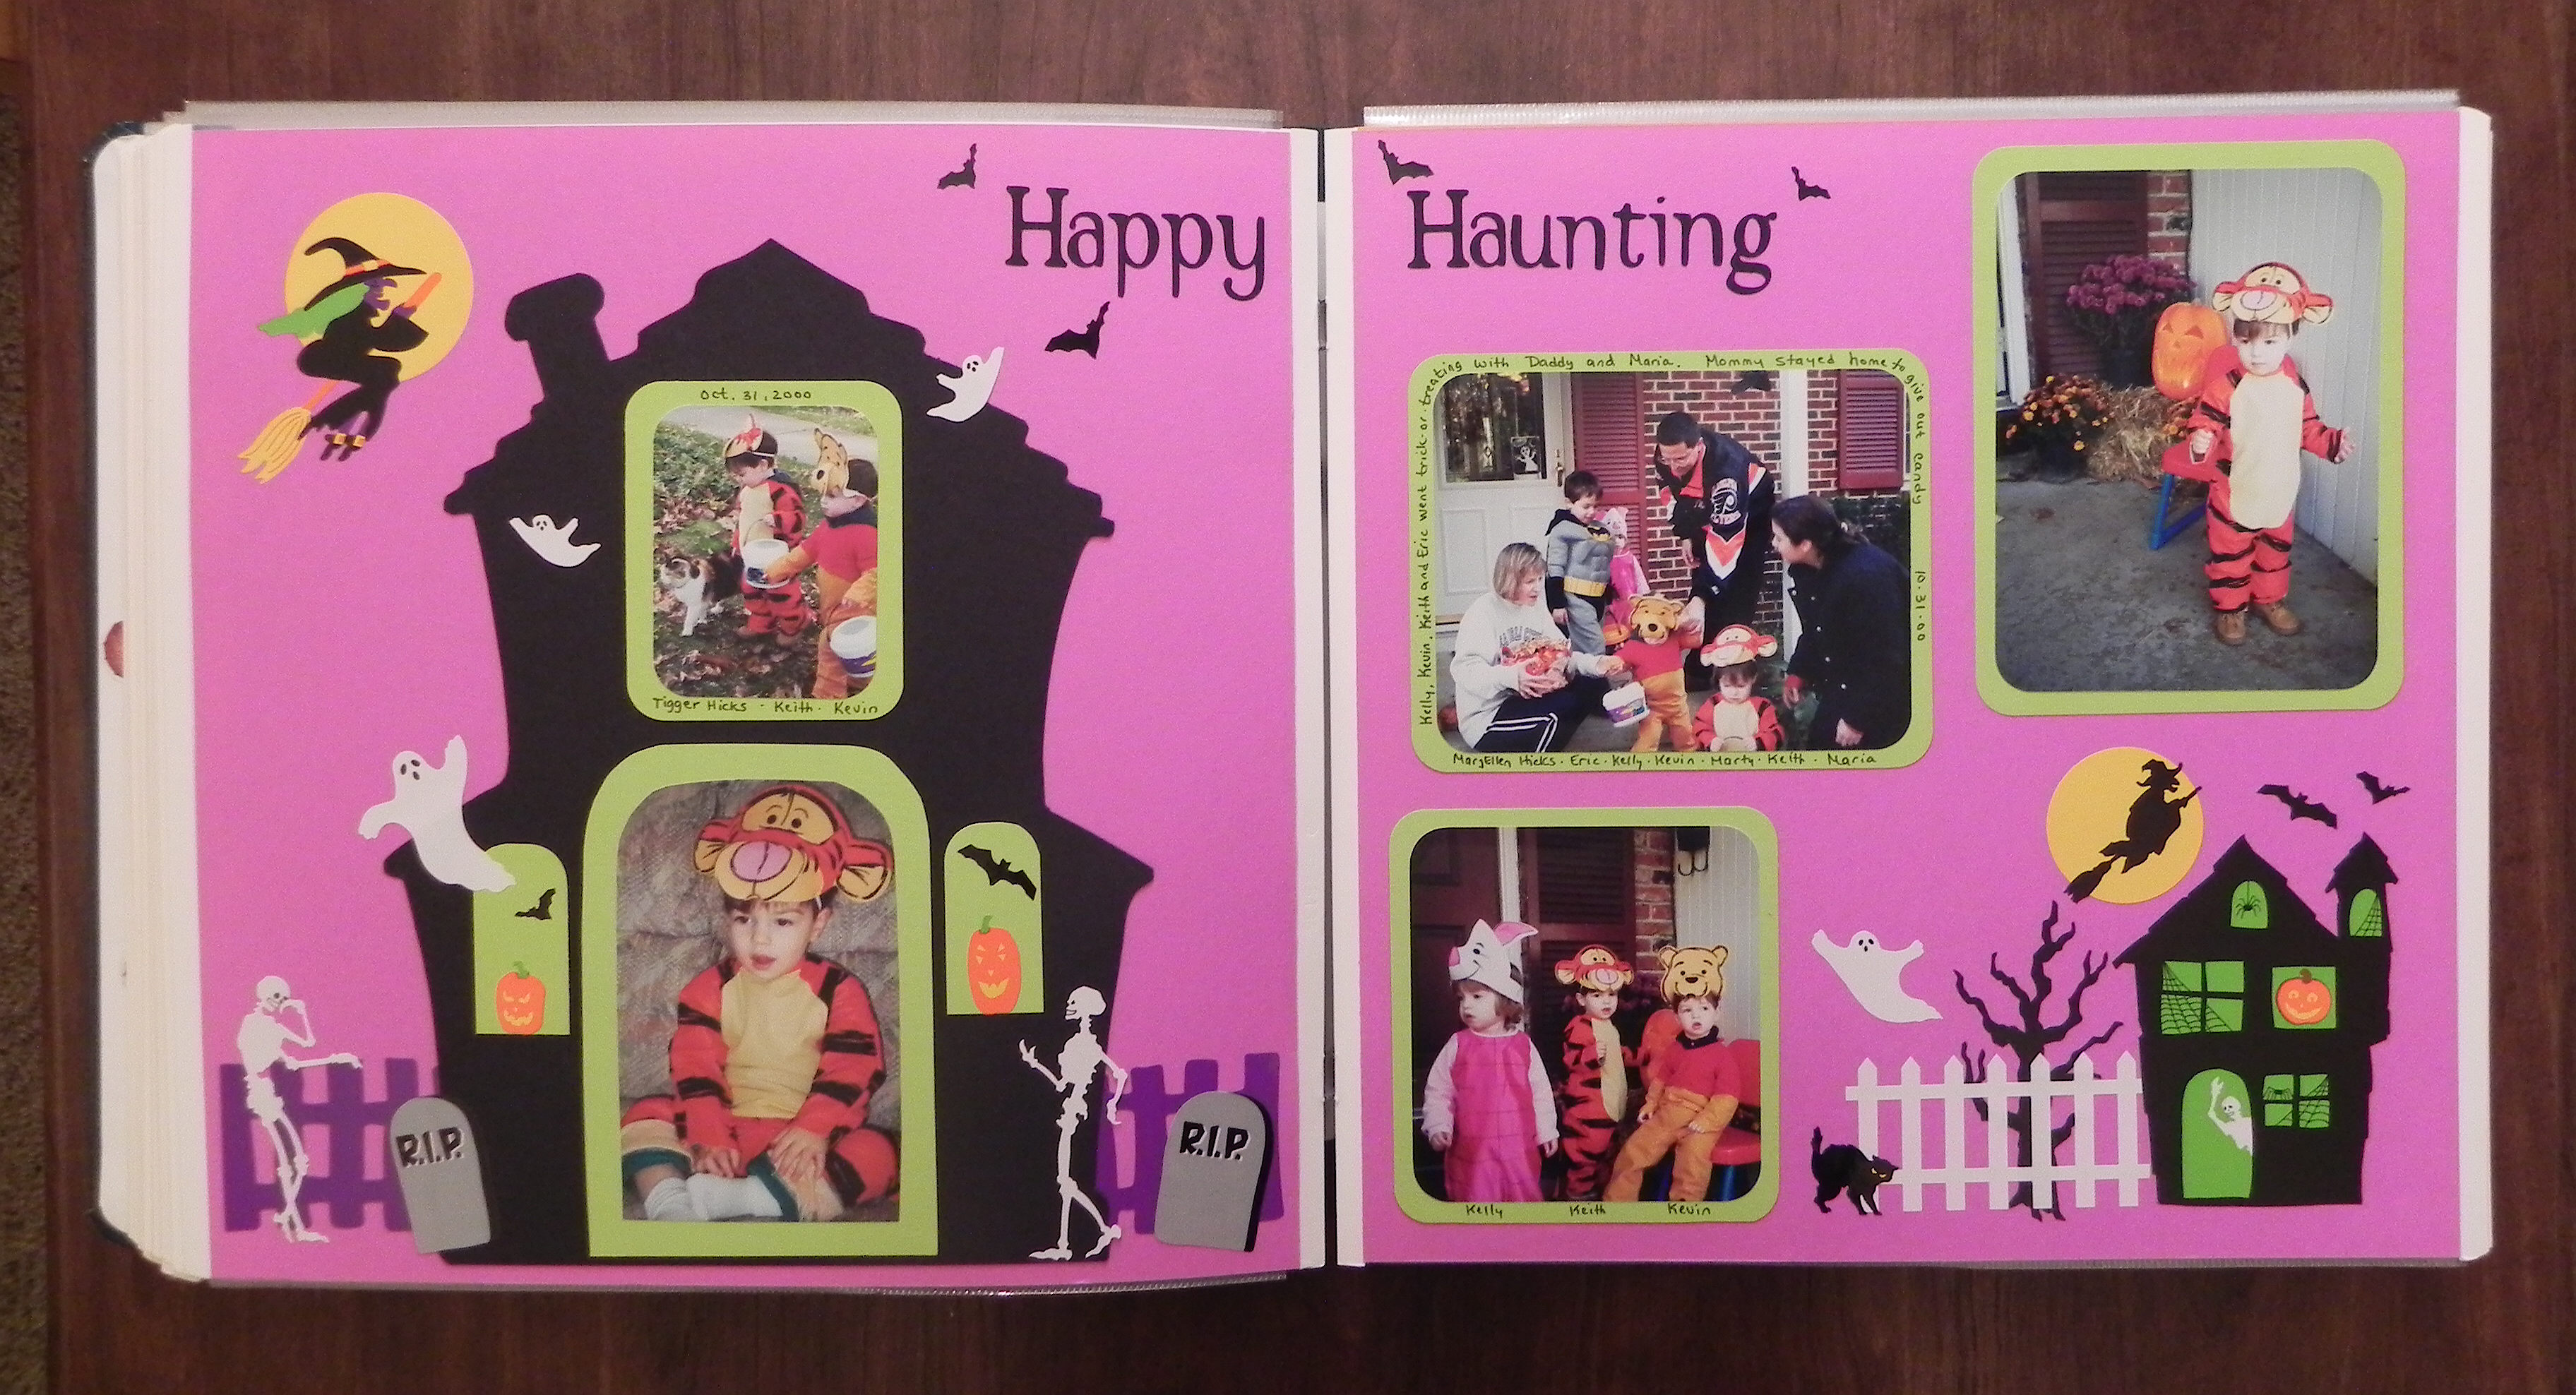
I used a distressing technique on the journal box to give it a spookier look and to make it match the patterned paper used on this Halloween layout.

cDSCN9971

cDSCN9971 text box


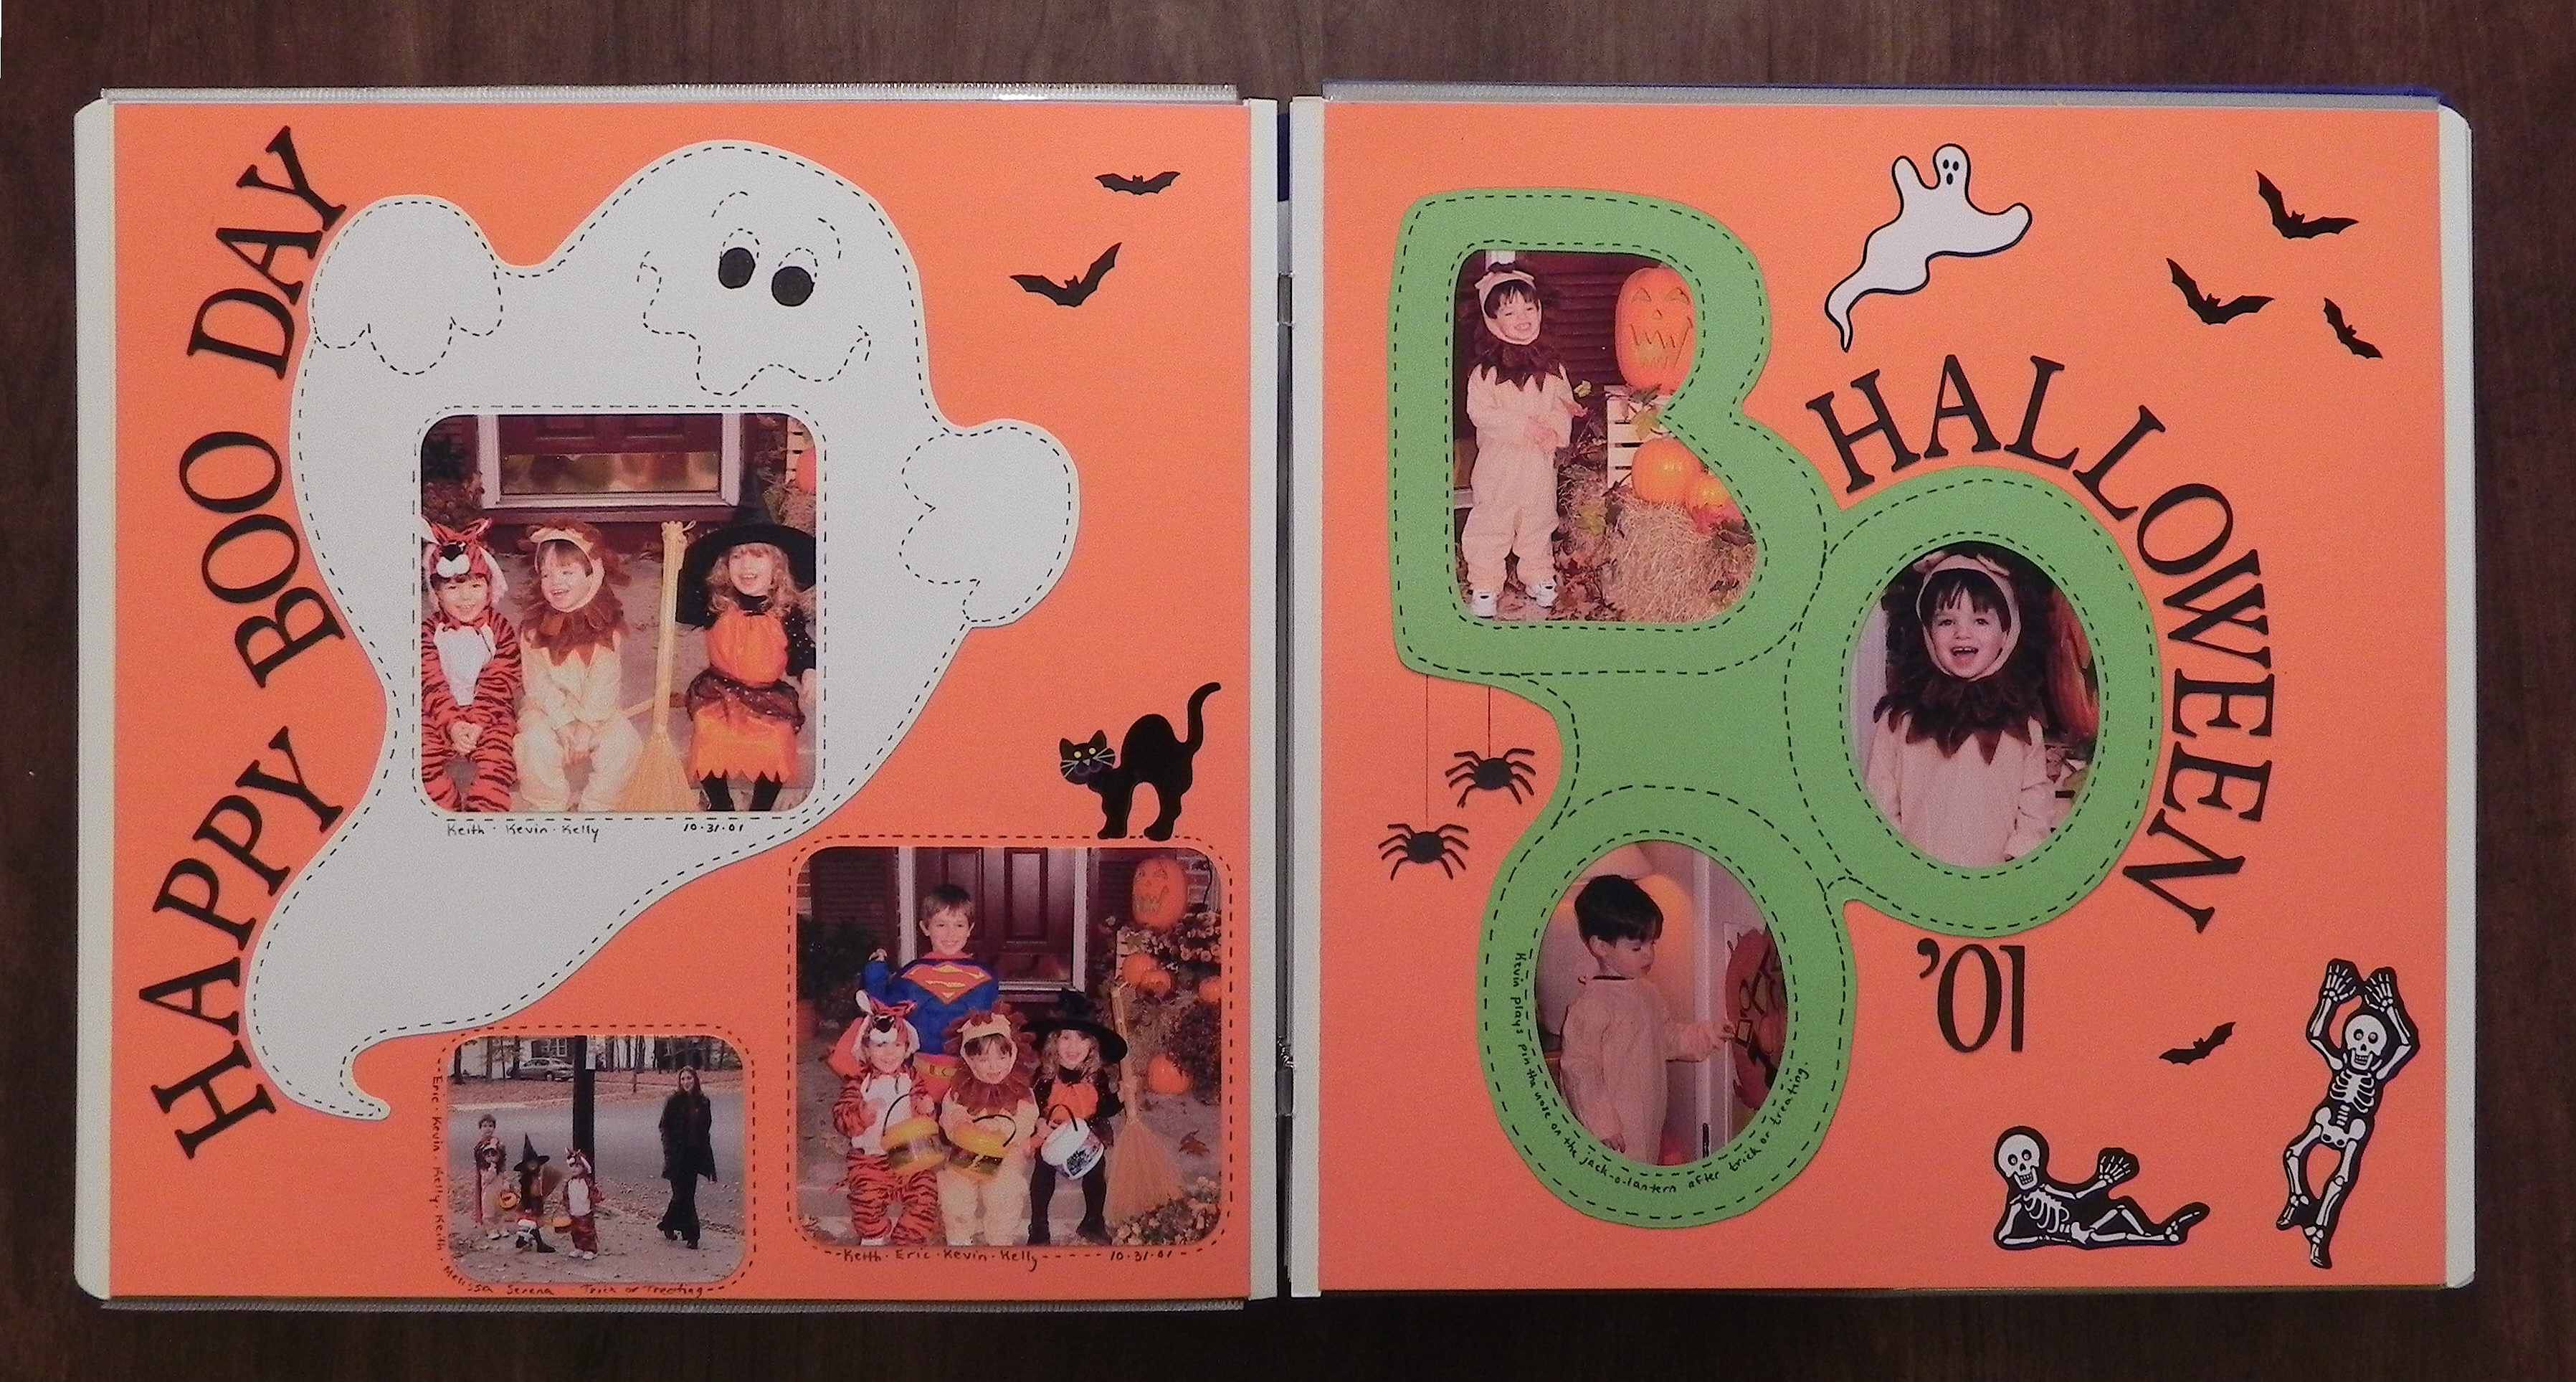
This layout was ALL stamped and inked!  I am not going to tell you how many times I had to start over for these pages; there were a lot of opportunities to mess up!  (And I had to duplicate this layout 4 times for each of my 4 children!!)  I really like how it came out, though, so it was worth it!

The Beach


Thanks for checking out my post!

What A Difference A Year Makes!

What A Difference A Year Makes!

The following 4 layouts were among the first ones I did, about a year after I started scrapbooking.  I took a photo of each of my children every month on their month-iversay, at birth, 1 month, 2 months, etc. After 12 months, I did a layout with all of their photos to show how much they grew and changed during their first year.  (Click on a photo to get a closer look.)

cDSCN9902

cDSCN9922

cDSCN9906

cDSCN9934

Thanks for checking out my post!

Thinking “Inside the Box”

Thinking “Inside the Box”

Usually we are encouraged to be creative and think outside the box.  However, I worked “inside the box” for these layouts!  (Click on a photo for a closer look.)


This fall page has several photos cut to fit inside fall-shaped dies.

cDSCN9766


The collage of photos is inside the barn on this field trip page.

cDSCN9806


Photos are cut to fit inside the ornaments and packages on this Christmas layout.

cDSCN9932


Look inside the mittens and snowmen on this winter page.

cDSCN9943


The insides of the water splashes contain the photos on this summer layout.

cDSCN9925


On this school page, the large schoolhouse die contains the individual and class portraits.

cDSCN9939


There are photos in the tent die on this camping page.

cDSCN9897


This Halloween spread has photos in the haunted house.

cDSCN9914


Here’s another Halloween layout with the photos trimmed to fit in the word “boo” and another photo is in the ghost.

cDSCN9928


Photos make up the parts of the Mayflower on this Thanksgiving page.

cDSCN9916


Party pictures are in the hand-made castle layout.

cDSCN9837


Thanks for checking out my post!

A little info…

(Cartoons and clip art on this page are from google images from various sources and are not my artwork.)

My plan for this scrapbook section is to post random layouts, in no particular order.

Cartoon 17

As you will see, my pages are pretty clean and flat. I use mostly paper to decorate my layouts, and I usually try to get as many photos on a page as possible. I often see gorgeous layouts/works of art posted online that contain such beautiful embellishments and decorative papers. These layouts often contain 1 or 2 photos. I admire them from afar, but that style doesn’t really work for what I am trying to do; I need my books to close flat, I have way too many photos to put one on a page, and I am trying to keep the focus on the photos and journaling without too much distraction. Presenting my photos and memories in a way that’s pleasing to look at is my goal. As with any craft, one gets better over time, or at least one’s style evolves.

Cartoon 16

I laugh when I look at some of my earlier layouts and compare them to the later ones!

Cartoon 7


cartoon 8

I started scrapbooking in the summer of 1999. My friend was a Creative Memories consultant and asked if I’d like to host a workshop at my house. She taught us what scrapbooking was, why it was important to use the right products, and how to get started.   I was immediately hooked! (We still try to meet monthly to scrap and catch up!)

Cartoon 2

cartoon 10

Cartoon 12

cartoon 11

I decided to make a scrapbook in place of a baby book for each of my children. My mother had kept a baby book for me, and I still enjoy looking at it. It covers my first 7 years and contains a few photos, my mother’s thoughts, my milestones and firsts. I wanted to have something like that for each of my children as well, but I thought a scrapbook would be a better idea because it could contain everything a baby book has and more. Since I was starting with blank pages, I could customize it to include whatever I wanted.

cartoon 9

Cartoon 13

Well, one book for each turned into several, and the first 7 years will now be the first 18. I take soooo many photos and I want to include , among other things, every holiday, major event, vacation, and sometimes cute photos of nothing in particular! As a result, I am hopelessly behind because I just keep snapping away!

Cartoon 4

Cartoon 3

 Eventually, I’ll finish! And if not, they will have the first 5 years at least since that’s where I am at the moment!!

Cartoon 6

cartoon 1

I am so glad I started this project for them.  I really enjoy scrapping, and they really enjoy looking at their books at what I’ve done so far. And it will be something they will have, from me, for years to come!

I Love Scrapbooking! clipart

Cartoon 5

Thanks for checking out my scrapbook posts!

Golden Sunshine – Childhood Cancer Awareness Card

Golden Sunshine – Childhood Cancer Awareness Card

Golden Sunshine - Childhood Cancer Awareness Card.jpg

I made this card for Lee’s “Stamp Out Cancer – Challenge #8 – Many Colors” for StampTV. For this challenge, we are to make a card using colors to bring awareness to and honor those affected by cancer other than breast cancer, BUT we may NOT use any pink…..not at all!  (Sadly, this site is no longer active.)

September was Childhood Cancer Awareness Month, and the ribbon for childhood cancer is gold.

childhood awareness image

My daughter. Kelly, was diagnosed with thyroid cancer three years ago, when she was 12. She was successfully treated at the Children’s Hospital of Philadelphia and continues to be cancer-free today. I wanted to do a project with the thyroid cancer colors (blue, teal, and pink), but we are not permitted to use pink for this challenge! So I decided to use the color for all childhood cancers instead.

The cheery, yellow paper I used is really a great color for a card inspired by Kelly. She was so strong throughout her treatment and always had such a positive, cheery attitude which I find remarkable for a child going through all that she did!

This card is also being entered in the Simon Says Stamp Wednesday Challenge – Use Watercolors.  For this challenge, we could “use watercolor paints, pencils, crayons, gelatos, distress inks, whatever we can think of.”  We could “create backgrounds, color stamped images or die cuts, or color a stamp, spritz with water and use the direct to paper technique.”(http://www.simonsaysstampblog.com/wednesdaychallenge/simon-says-use-watercolors/)

For my card, I used stamps from the Gina K Designs “Sunkissed Autumn” set, and stamped them in black archival ink on watercolor paper. I needed a waterproof ink since I planned to watercolor the background, and I didn’t want the ink to smear.

I masked my stamped image with Frisket masking liquid. I applied the Frisket with a fine liner paint brush and allowed it to dry. Frisket is a watery substance that dries like rubber cement and creates a mask on the image.

For the background, I used Tim Holtz faded jeans, broken china, peeled paint, and mowed lawn distress inks. I wiped some of each on my craft mat, spritzed the ink with water, and painted it on the card with a brush. (I am not at all good at watercoloring!!! It took several tries, and it’s still not exactly what I was going for. I need to practice this technique since I really like the watercolored look!)

After my background was watercolored, the frisket mask was rubbed off with a rubber cement eraser (or you can use your finger). I colored the image using Tim Holtz distress markers: tattered rose (for her skin) and vintage photo, tea dye, wild honey, and mustard seed (for her hair). I tried to blend these hair colors and discovered it is next to impossible to blend markers on watercolor paper! After coloring, I paper pieced her dress and the sun balloon with the same yellow paper I used for my mat.

My watercolored panel was mounted on a small white mat. This was then adhered to a wider yellow mat using a piece of printed paper from a Recollections paper pack (not sure which one since the cover came off a while ago), and then all was attached to a white card base.

Here is the thank you note I made to thank people for their support and gifts while Kelly was undergoing treatment.  She loves giraffes and had surgery on her throat, so …

Thyroid Cancer Thank You Card

Thanks for checking out my card projects!

This content uses referral links as described in the disclosure policy on my sidebar.