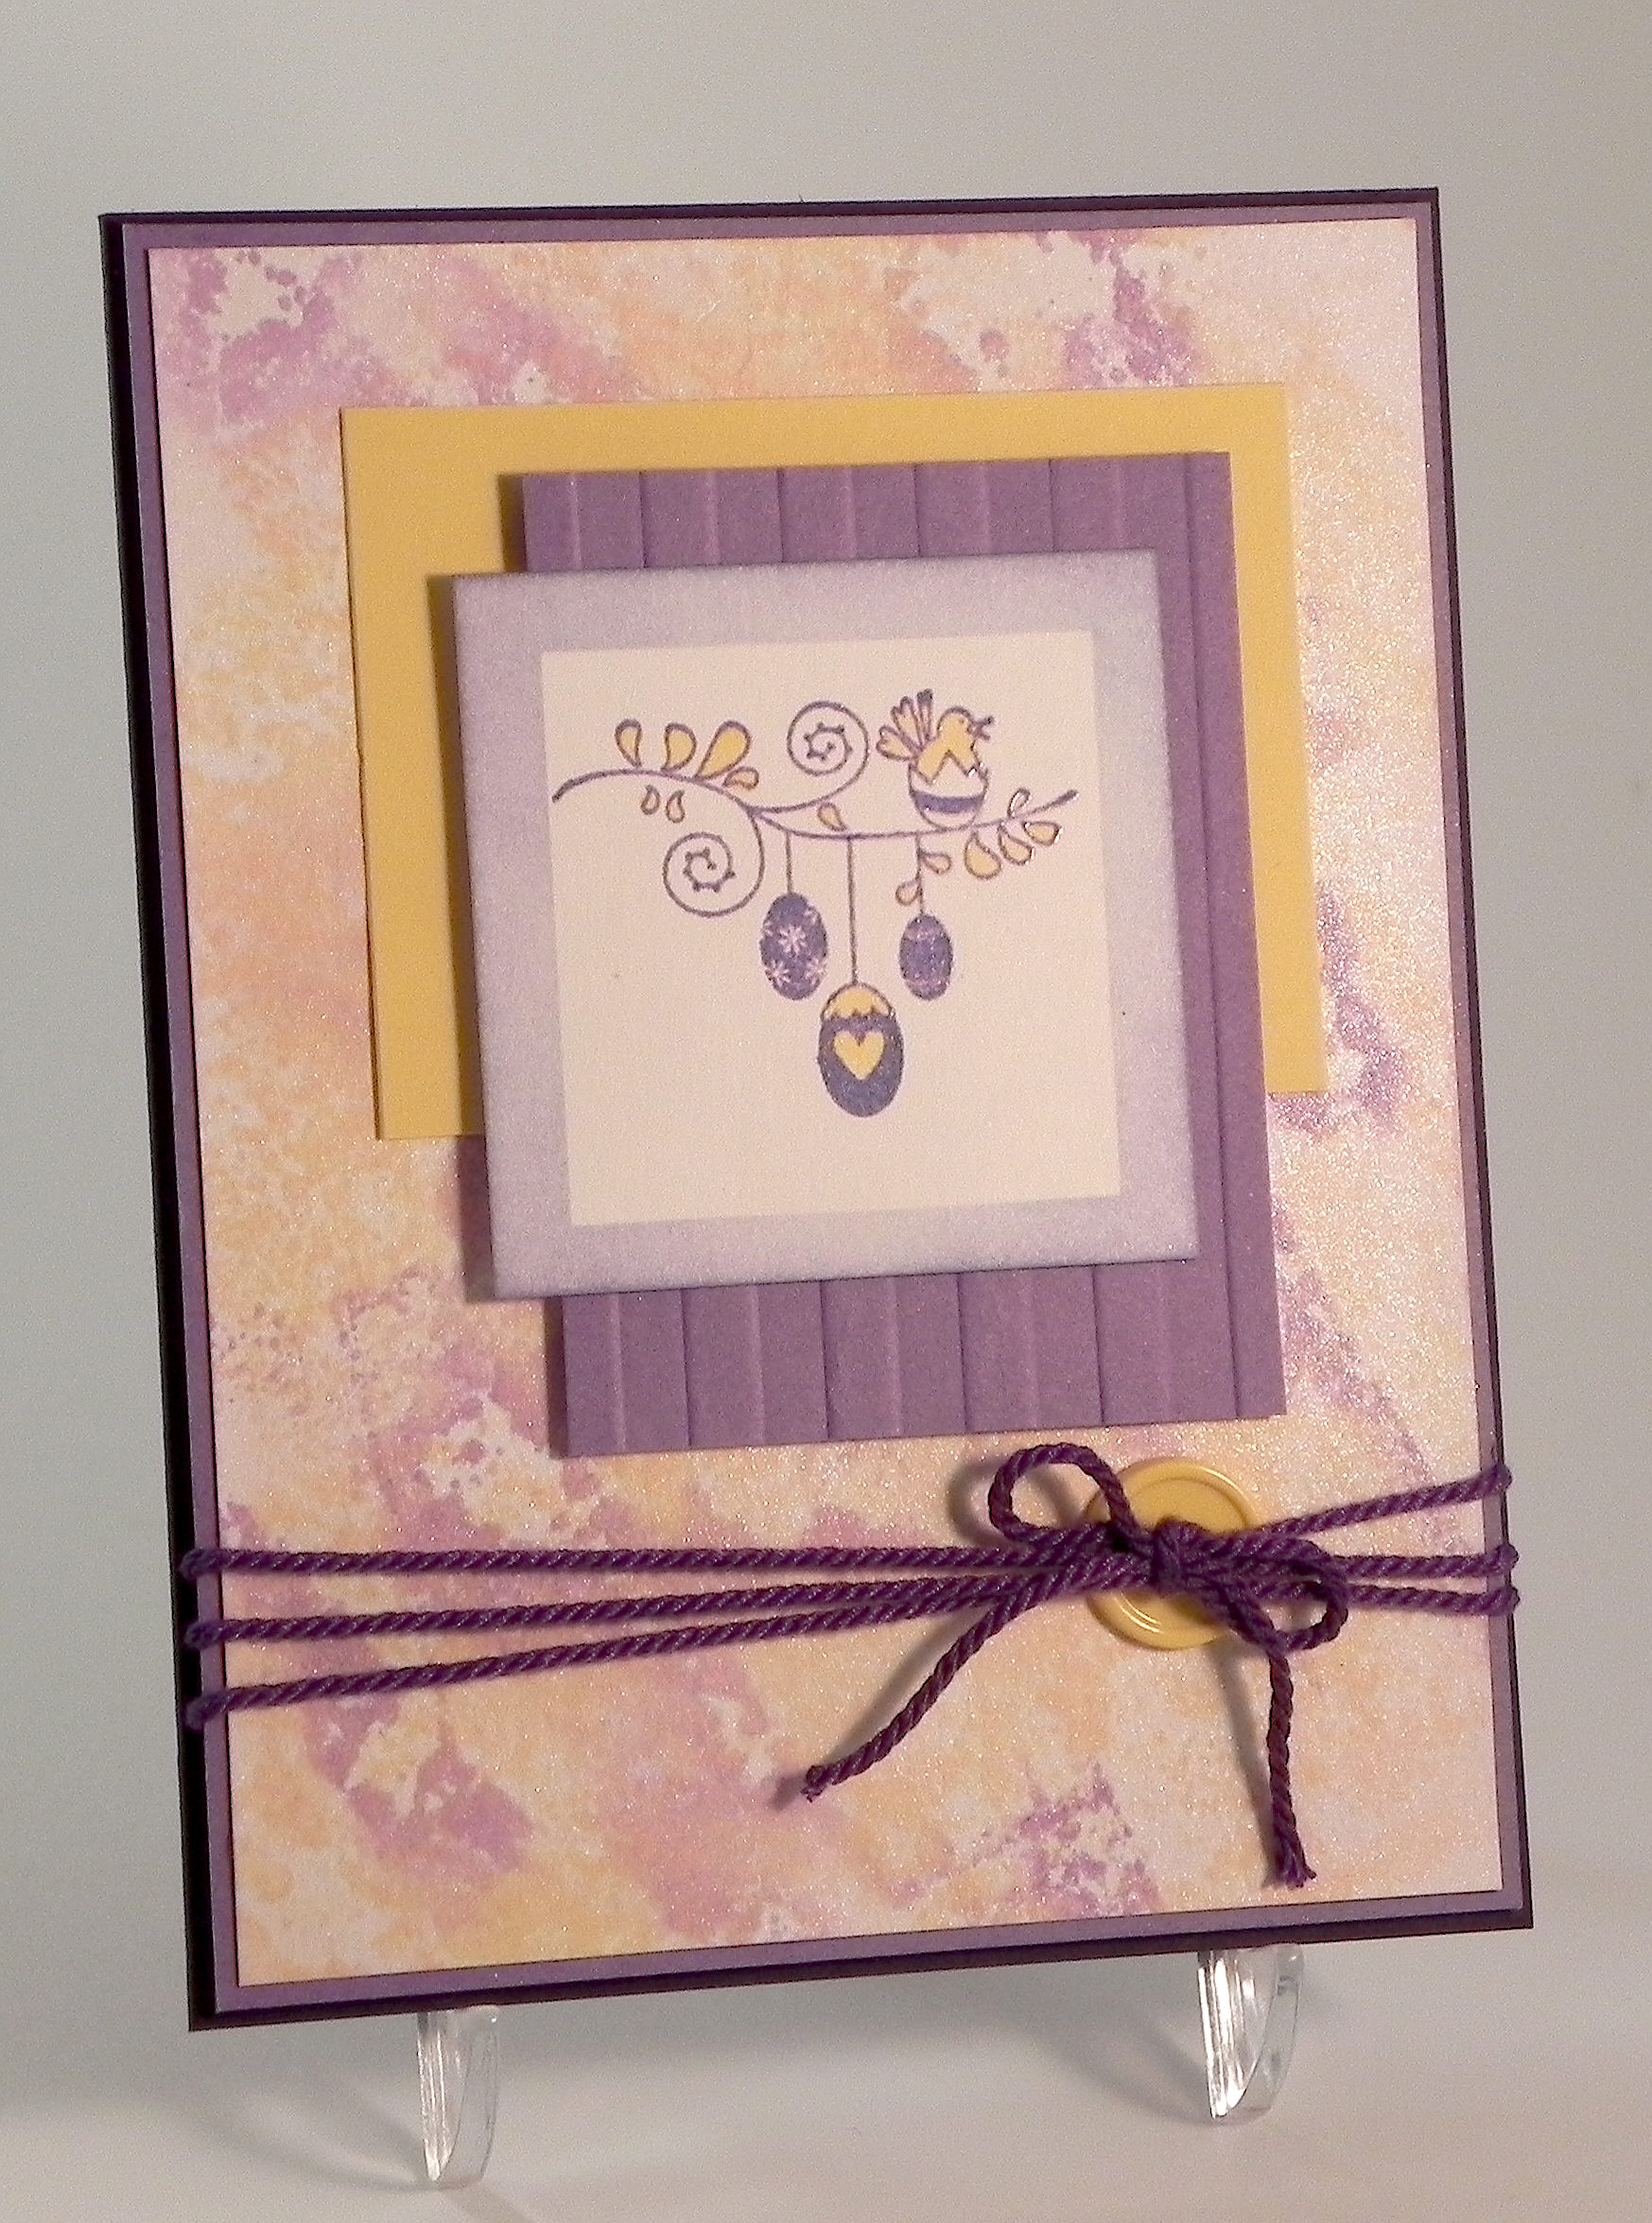
“Smooshed” Egg Easter Card

Over at Perfectly Rustics this fortnight, the challenge is “Eggs” (challenge # 44) where we are to make a creation with an egg or eggs on it. For this project, I made an Easter card with an egg-shaped (oval) window and a “smooshed” panel behind it. (http://perfectlyrustics.com/2015/03/23/prdc-no-44-eggs/)
I got my idea for this card from several places:
When I was teaching quite a few years ago, two of my students (twins) gave me a gift for Easter. I’m guessing that their mother made it, although I suppose the boys could have done it! Anyway, it was a picture frame with an oval mat, and instead of a photo, there was a collage of scraps of paper. I’ve always thought this was a clever idea and a beautiful project. Here it is:

A few weeks ago, I saw a beautiful project posted on a blog I follow where Karen did something similar for her card project. She created an oval mat for her egg, but instead of using tissue paper, she inked stripes for her back panel. You can see her post HERE. Seeing this post reminded me of the frame gift I had received all those years ago, and it got me thinking – what could I use for my background if I were to make a card with an oval mat as an Easter egg…
The final bit of inspiration came from another post I saw this past week by my friend Barb where she made an awesome card with a “smooshed” background. A “smooshed” background is where you put ink down on a non-porous surface (like a craft mat, a piece of acetate, or an acrylic block for example), spritz the ink with water, and “smoosh” your paper onto the wet ink. It creates a beautiful water colored panel that looks different every time it is done! I’ve tried this technique before, but I was never really happy with how mine came out. Her colors were so vibrant! So I watched the video tutorial that she posted (by Betsy Veldman from papertrey ink) and decided to give it another try and use it for my egg. (You can see the video tutorial HERE on You Tube, and HERE is Barb’s post.)
For my “smooshed” panel, I used Gina K wild lilac, sweet corn, and innocent pink inks. I used those Gina K card stock colors as well, along with grass green. I cut my oval with a Spellbinders classic oval (large) die. The grass was made with a Fiskars “grass” contiuous border punch and embossed with the Cuttlebug swiss dots embossing folder. The lilac panel was embossed with the Cuttlebug d’vine swirls embossing folder. I didn’t have ribbon to match the lilac, so I used my air brush and Copic Marker V17 to color a piece of white ribbon and added it to the bottom of the grass strip and on top of the egg. The greeting was Inkadinkadoo (no name) and was stamped with Gina K edible eggplant ink. The sentiment was too long to fit on my egg so I stamped each word separately while masking the other word. To make sure the words lined up properly and ended up where I wanted them, I used my stamp-a-ma-jig. Normally, I would have used my MISTI for a job like this, but this stamp was mounted on wood so the MISTI couldn’t be used.
It’s hard to see in the photo above, but there is a beautiful shimmer on the “smooshed” panel which came from the Tattered Angels “Pearl” Glimmer Mist that I added before I adhered it behind my oval frame. Hopefully, you can see the shine a little better in this photo:

(click on photo to see the shimmer from the glimmer mist)
Now it’s your turn. Create a project with eggs, and join us over at Perfectly Rustics. I can’t wait to see what you create!
Thanks for checking out my card project!
This content uses referral links as described in the disclosure policy on my sidebar.