Layered Hanukkah Card

Layered Hanukkah Card

wwwDSCN6074.jpg

(inside:  May love and light fill your home and heart at Hanukkah.)

This layered card features printed shimmer card stock (and mats) from a Recollections pack called “Christmas – Holiday Printed Paper” which I picked up after the holidays last year.  The pack contains 3 different 8 1/2 x 11 inch shimmer prints and 2 solid, matte colors.  (The patterns are not really very “Christmas-y.  In fact, the sales clerk almost didn’t give me the post-holiday clearance price because she didn’t think it qualified until I pointed out the title of the pack!)  The shimmer on this card stock is so subtle and beautiful in real life.

zzDSCN6085

(click on photo to see shimmer)

The greeting stamp on the front is by craftsmart which I also found at Michaels.  The sentiment on the inside is called “Hanukkah Saying” (item: H-19716) from Rubber Hedgehog Rubber Stamps.

The center panel is popped up with foam tape.  The ribbon is half sheer and half satin with an iridescent thread across the center.

I went back and forth on whether this card stock was appropriate for a Hanukkah card, but I thought it seemed to go so well with the elegant font of the greeting stamp.

Thanks for checking out my card project!

Getting a Better Masked Image

Getting a Better Masked Image

zzzDSCN6123 cropped tighter and tilted

(click here to see original post)

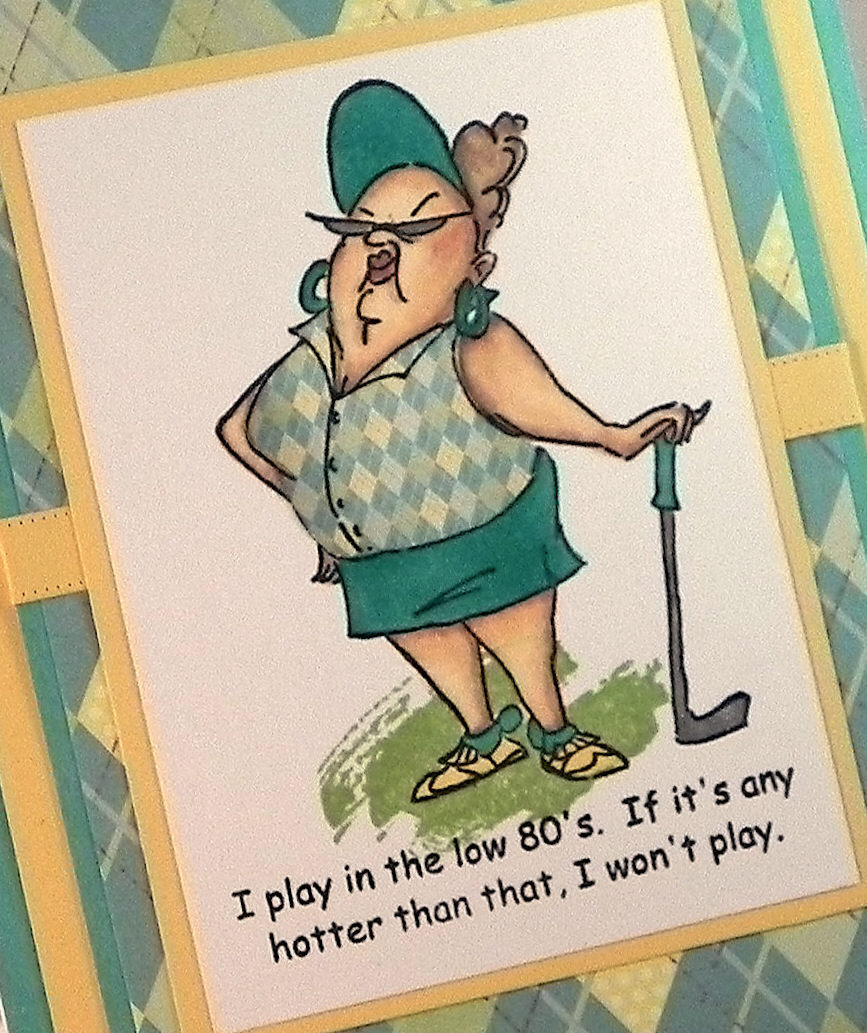
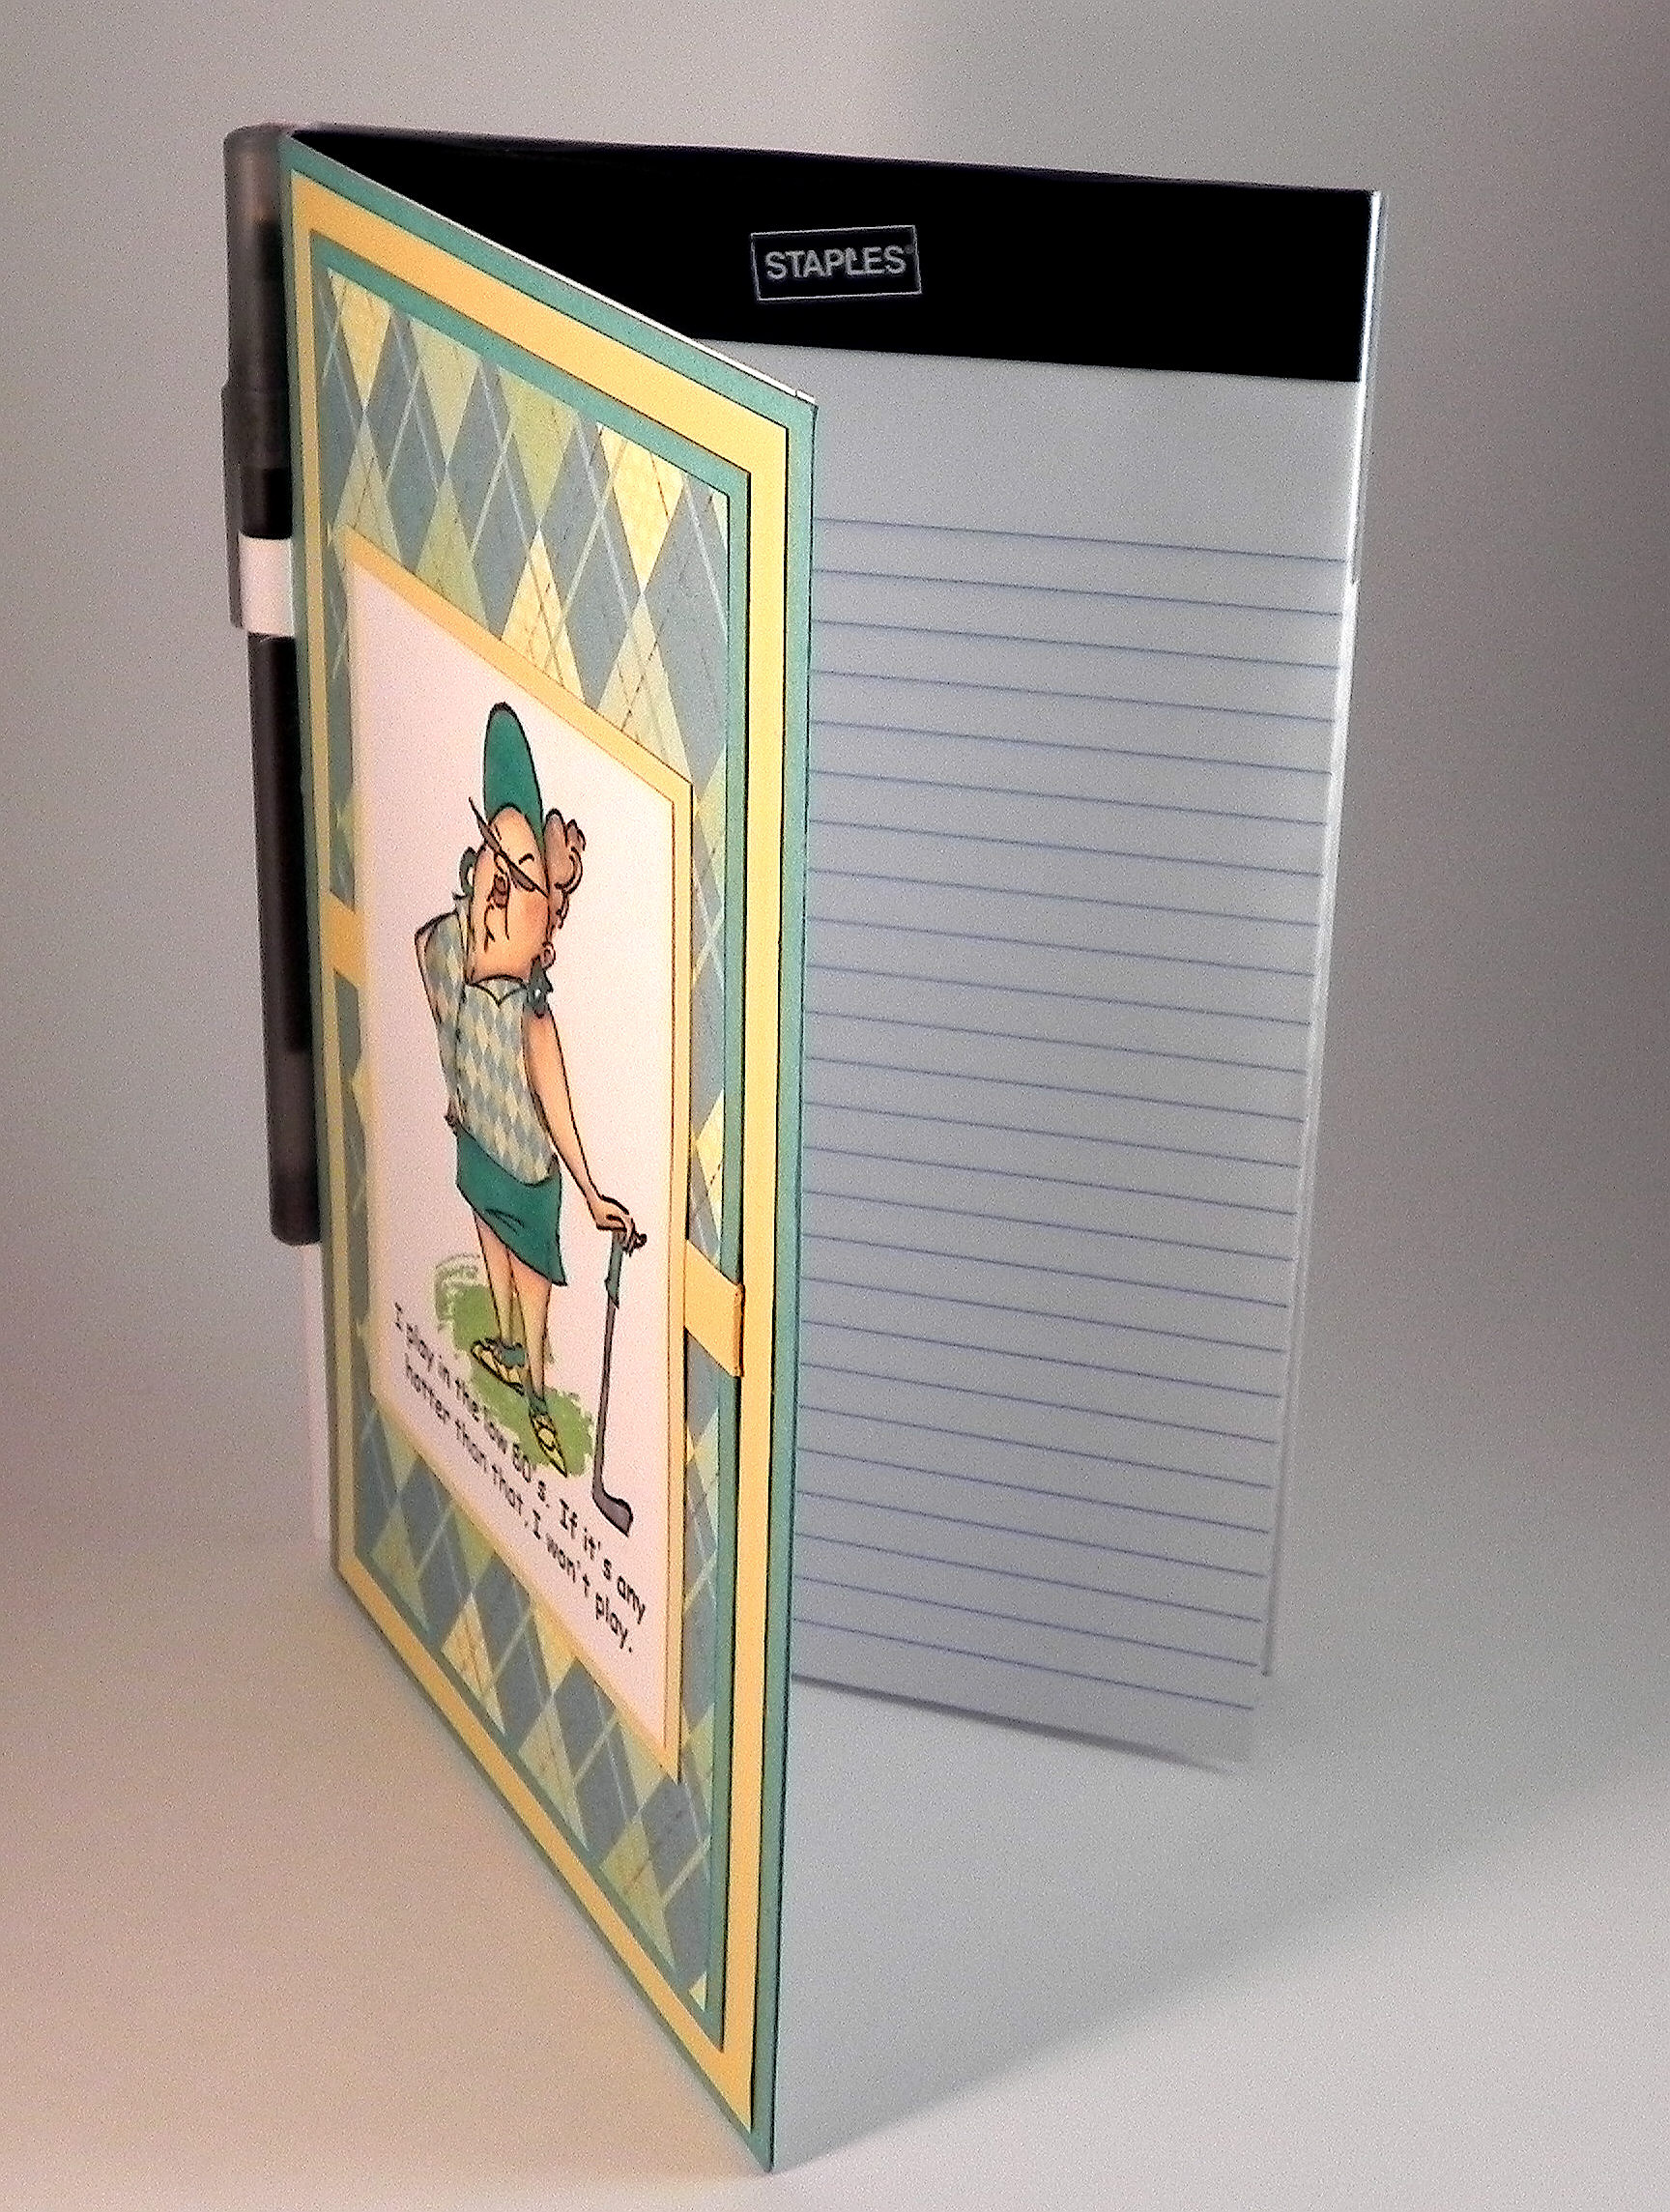
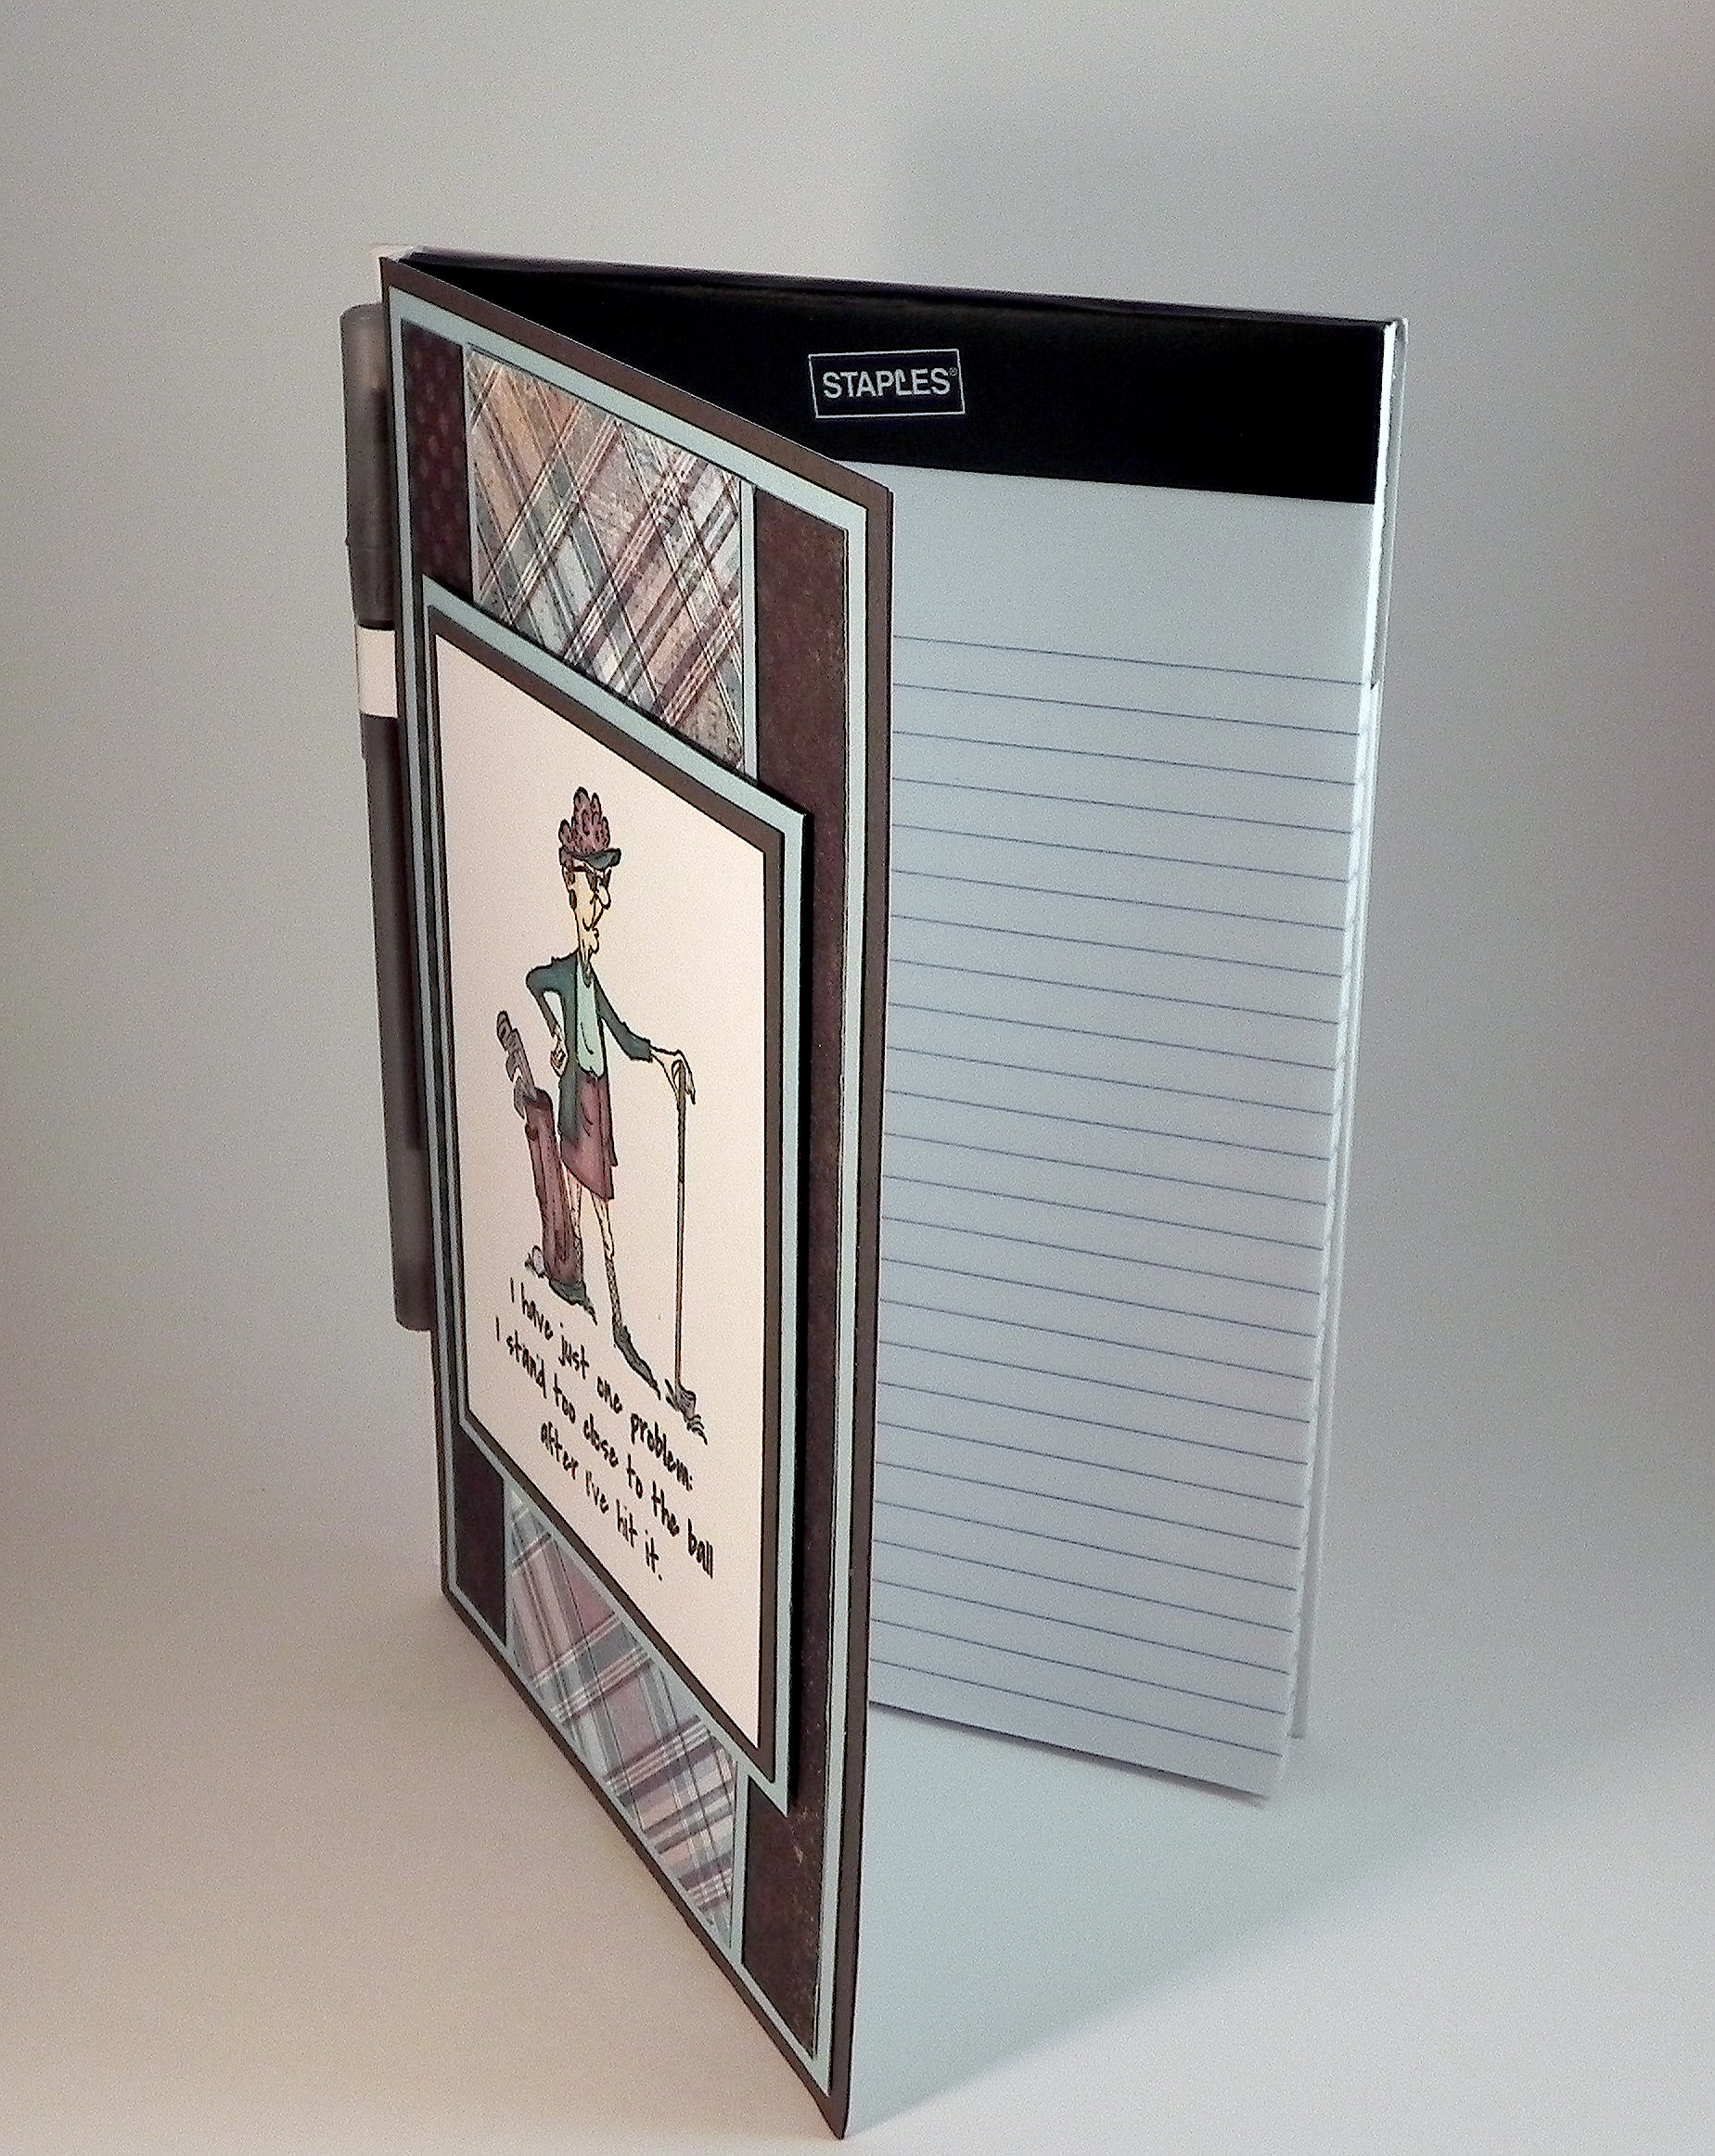
Often, when I am stamping images for my projects, I need to mask off a portion of one of the images to avoid unwanted overlap.  The image above was made with a few different stamps; the golfer is called “Goldie Golfer” by Art Impressions, and the “grass” is from a set called “Work of Art” by Stampin’ Up.  I wanted it to look like the golfer was standing on the grass.

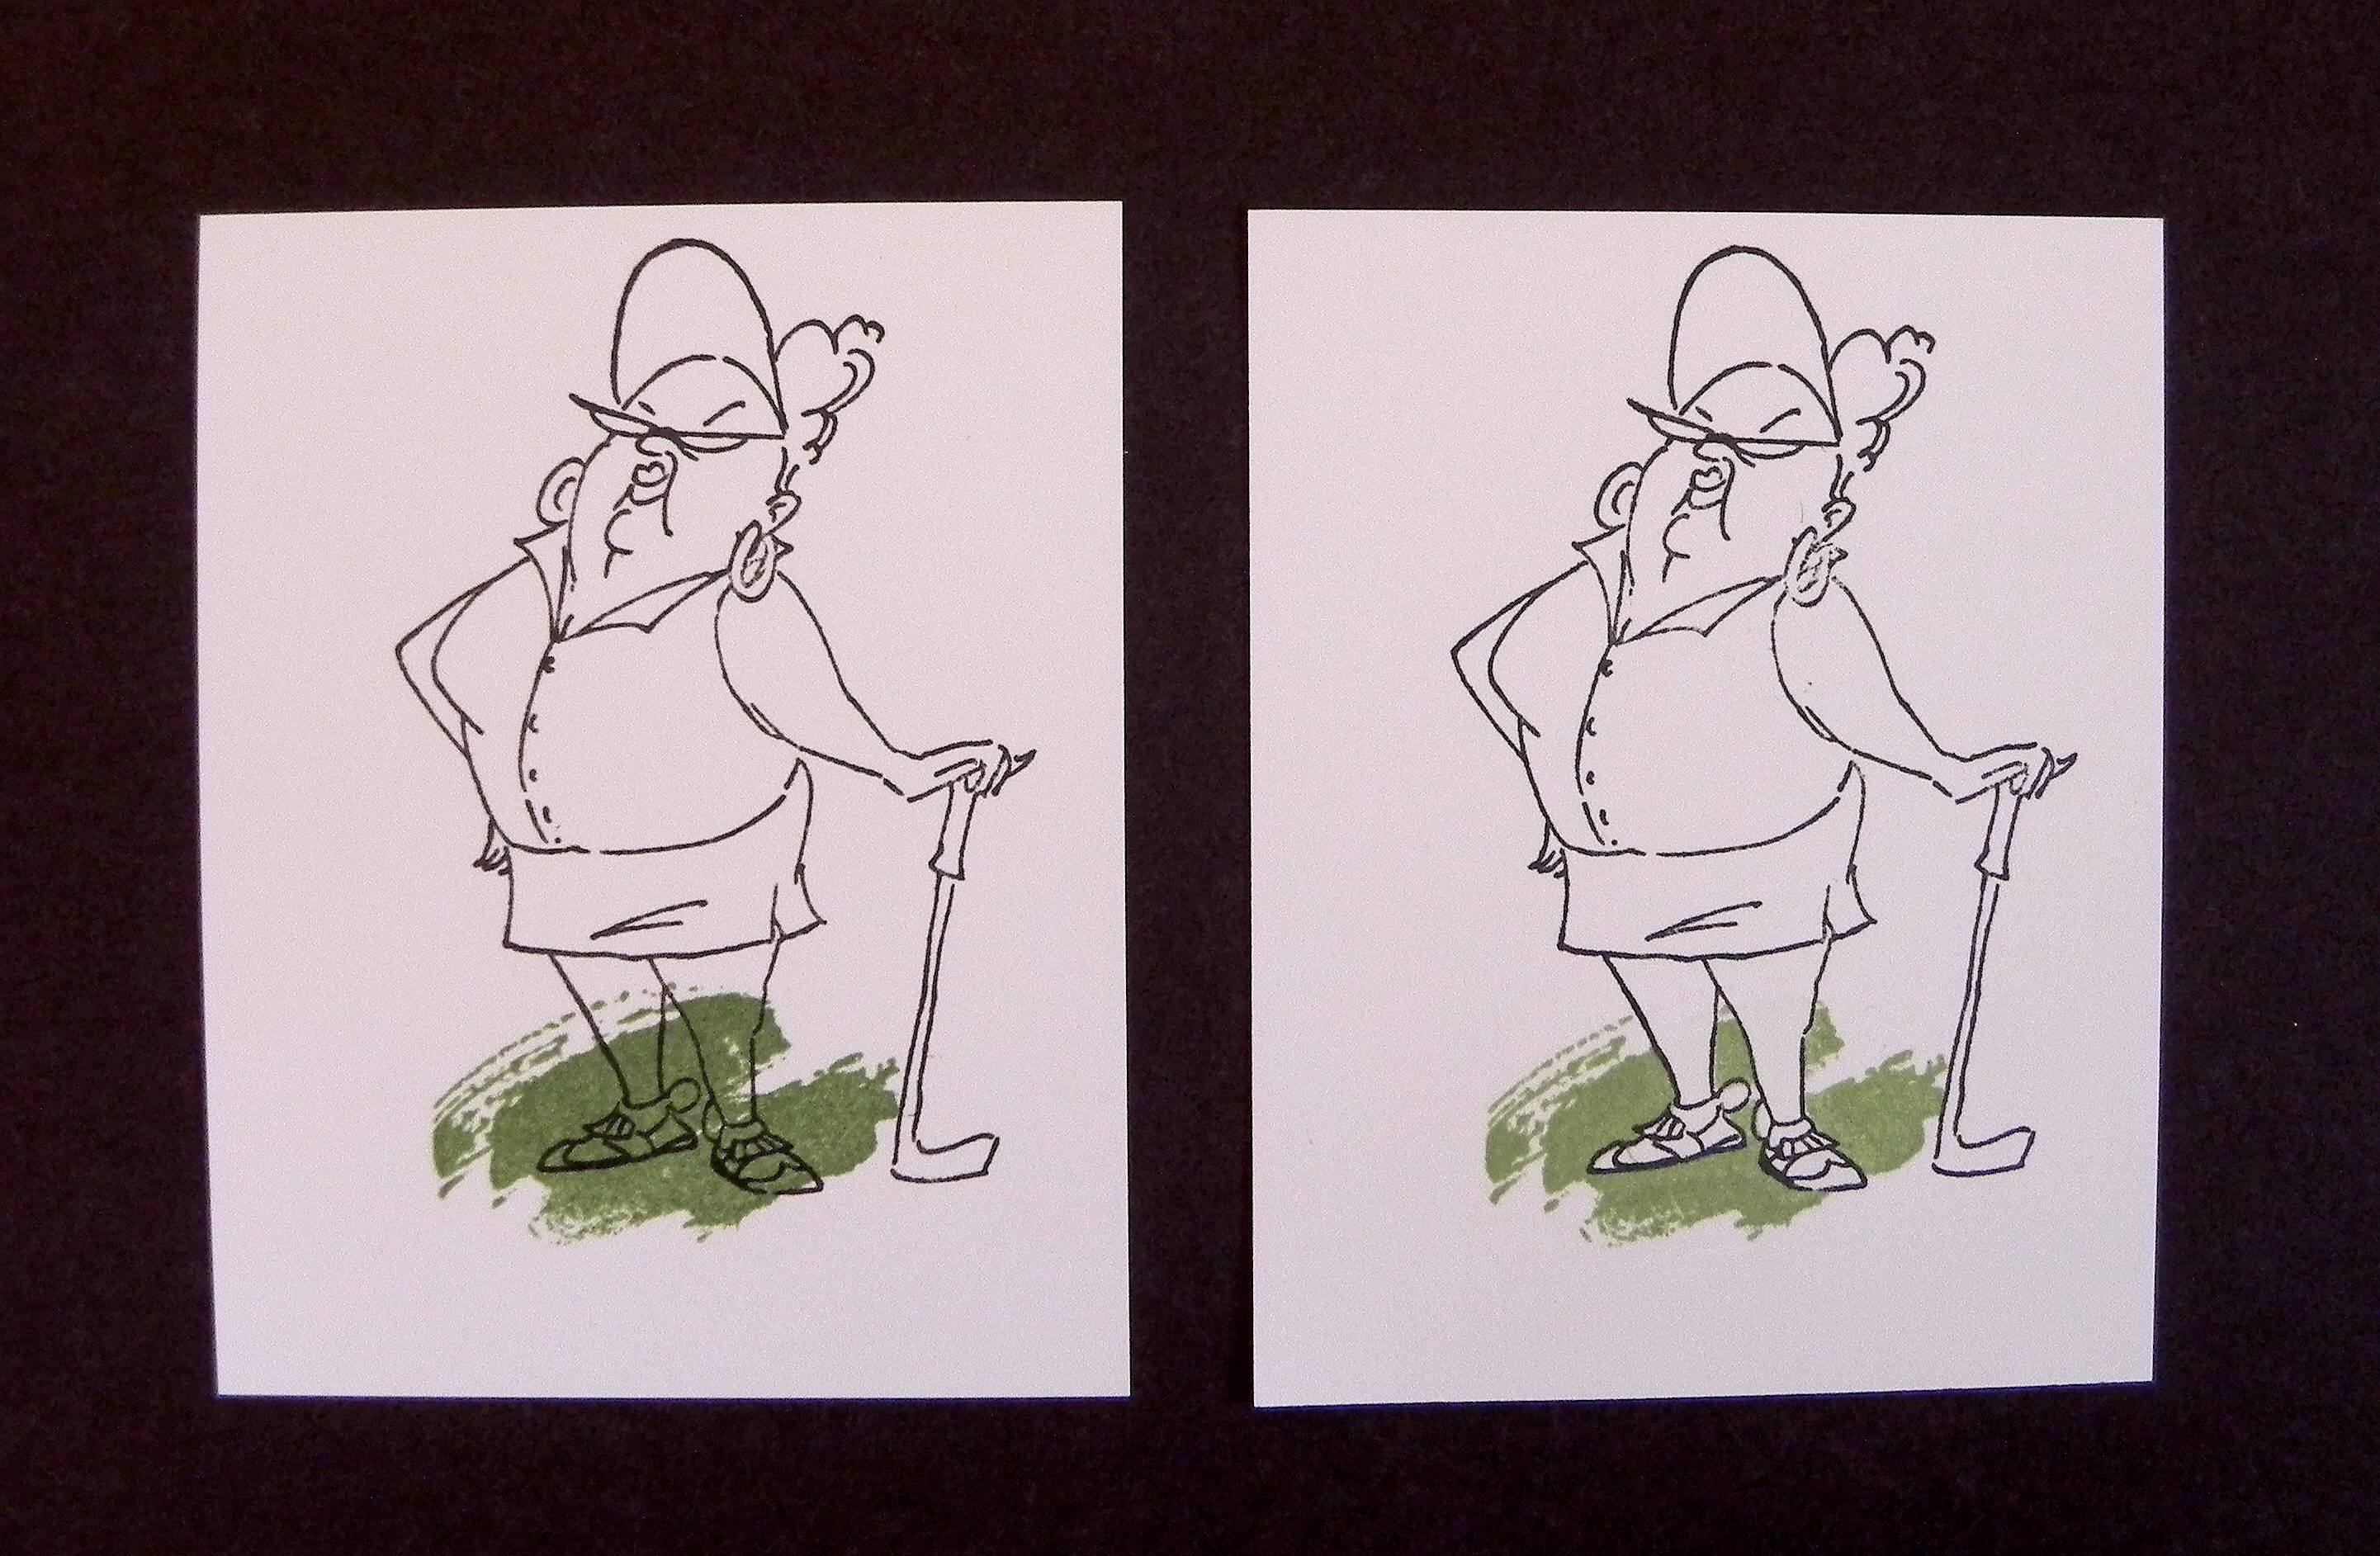
On the first sample below, I did NOT use a mask when adding the “grass” to the image.  It ended up on the golfer’s legs.  Yuck!  On the second sample, I masked the golfer first and then stamped the “grass.” When the mask was removed, the grass appeared to be under and around her but not on top of her. Much better!

007DSCN6069

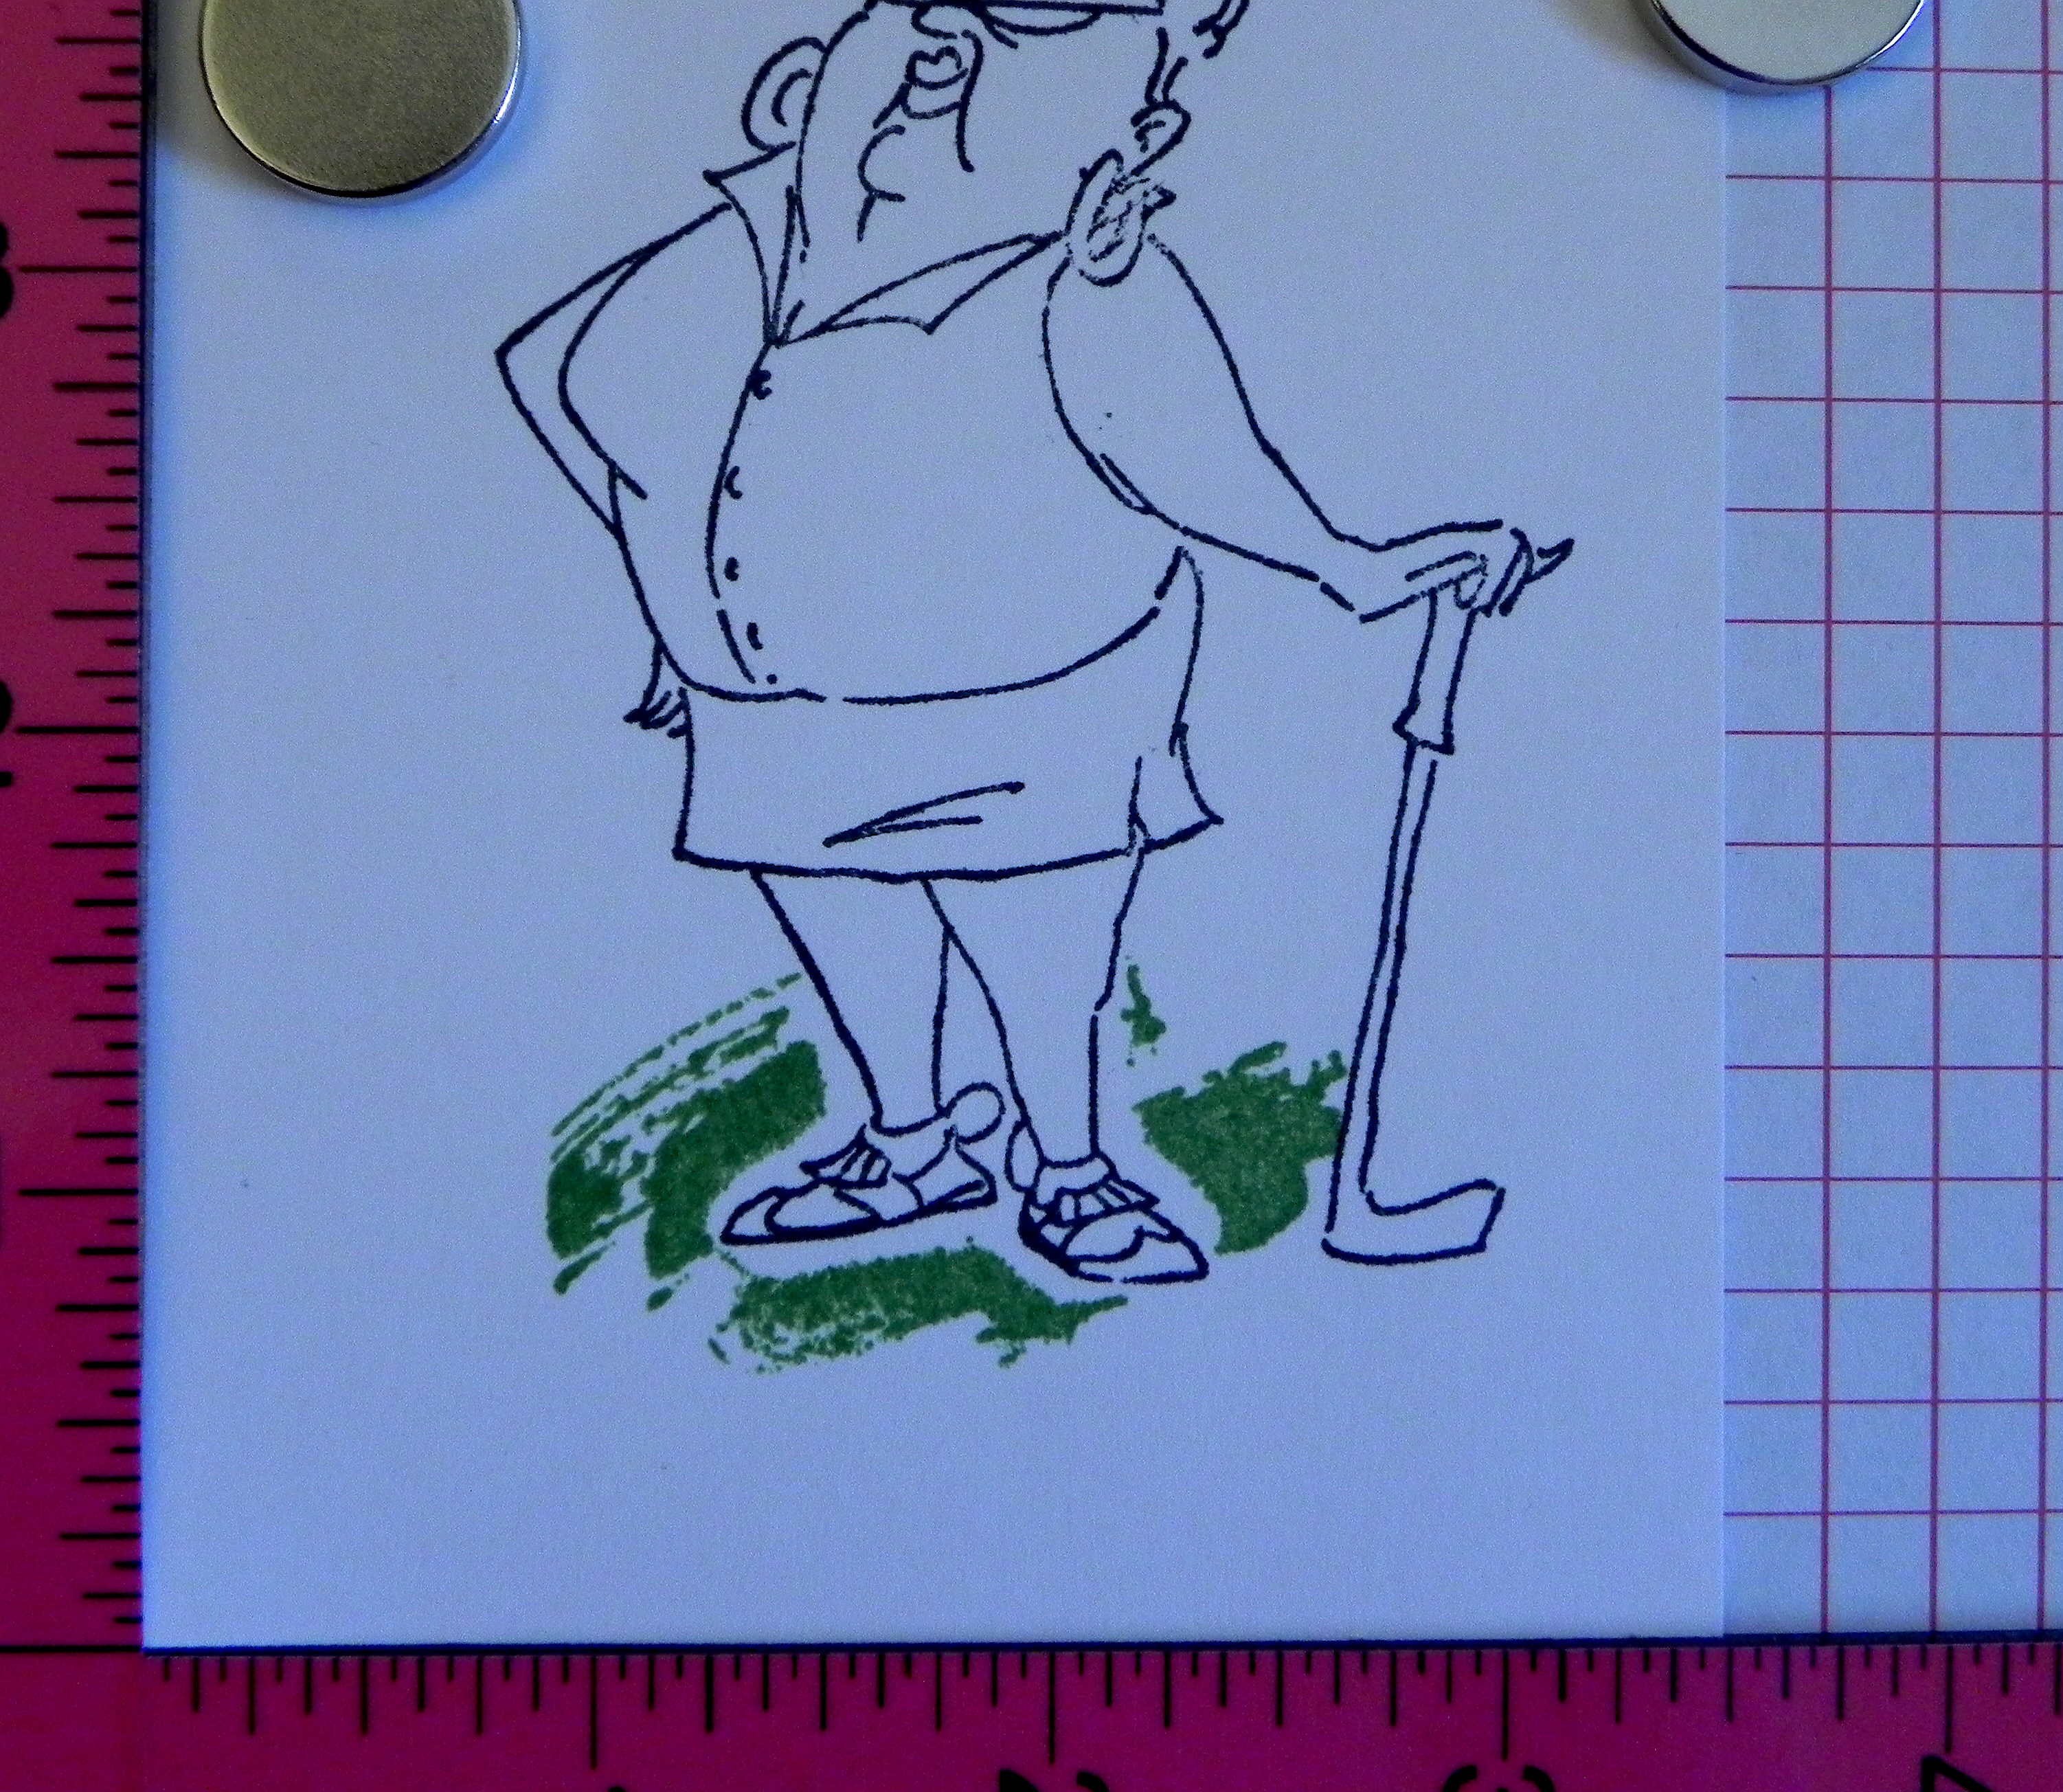
Honestly, though, the second sample didn’t look this good at first, and it took me a while to figure out how to fix it!  As you can see below, I was left with a white border around my original stamped image. What was happening was that the “thickness” of the mask was preventing the second stamp from making contact with the paper around the mask.  (This problem occurs mostly with solid stamps like the one I used for the grass on this sample.)

080 DSCN0080

I tried pressing really hard to get as much of the stamp to hit the paper as possible.  I tried sponging more ink around the mask with a dauber.  I tried making my mask smaller so the ink would get closer to the edges. None of these methods worked very well.

The solution to fix this was so obvious once I figured it out, but I just didn’t see it at first!  I figured I’d share my “aha moment” in case you’ve had the same problem and are also frustrated!!


A quick explanation on how to mask:

When I mask things to layer images on my projects, I use a stamp positioning tool to make sure I am placing everything exactly where I want it.  A stamp-a-ma-jig works well.  I use my MISTI.

* * *

First, I need to figure out where I want my “background” image to be and position the stamp accordingly.  In this sample, the “background” is the grass.  (Even though it looks like the golfer is in front, I stamped her first.  I’ll stamped the background “grass” over her.)

015 DSCN0069   014 DSCN0071

* * *

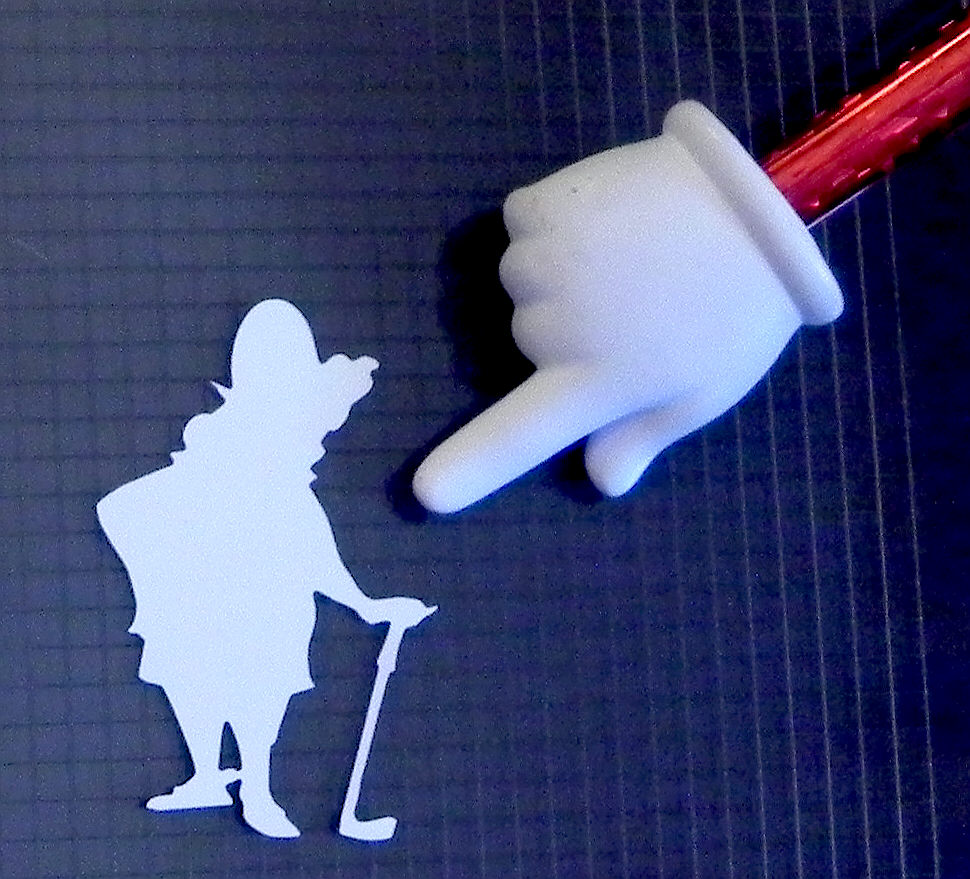
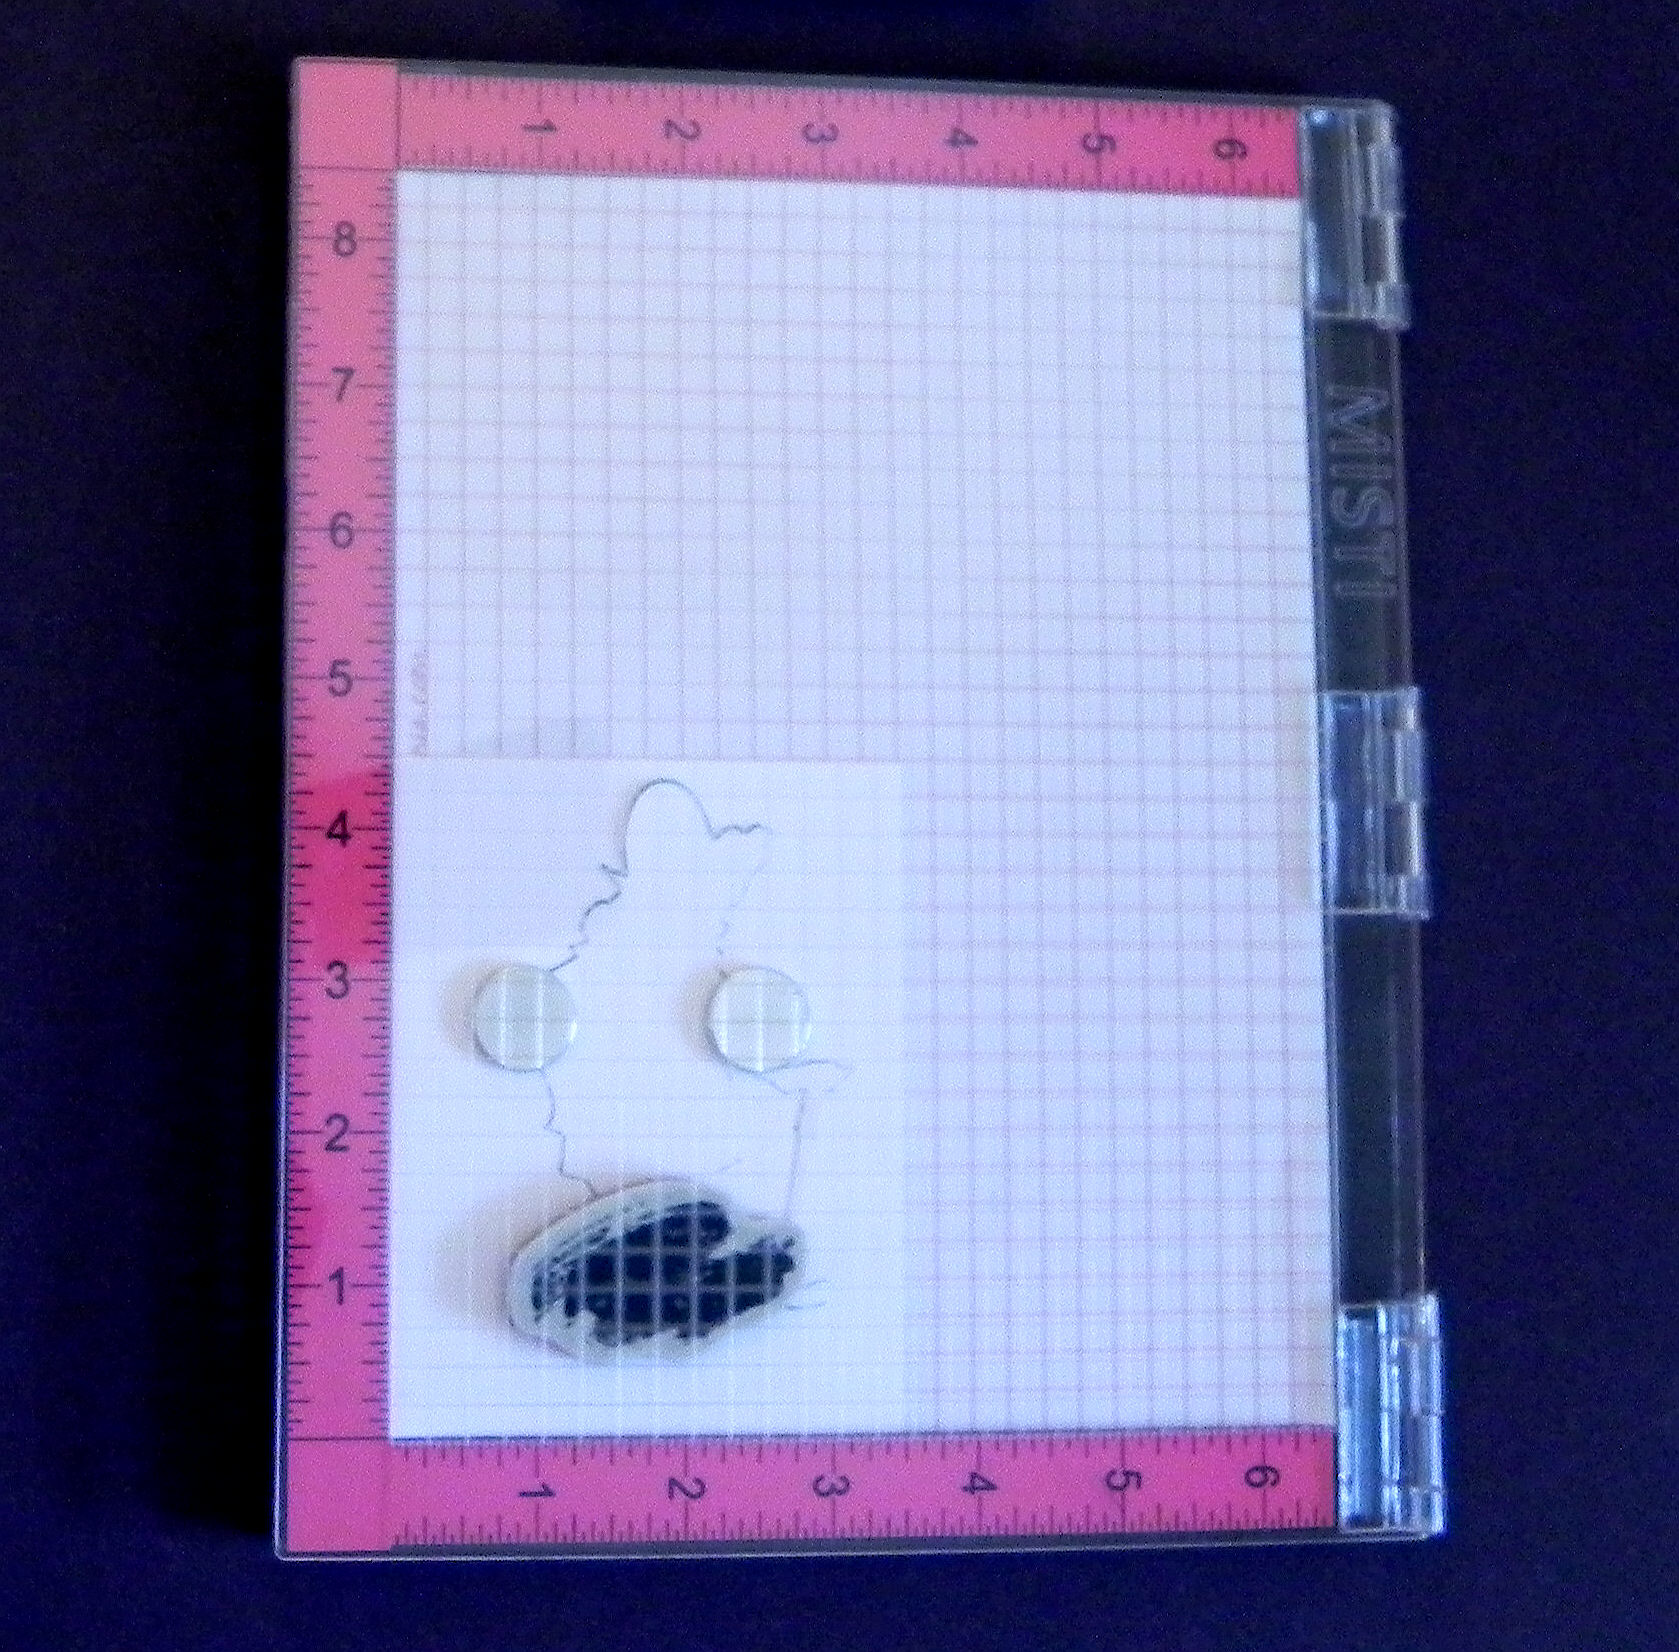
I also need to make a mask (of my “front” image).  If my mask is for a simple image, I just stamp it on a piece of scrap paper and cut around the outer edges.  For more complicated images, I use my Silhouette electronic die cutting machine to “trace” the image and to create a cut file for my mask. That’s what I did with this golfer image.

020 DSCN0066

* * *

I place the mask over my original stamped image.

055 DSCN0068

* * *

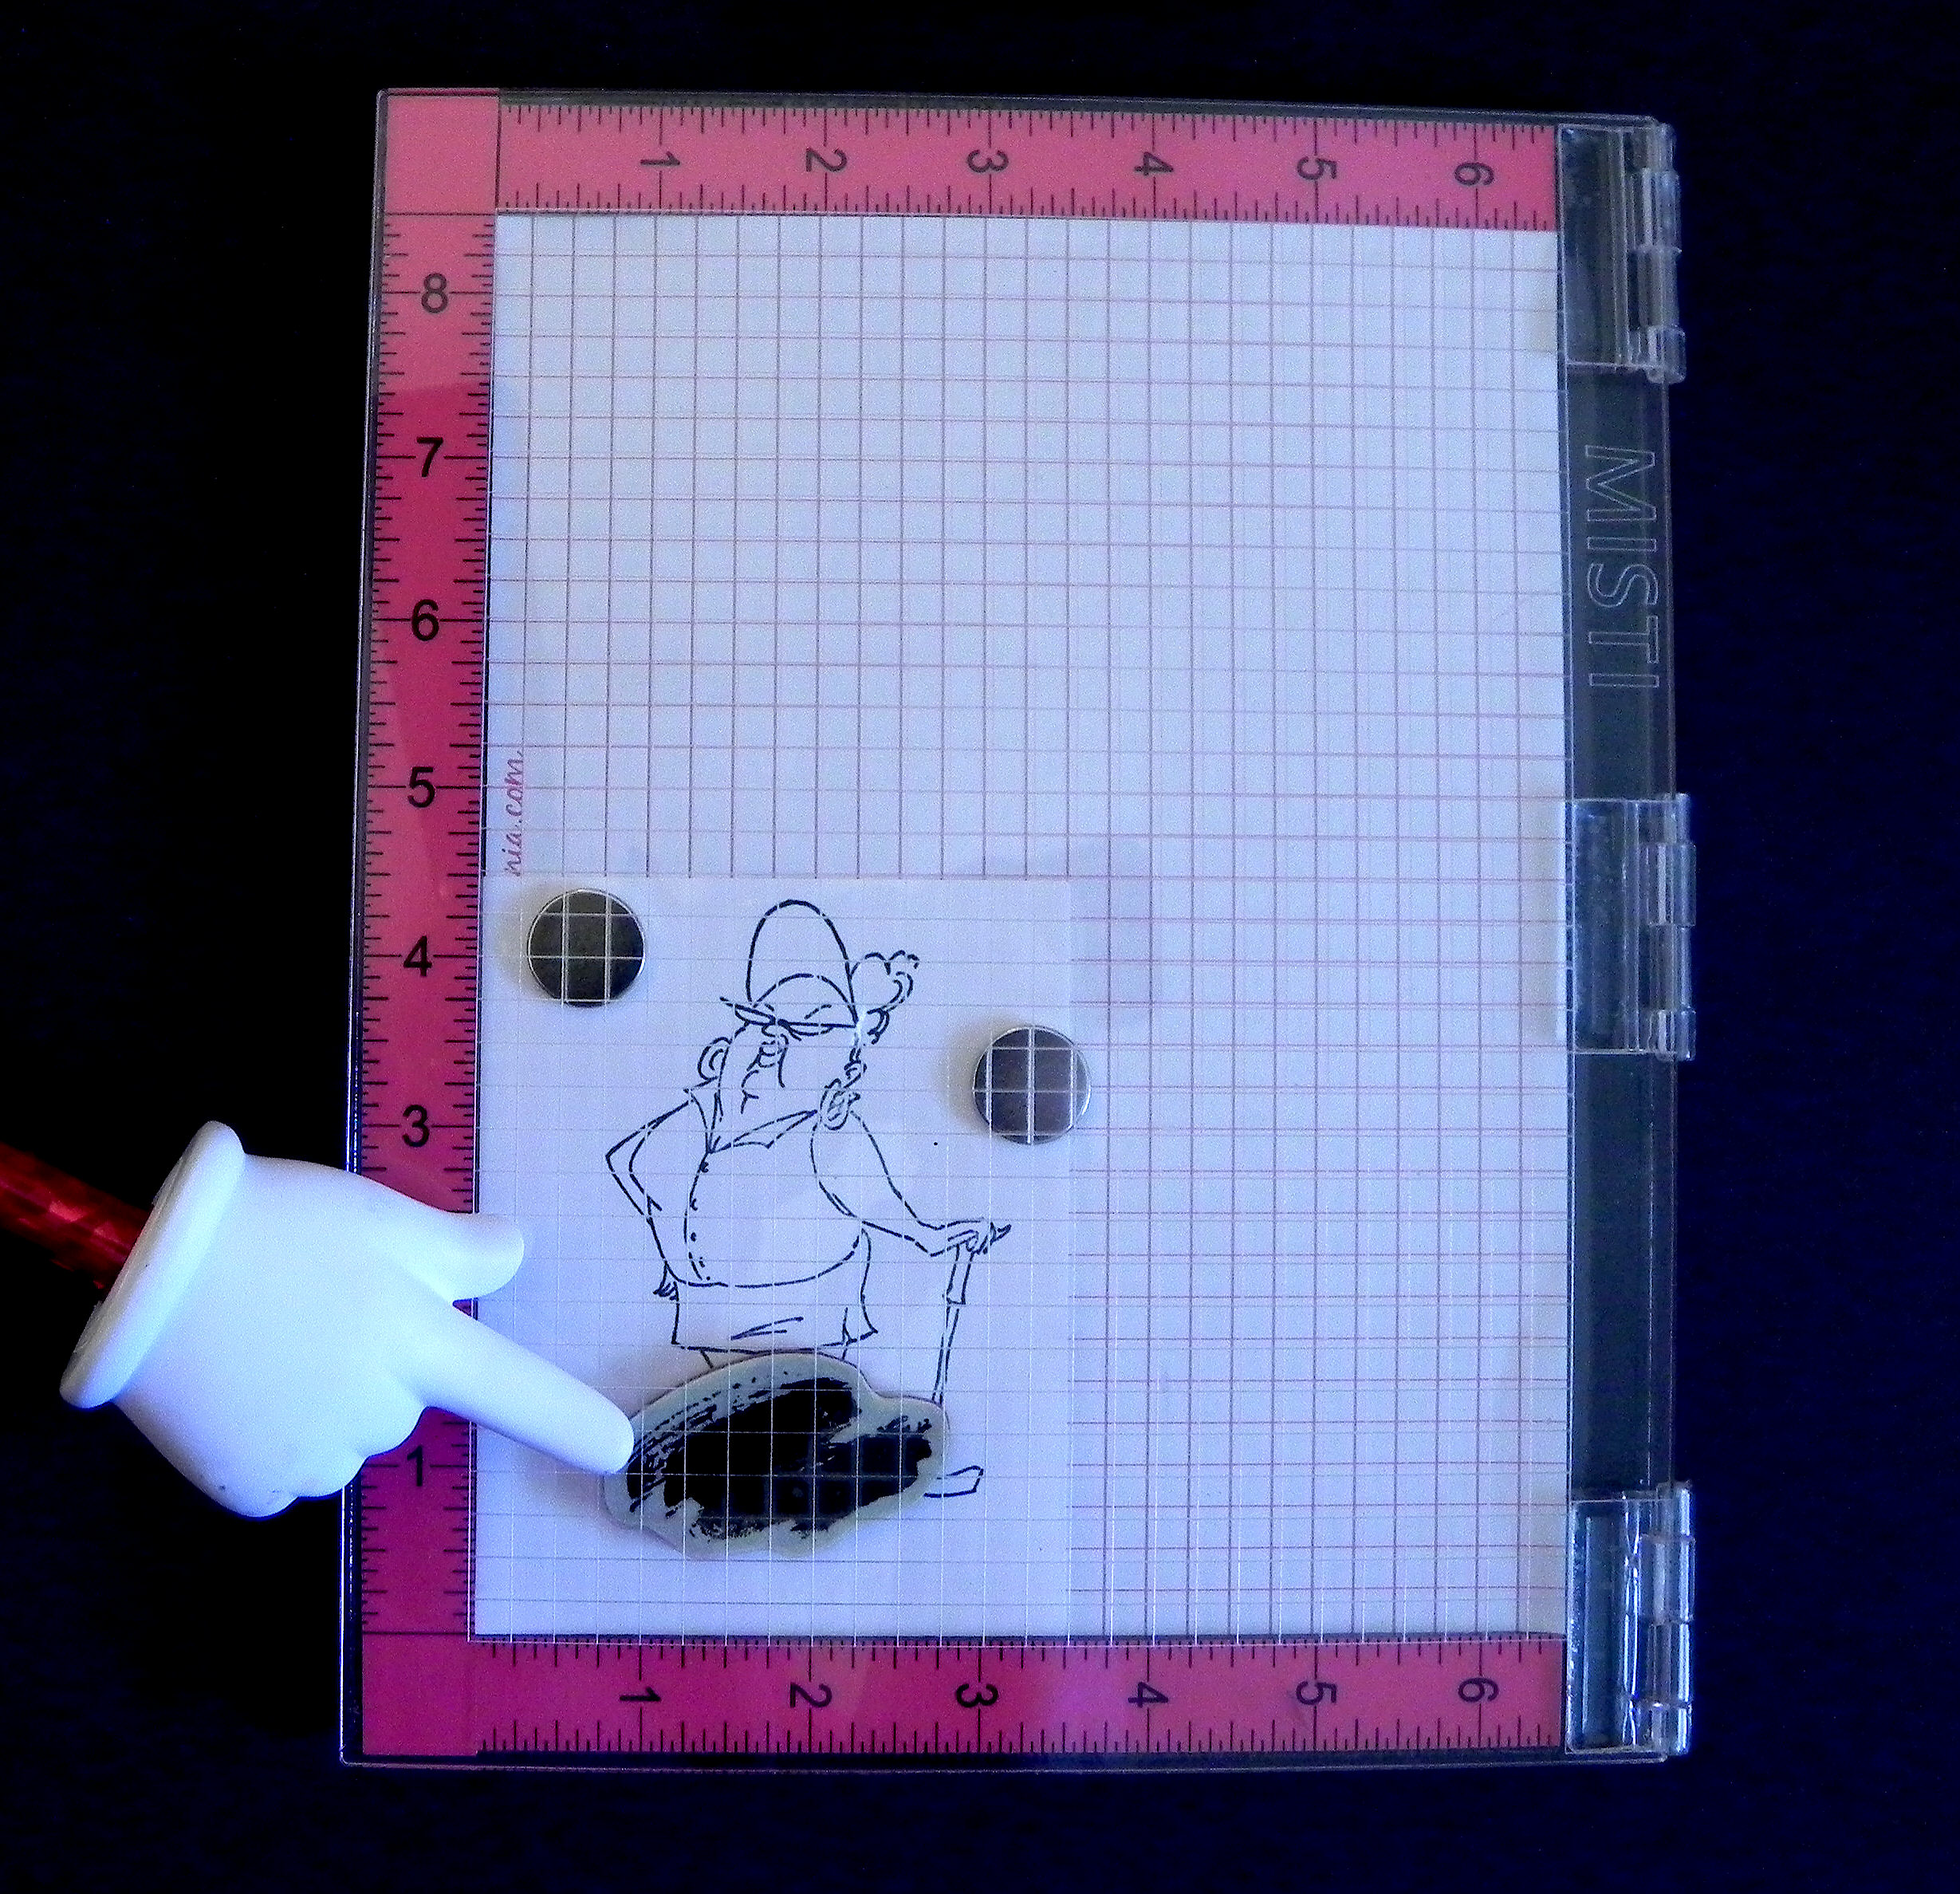
 Then I ink up the “background” stamp and stamp it on the masked image.

060 DSCN0073    070 DSCN0075

* * *

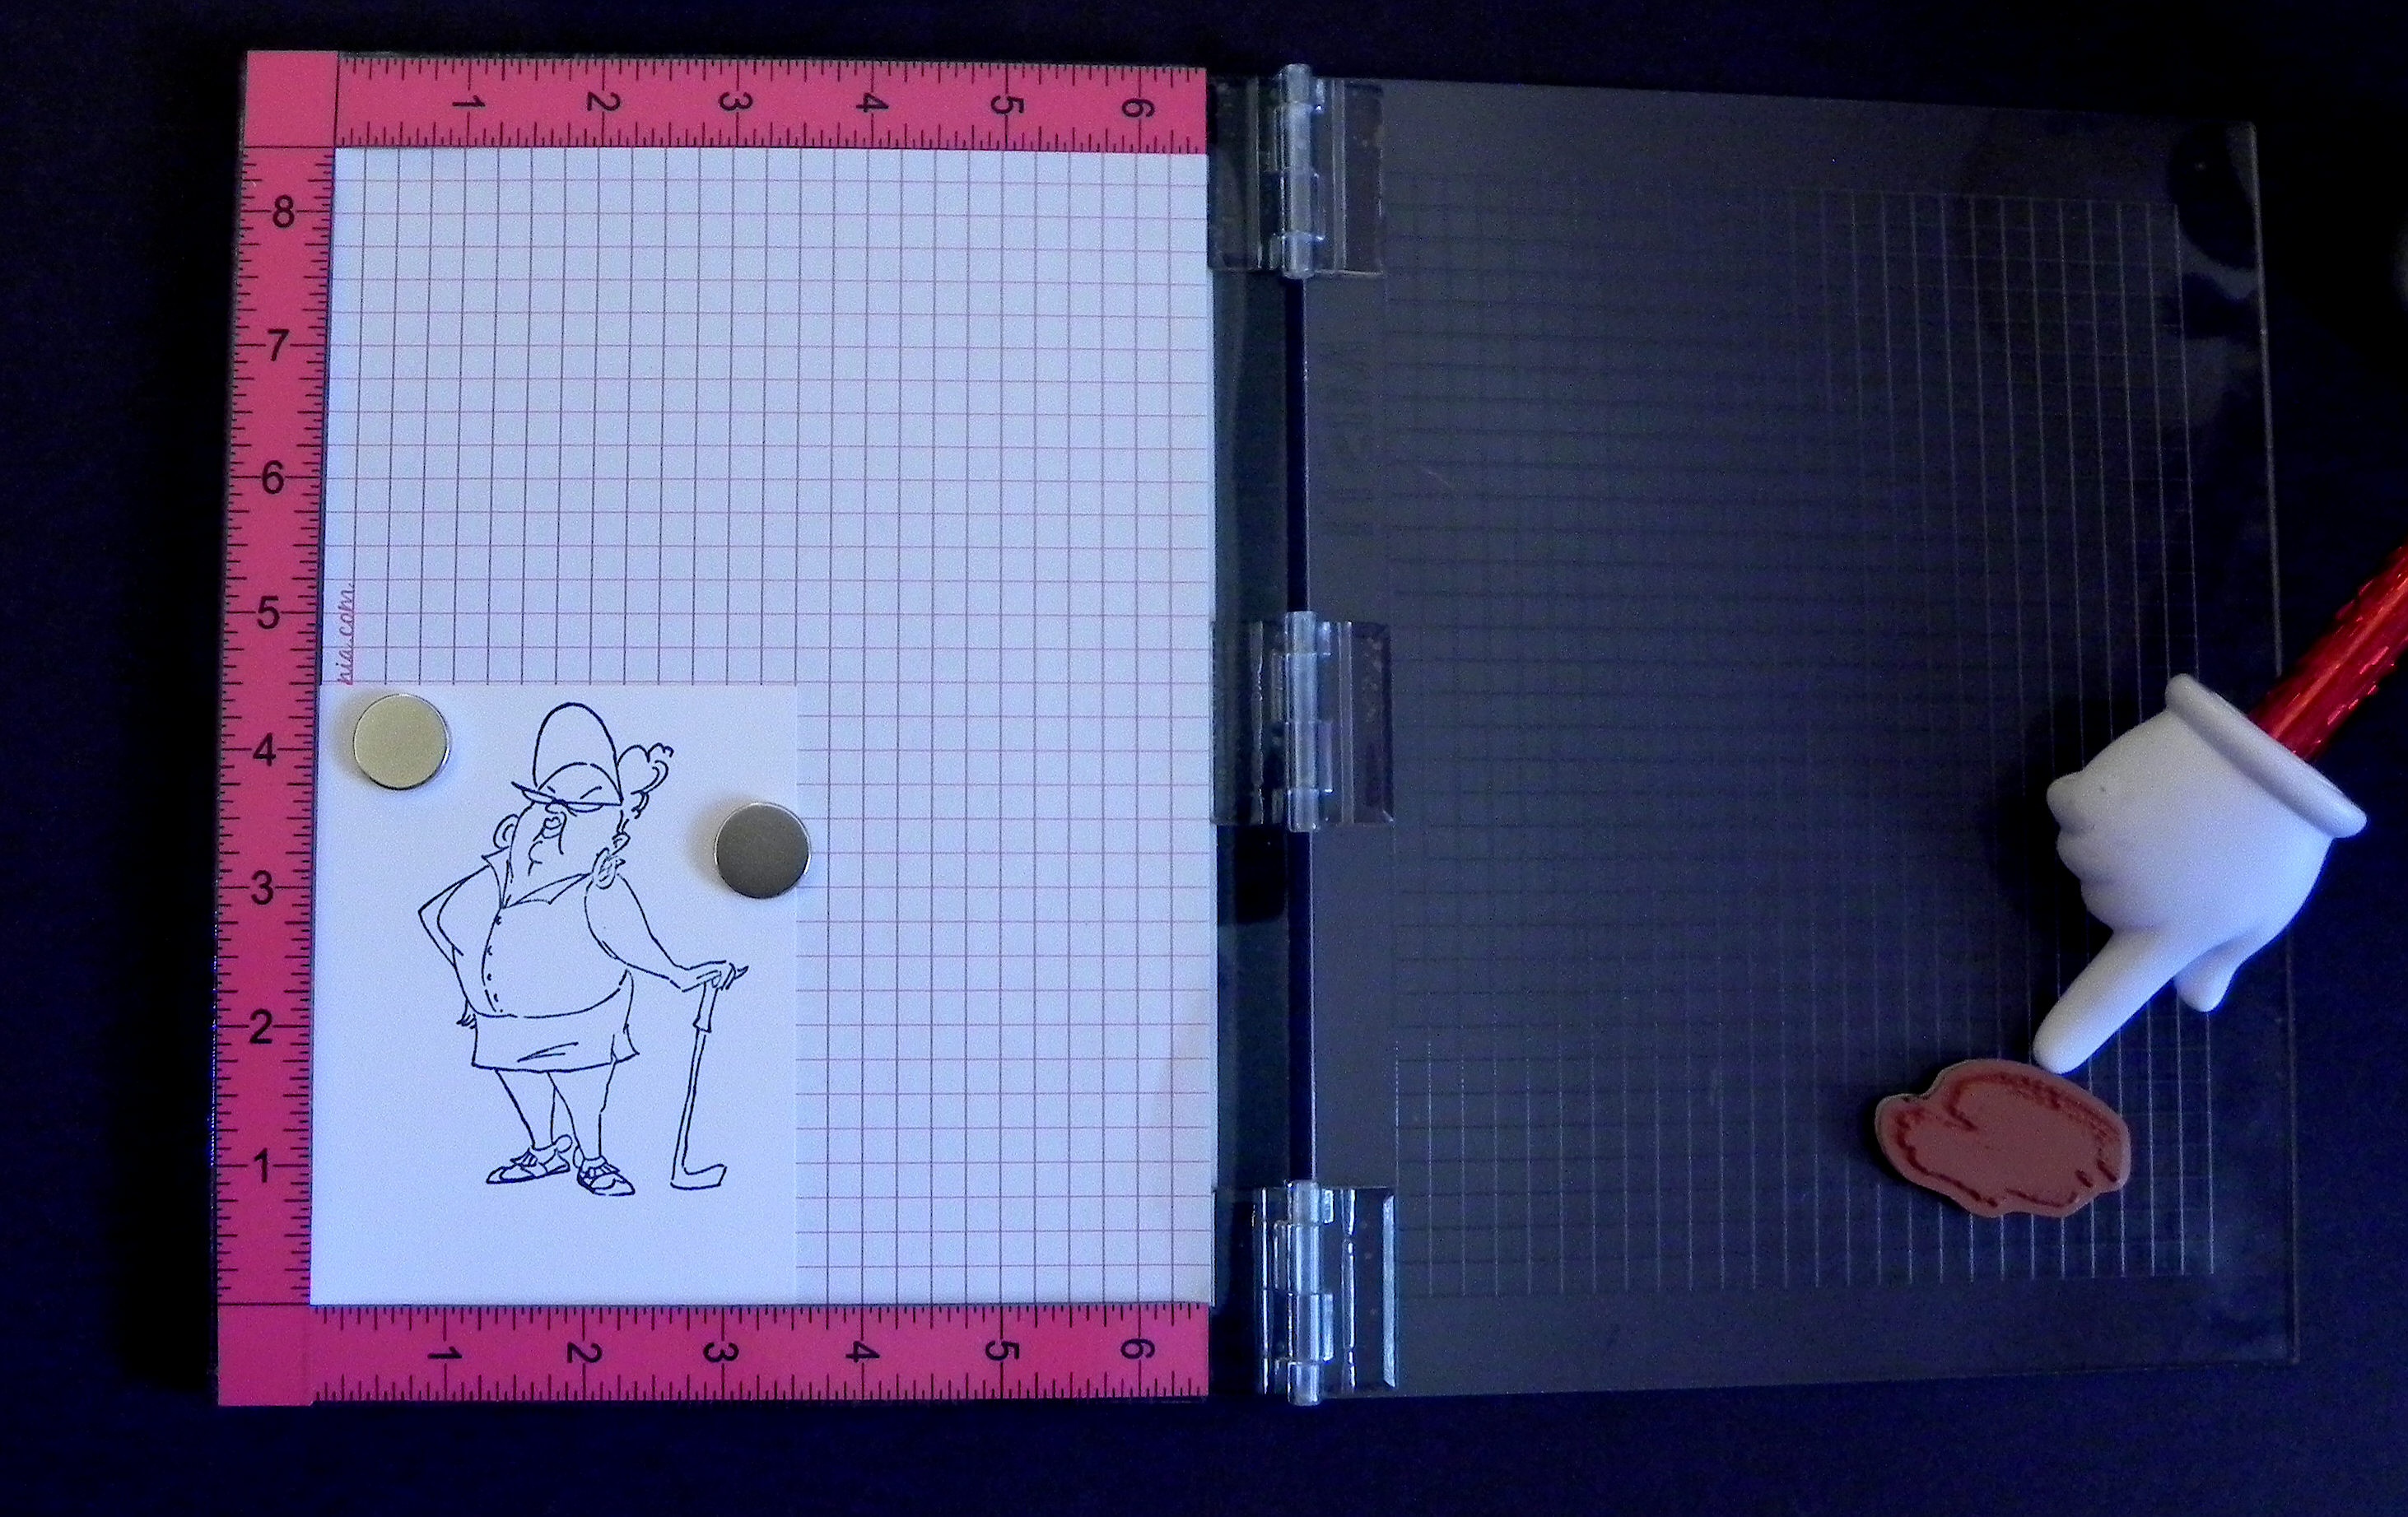
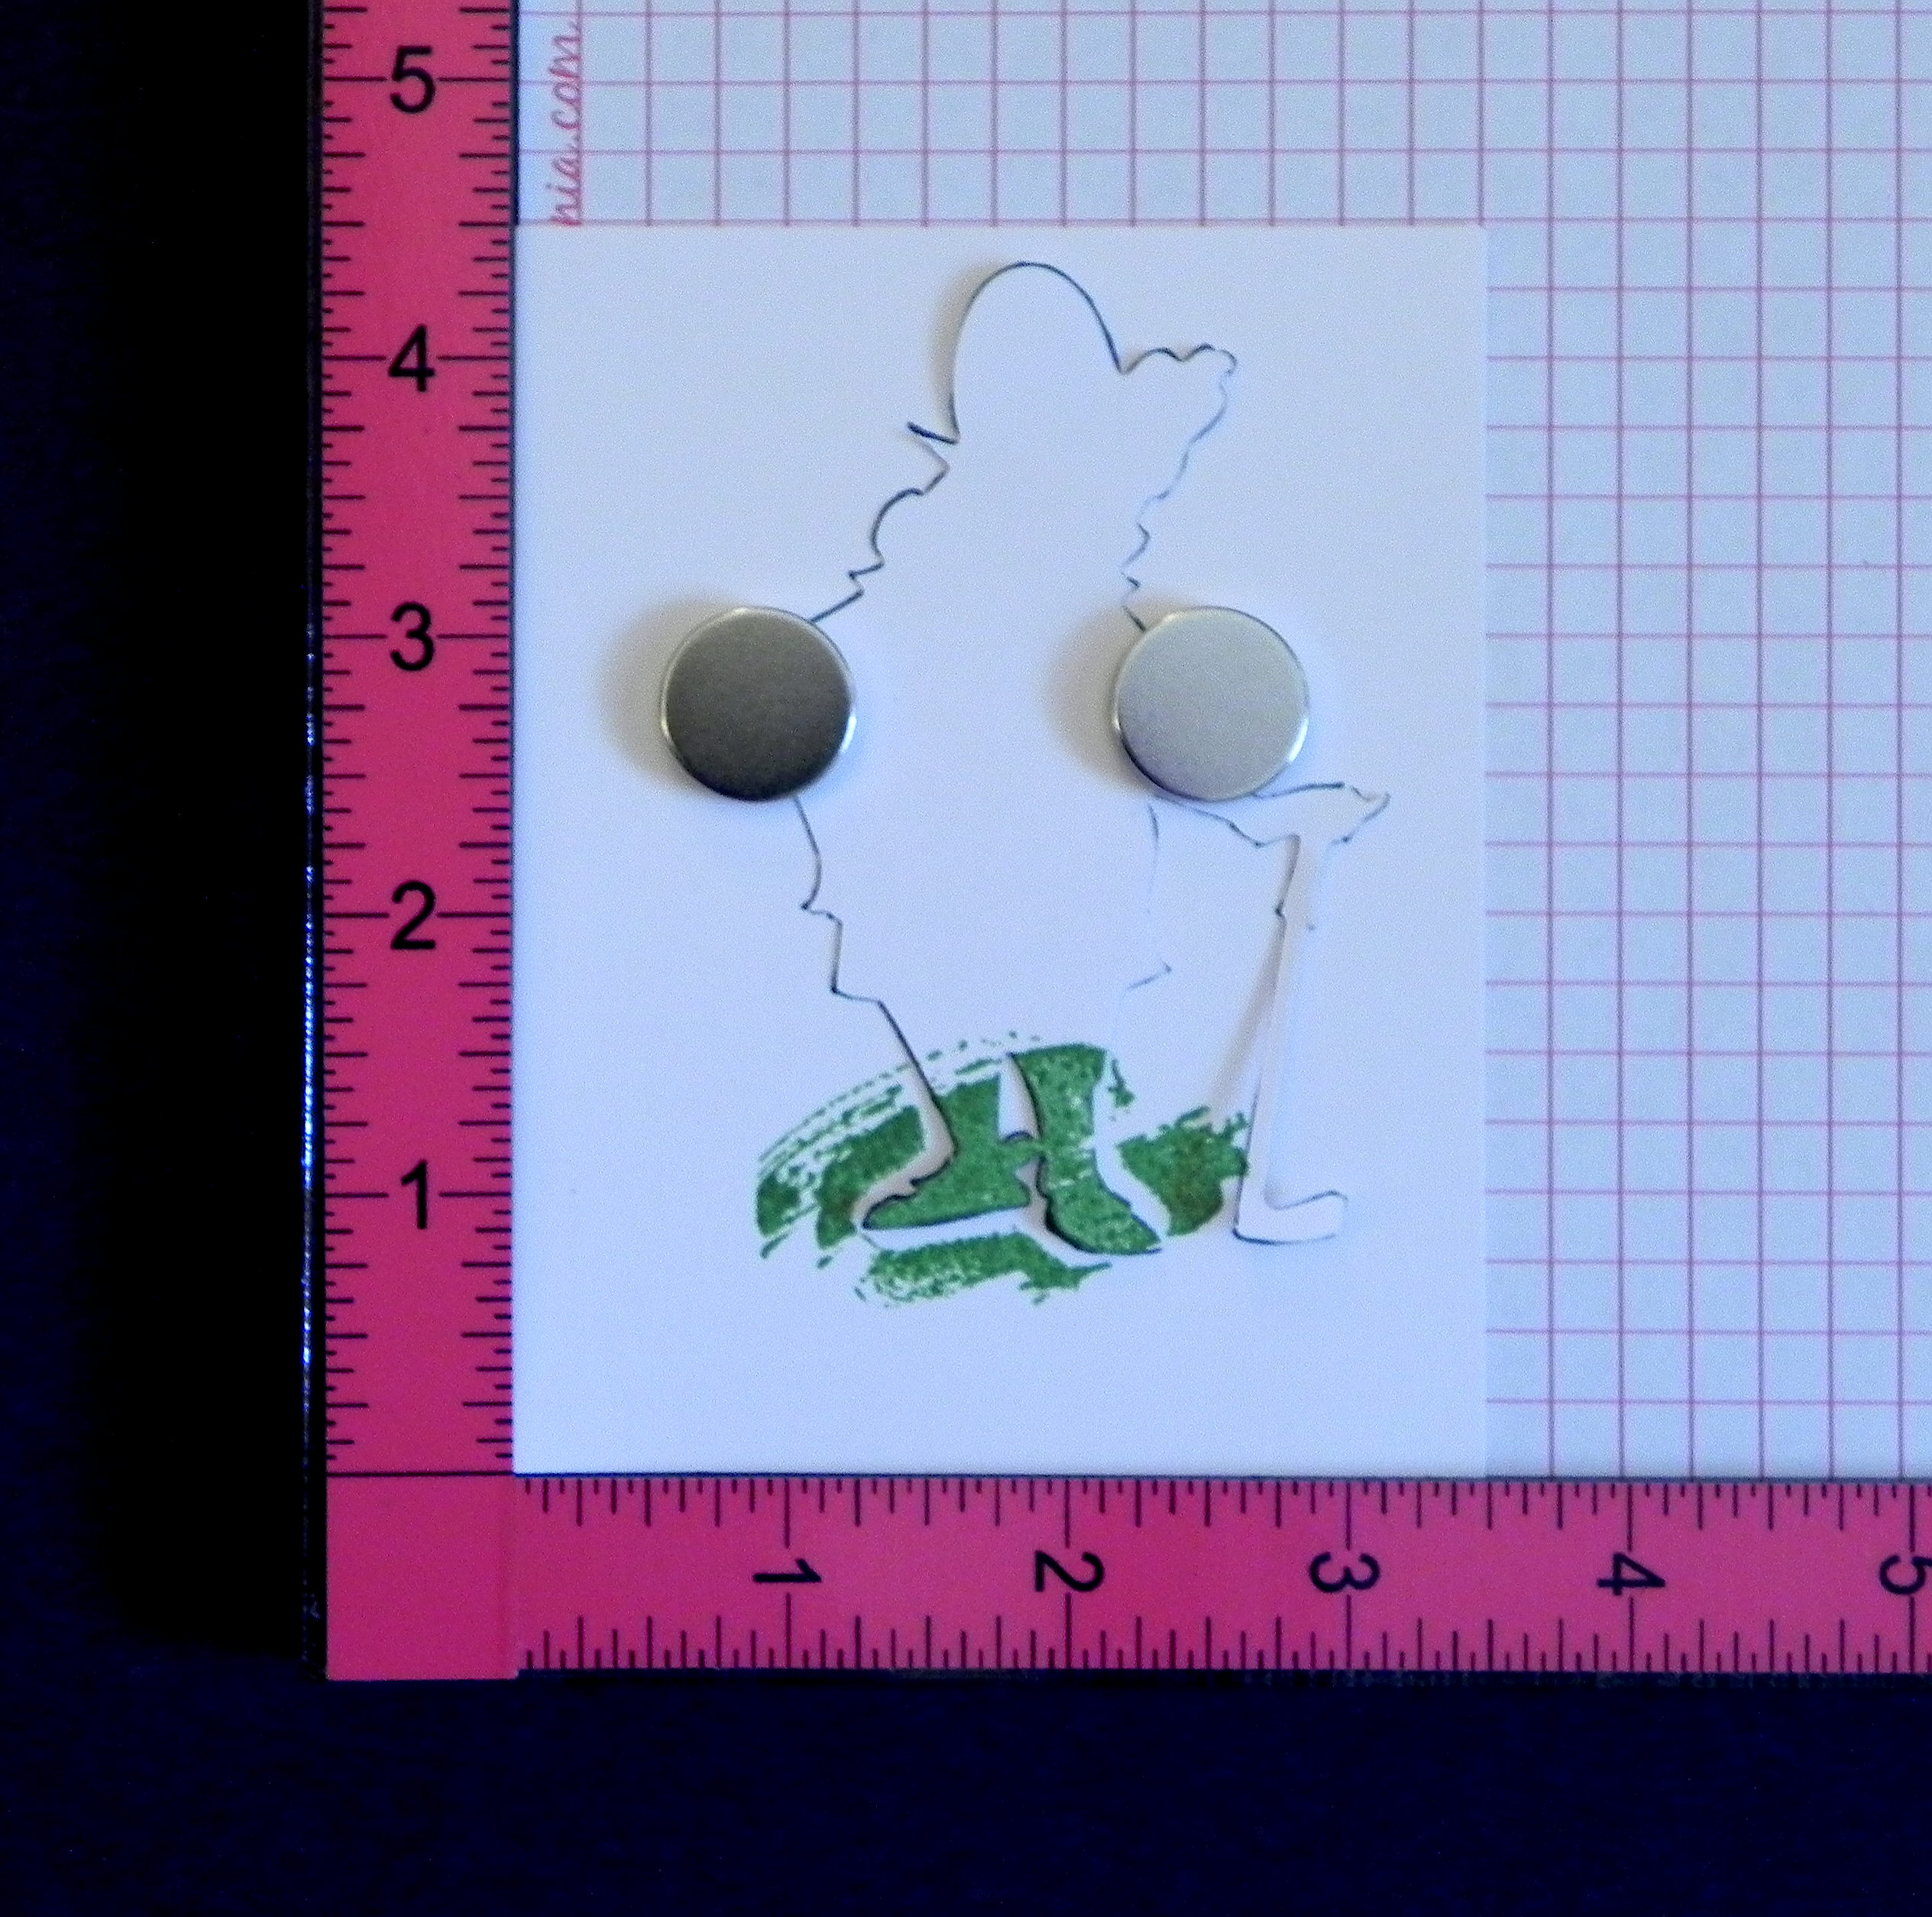
Here’s what it looks like when you remove the mask…

075 DSCN0079     080 DSCN0080

* * *

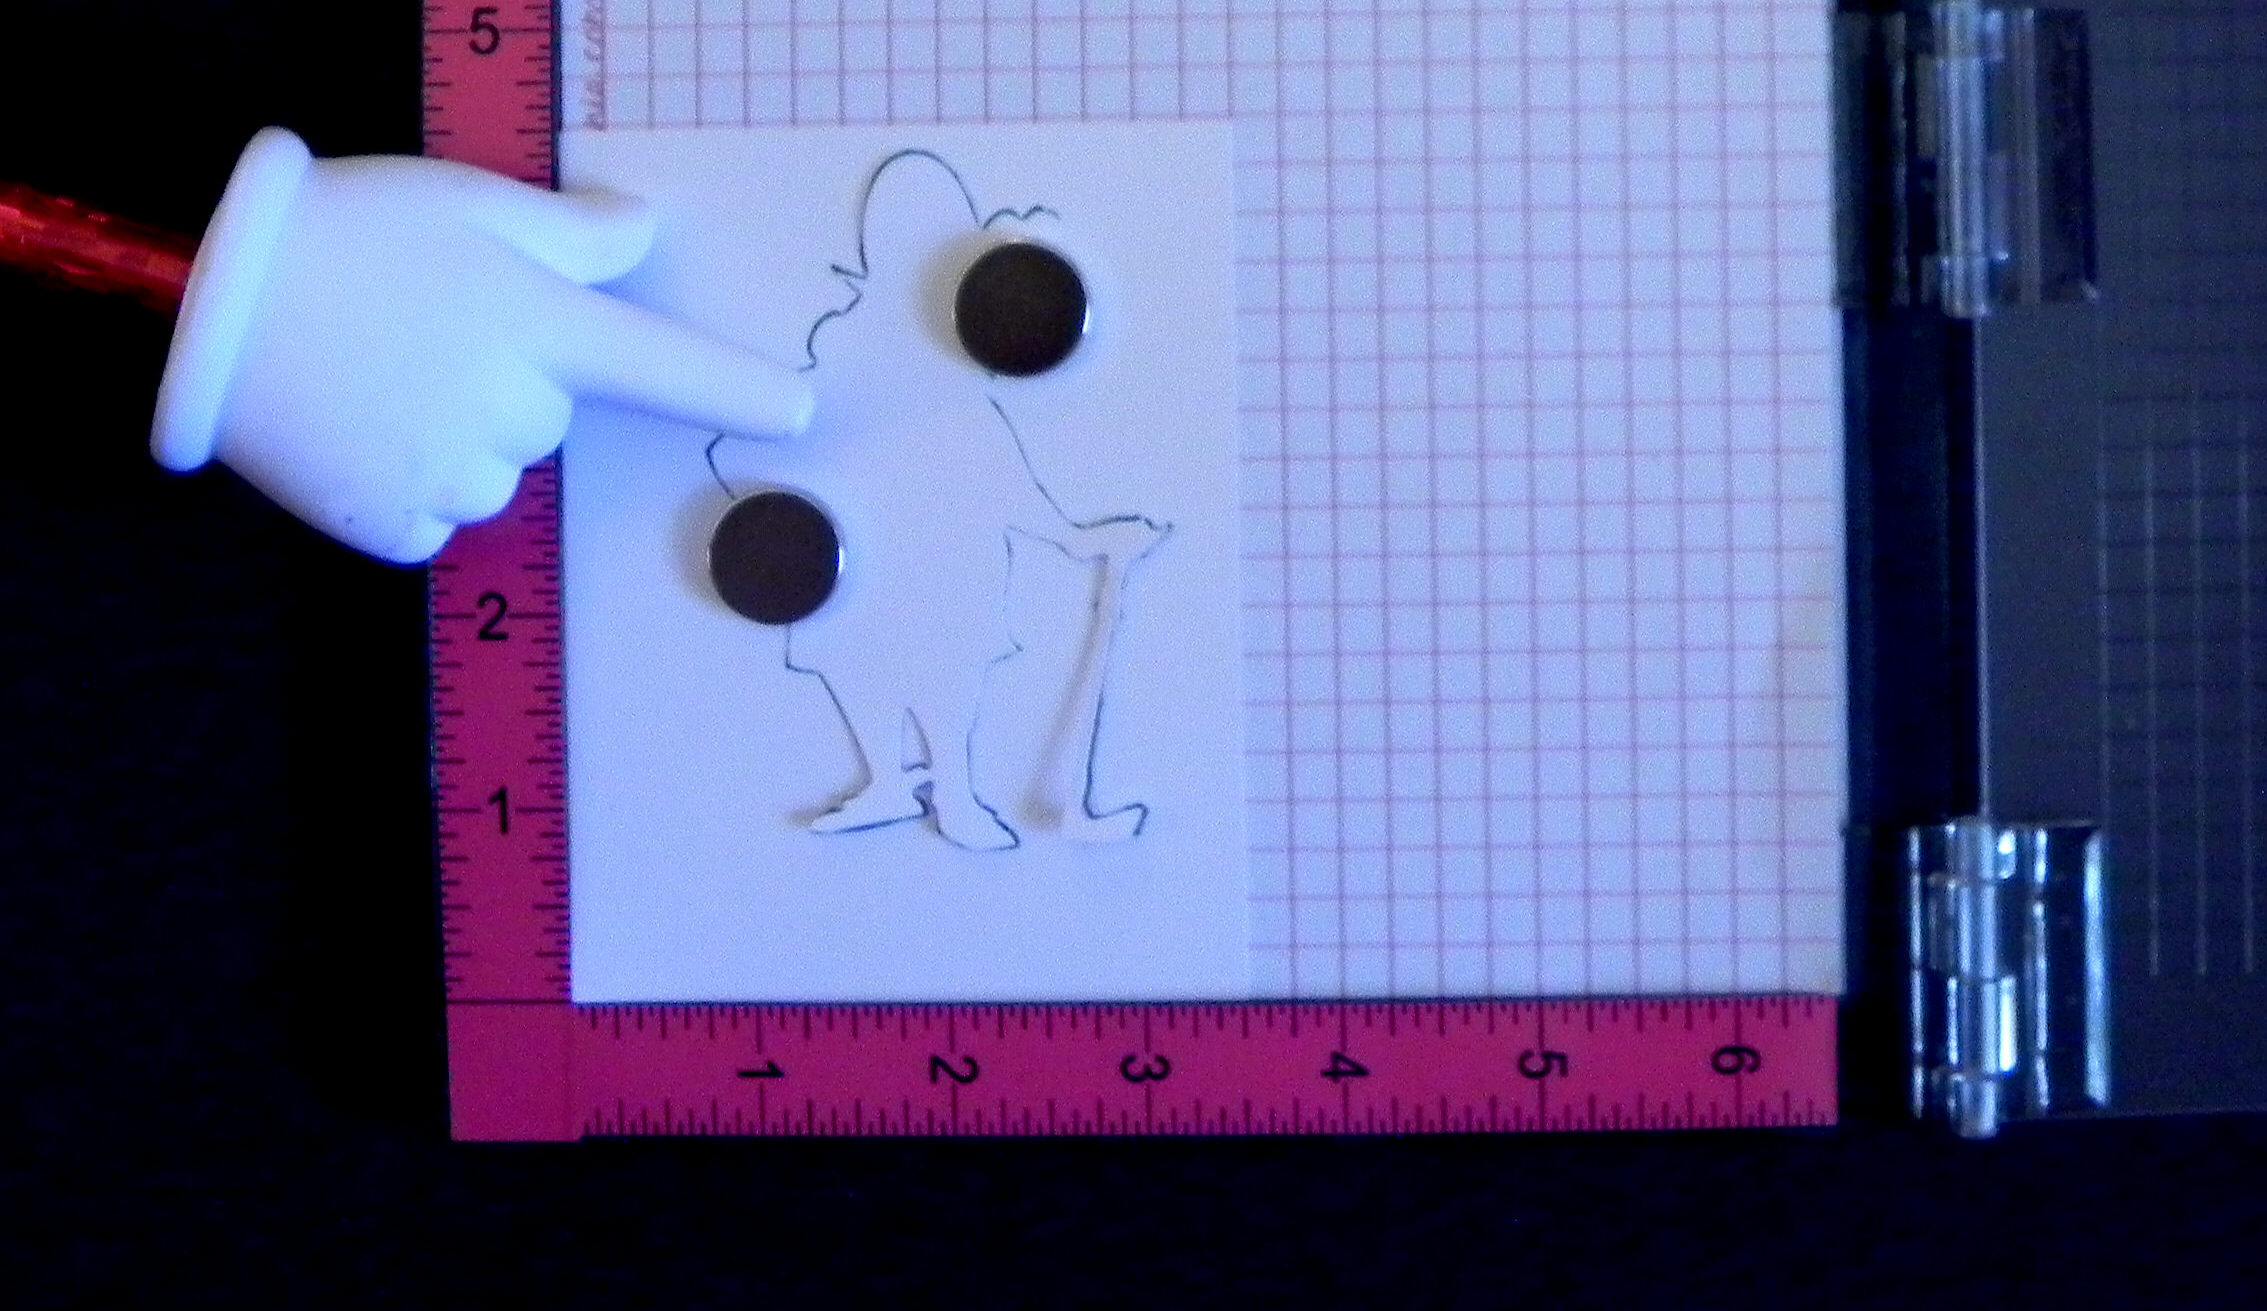
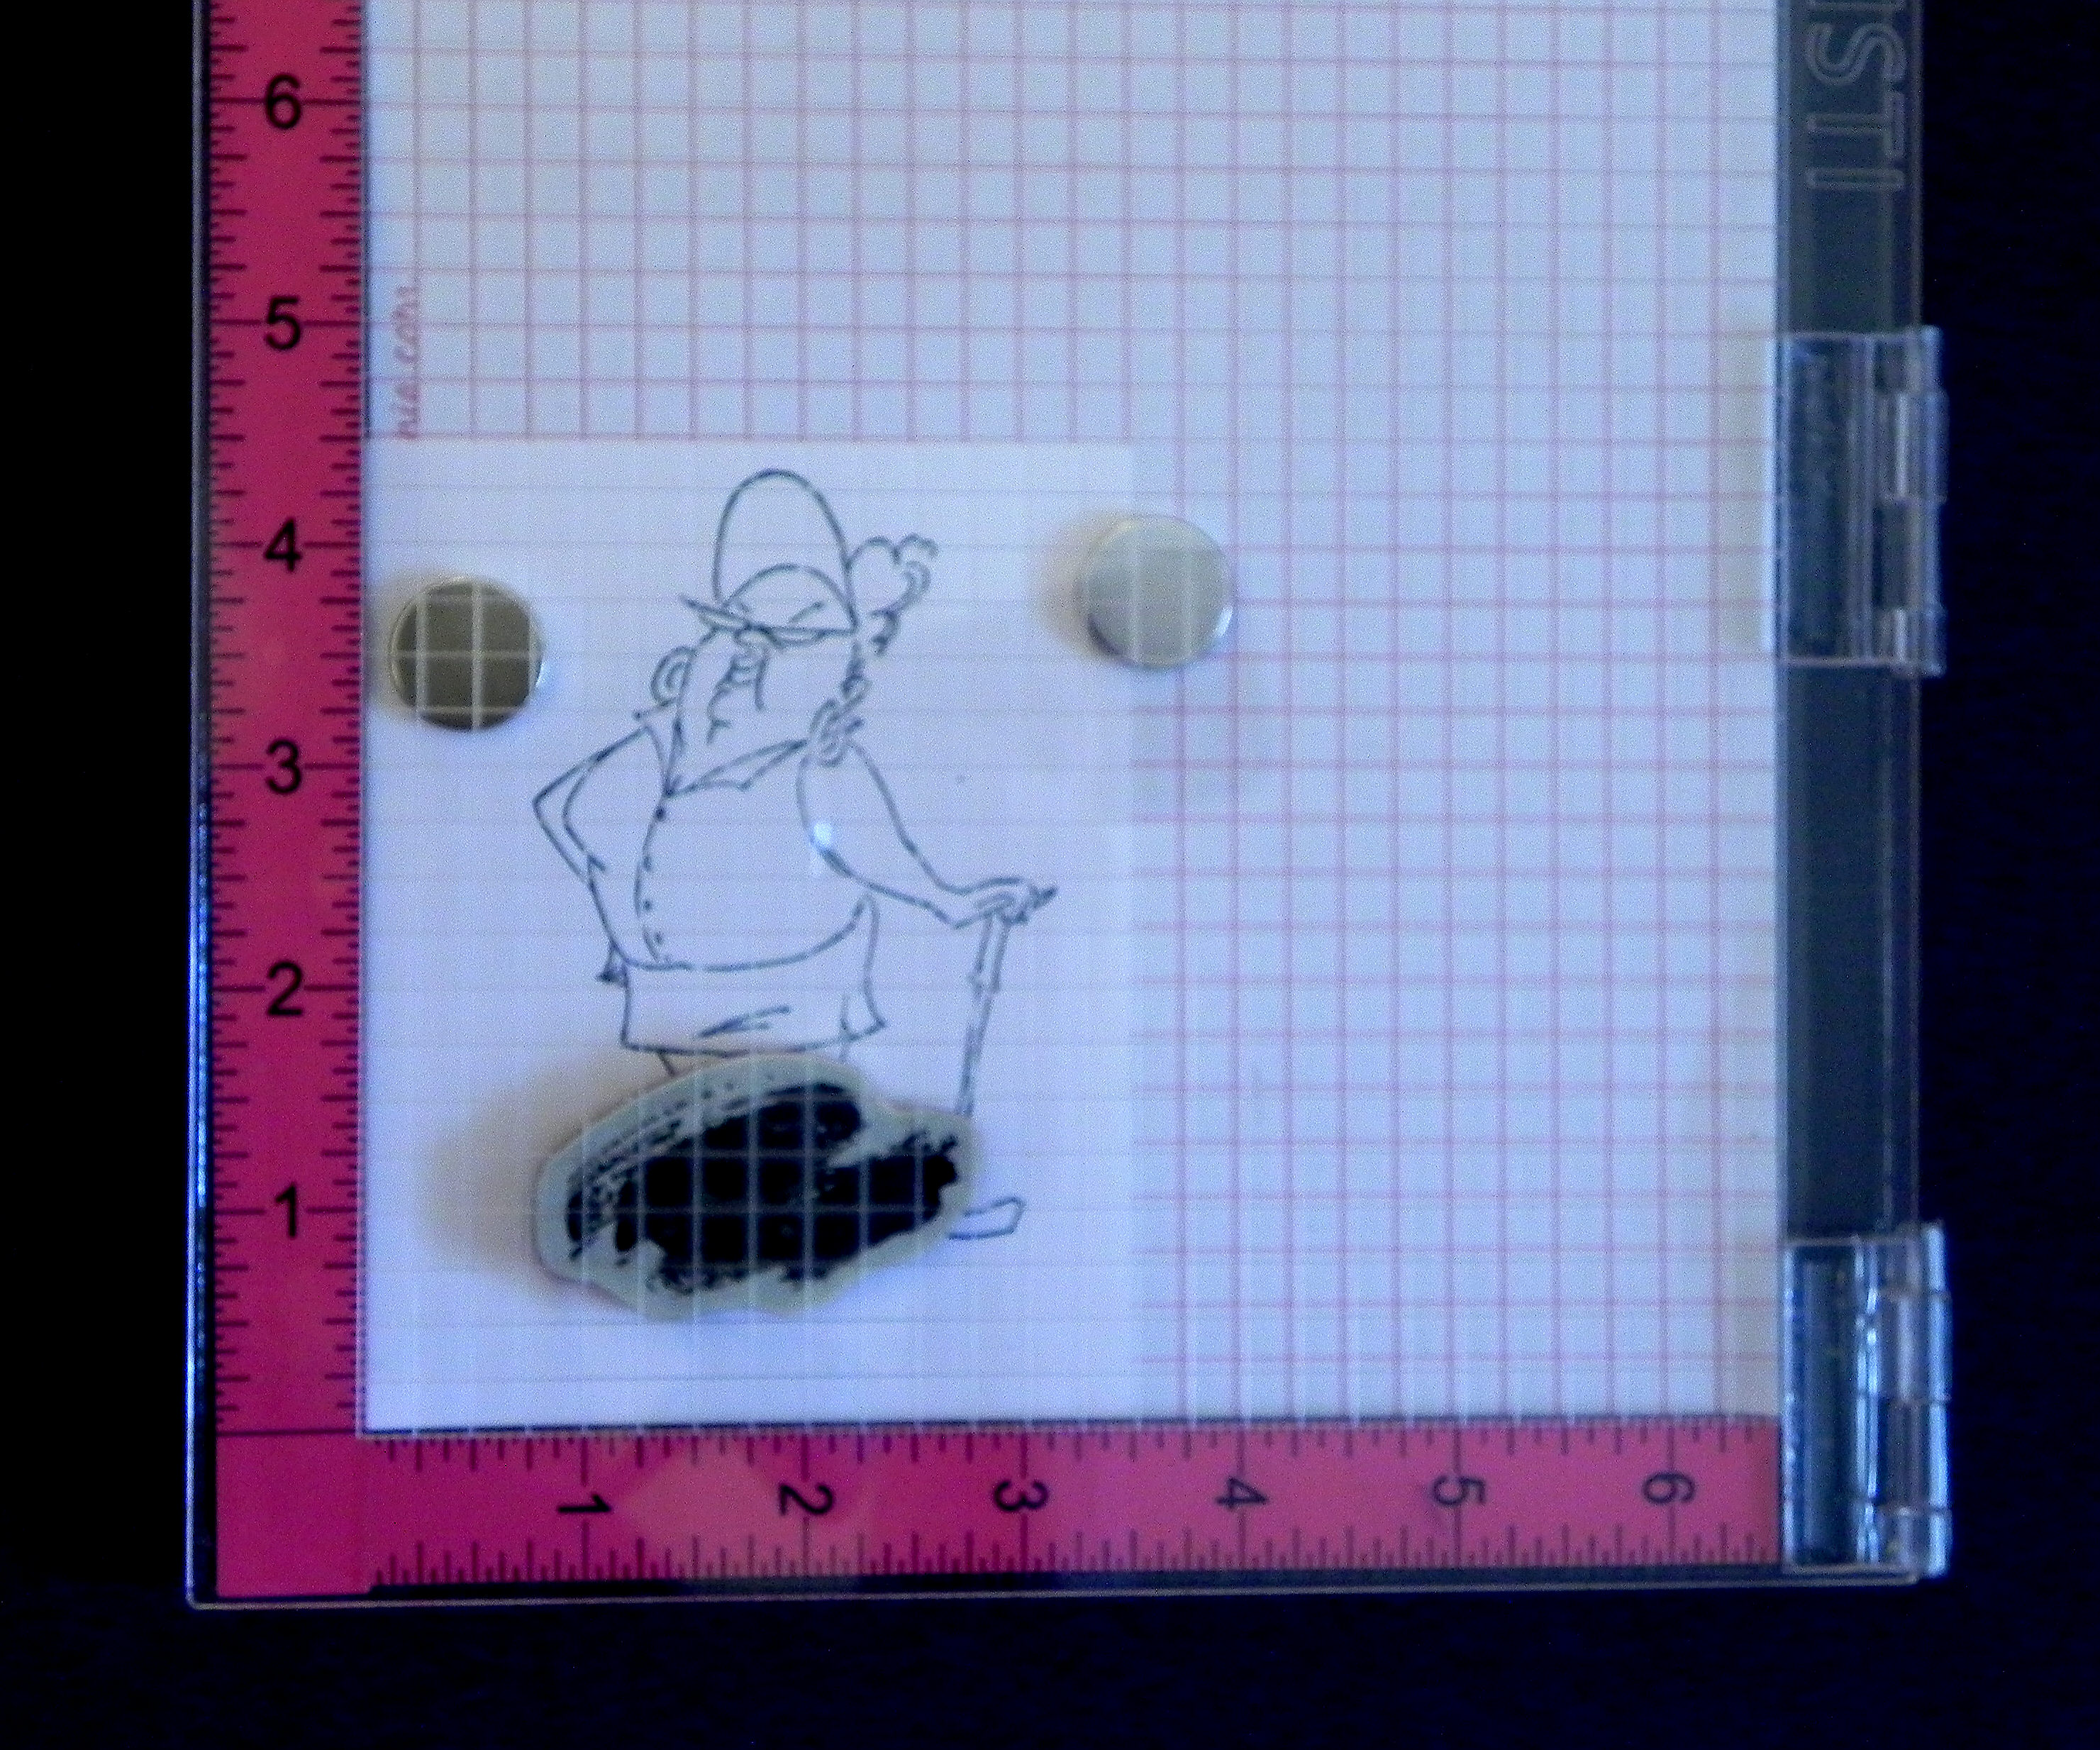
(Here’s the “aha moment” I was talking about!):  and this is what the stamp looks like…

wDSCN6184

* * *

The ink that never made it to the paper was still on the stamp.  So, I simply stamped it again (without the mask)…
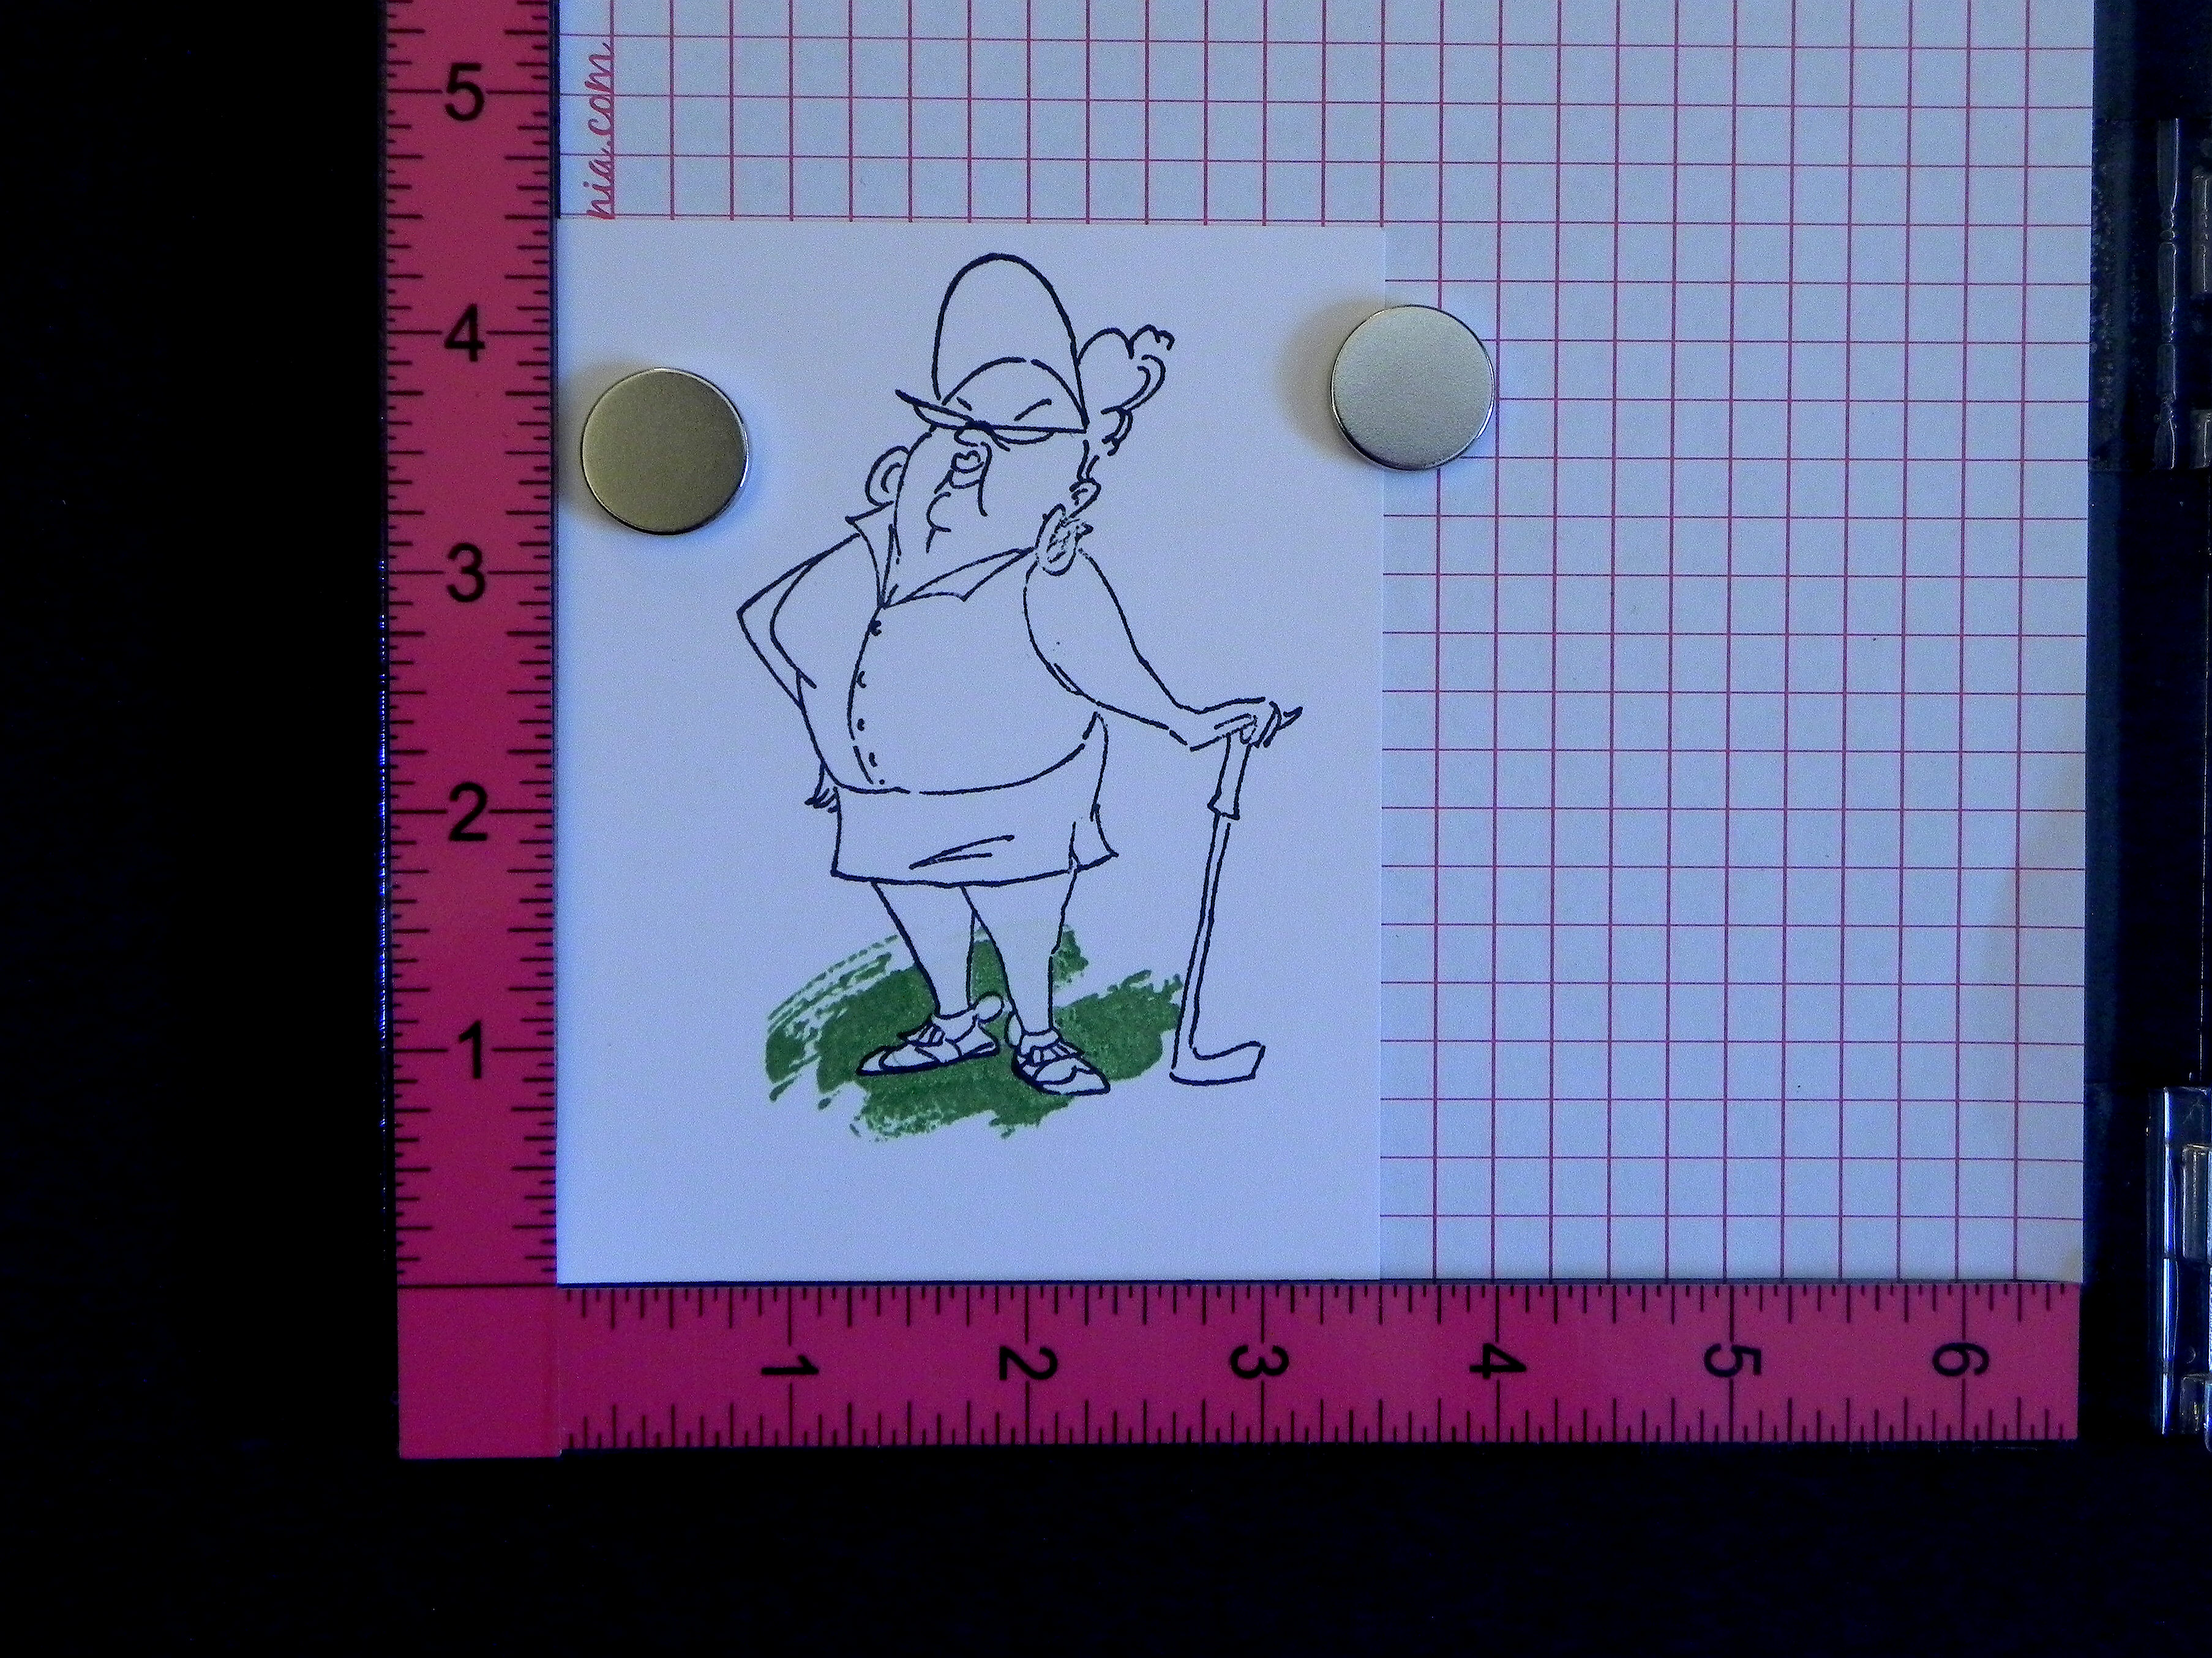
090 DSCN0087

* * *

…much better!

100 DSCN0090

* * *

I know that seems obvious, but I was really not thinking about stamping without the mask when I needed the mask for my layout!

As you can see, using a positioning tool like the MISTI is really helpful because this method requires re-stamping the image in the exact same place it was previously stamped – unless, of course, you are really good at just eye-balling it to re-align it.  (I am not!!)

And one more thing:  When you stamp initially with the mask in place, you really want to make sure all the ink has been transferred to the parts that are hitting the mask.  I re-stamp a few times (without re-inking) to make sure.  You don’t want any ink left on the stamp where it hits the mask so when the mask is removed, ink will not get on the areas that were meant to get no ink.  (I learned the hard way when I started rushing on some of my panels.  She had a very faint green strip across her legs!)

Hopefully, this helps you to get better images when masking

Thanks for checking out my post!

This content uses referral links as described in the disclosure policy on my sidebar.

I Play In The Low 80’s… Jr. Legal Pad Cover

I Play In The Low 80’s… Jr. Legal Pad Cover

zzzDSCN6123

Here is another golf-themed notepad cover design I created.

The sentiment is a quote that I found online by comedian Joe E. Lewis , and I used it to create a custom made stamp from RubberStamps.net.  The image is an Art Impressions stamp called “Goldie Golfer.”  I stamped the sentiment and image with Memento Tuxedo Black ink and colored it with Copic Markers (hair: E50, E42, E43 and E44; skin: E50, E53, E71 and E04; clothes: BG15, Y21, Y23, and Y11; golf club and glasses: C4) and a Sakura clear glitter pen.  The grass was stamped with Gina K Grass Green ink with a stamp from the “Work of Art” set from Stampin’ Up.

The cover was made with white card stock.  Then I created a decorative panel and adhered it to the front.  The argyle patterned paper is called “Summer Argyle” from the “Golf Collection” line by Adorn It – Carolee’s Creations.  I also used Gina K Sweet Corn and Turquoise Sea card stock.

I paper pieced her shirt.  I needed a smaller print than what was on the patterned paper since the shirt was so small so I scanned the paper and used the Silhouette software to create a “fill pattern” for the cut file I created of the shirt.

I have boxes of ribbon but never seem to have the right color when trying to finish off my projects!  I recently purchased the Alison’s Ribbons die plate by Cheery Lynn Designs and was able to create a faux ribbon with the card stock I used.  A perfect match!

zzzDSCN6123 cropped tighter and tilted

The jr. legal pad was purchased at Staples.

wDSCN6131

HERE is a YouTube video tutorial by Melissa The Stamp Doc  showing how to make a notepad cover.

Thanks for checking out my project!

This content uses referral links as described in the disclosure policy on my sidebar.

Manipulate the Data… Jr. Legal Pad Cover

Manipulate the Data… Jr. Legal Pad Cover

uvDSCN6151

Here is another notepad cover design I created.

The golfer is a stamp from a set called “Gordon Golfer” (sku#4325), and the sentiment is called “Manipulate the Data” (sku# F2623).  Both are by Art Impressions.  I stamped the sentiment and image with Memento Tuxedo Black ink and colored it with Copic Markers (hair: C5; skin: E50, E53, and E71; socks and shoes: BV02, BV08, C2, and C4; club: C4 and BV08).  The grass is a stamp called “Easy Grass Background” by DRS Designs and was stamped with Gina K Moonlit Fog.

The cover was made with white card stock.  Then I created a decorative panel and adhered it to the front.  The multi-colored card stock is called “Easygoing” (item #2003) from the “happy-go-lucky” line by Fancy Pants Designs.  The purple plaid card stock is by Kite Tails Designs called “Dart Board” (item: 12-101) from the “Man Cave” collection.  I also used Gina K Edible Eggplant and Stampin’ Up Pistachio Pudding card stock.

I paper pieced his pants, hat and shirt.  I needed a smaller print (than what was on the patterned paper) for the pants and hat since they were so small so I scanned the paper and used the Silhouette software to create a “fill pattern” for the cut files I created.  For the shirt, I used the dropper in the “Fill Color” window and got the color from a spot on the pattern I used for the pants and hat.  I then added a little extra color with Copic G21.

wDSCN6146

HERE is a YouTube video tutorial by Melissa The Stamp Doc  showing how to make the notepad covers.

Thanks for checking out my project!

I Have Just One Problem… Jr. Legal Pad Cover

I Have Just One Problem… Jr. Legal Pad Cover

vvDSCN6118

Here is another notepad cover design I created.

The sentiment is adapted from a quote by professional golfer, Sam Snead, and I used it to create a custom made stamp from RubberStamps.net.  (I believe his original quote started with, “You have just one problem…”)  The image is an Art Impressions stamp called “Vera.”  I stamped the sentiment and image with Memento Tuxedo Black ink and colored it with Copic Markers (hair: E71, E74 and C2; skin: E50, and E31; clothes: BG18, BG15, BG10, E79, E71, E74, and C2; golf bag and clubs: BG18, C4. C2. E71, E74, and E77; grass: BG13).

The cover was made with white card stock.  Then I created a decorative panel and adhered it to the front.  The plaid card stock is called “Suave” from the “A Boy’s Life” line (item #BL25003) by echo park paper co.  The brown polka dotted card stock is by My Mind’s Eye and is the back side of the “So Sophie “We Are Family” Floral Swirl Paper.”  I also used Gina K Ocean Mist and Charcoal Brown card stock.

xDSCN6136

HERE is a YouTube video tutorial by Melissa The Stamp Doc  showing how to make them.

Thanks for checking out my project!

This content uses referral links as described in the disclosure policy on my sidebar.